This page describes how to operate M-Design Hub(MDH)
Last Updated: 12/01/2026
¶ Minimum and recommended PC requirements
Item |
Minimum configuration |
Recommended configuration |
Processor |
Intel Core i5-6200U |
Intel Core i5-11600 |
Operating system |
|
|
RAM |
8 GB |
16 GB |
Display resolution |
1280 × 720 (pixels) |
1920 × 1080 (pixels) or higher |
Hard drive |
8 GB |
12 GB |
With the minimum configurations, all the functions of MDH can be used properly. When you import a complex image, such as an image larger than 50,000,000 pixels or an SVG image larger than 1 MB, however, MDH may fail to run smoothly.
With the recommended configurations, MDH can run more smoothly when you import and edit a complex image, the software delay may be shorter, and the performance is better.
¶ 1 Introduction
¶ What is M-Design Hub?
M-Design Hub is a free laser cutting and engraving software developed by Monport company. It is suitable for Monport devices and can be used on Windows and macOS devices.
「Product positioning」 This software is an integrated design and control solution customized for intelligent laser equipment. As the central node of digital creativity and intelligent manufacturing, it provides a cross-dimensional collaborative platform for industrial design, artistic creation and precision manufacturing.
「Core value system」 With the idea of "perfect resonance between technical rationality and artistic sensibility,Build three core architectures:
Full link workflow management: Integrate the complete process from 3D modeling, path planning to laser processing to achieve efficiency improvement from concept to entity.
Cross-dimensional resource matrix: Built-in material database, process parameter library and intelligent algorithm Model Library to build a creative ecology covering multiple scenes.
AI driver tool set: equipped with adaptive optimization engine and predictive design module, supports complex surface processing, energy consumption simulation and other high-level functions.
¶ 2、Download and install?
¶ Windows Version:
https://github.com/Monport-Laser-Office/Monport-Design-Hub/releases
¶ MacOS-Intel Version:
https://github.com/Monport-Laser-Office/Monport-DesignHub/releases
¶ MacOS- M Version:
https://github.com/Monport-Laser-Office/Monport-Design-Hub/releases
¶ 3. Interface Introduction
This chapter introduces the functionality of the software, applicable to M-Design Hub V1.0.0.
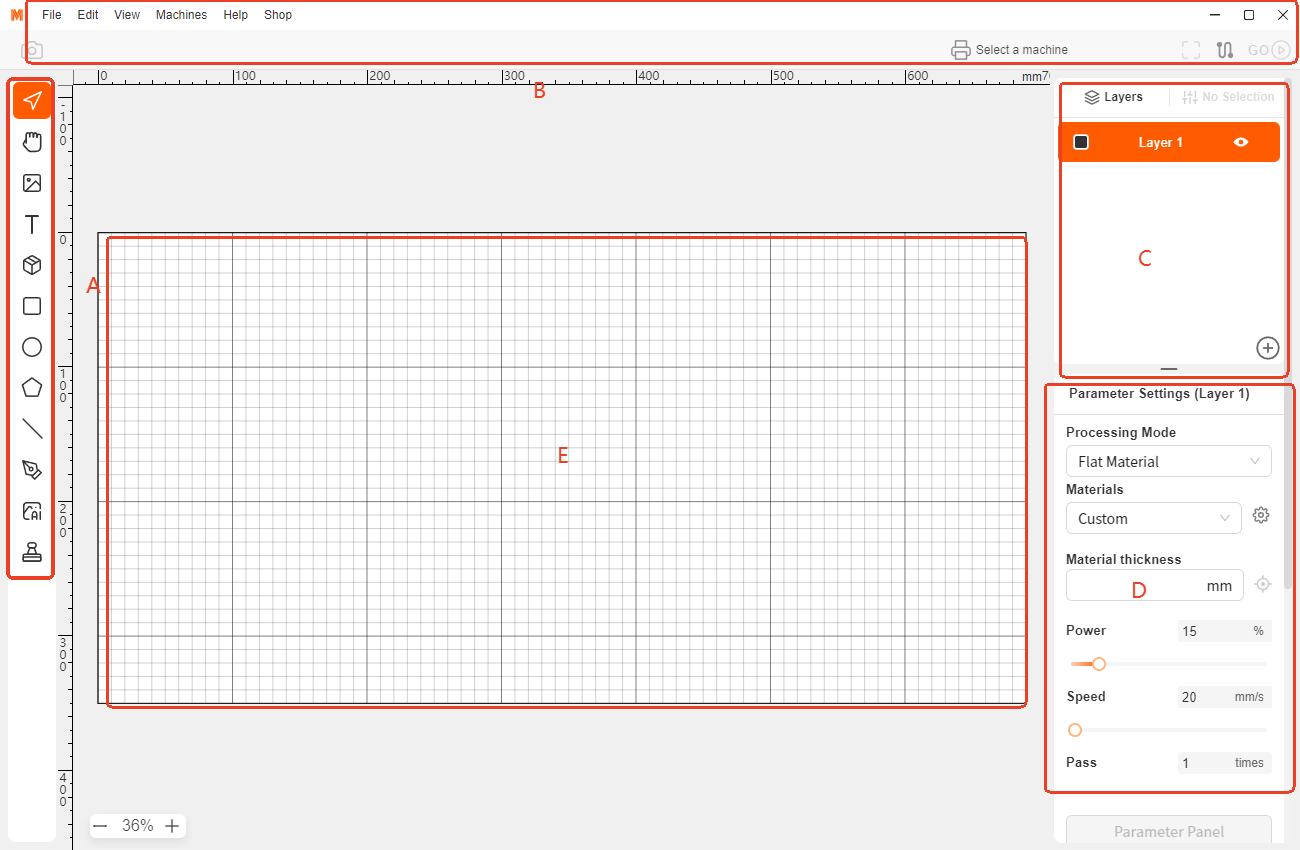
The software interface is divided into 5 parts: A. Toolbar
B. Menu
C. Layers and Objects Panel
D. Parameter Settings
E. Canvas Interface
¶ Toolbar
Icon |
Name |
Shortcut Key |
Description |
 |
Select |
V |
Select a specific object. |
 |
Drag |
D |
Drag the canvas. |
 |
Image |
I |
Import JPG / PNG / SVG files. You can drag and drop directly into the software, or copy and paste the image into the canvas. |
 |
Text |
T |
Add a new text object. |
 |
Element |
E |
Built-in clip art from the software. |
 |
Rectangle |
M |
Draw a rectangle. Adjust the corner radius. |
 |
Polygon |
Draw a polygon. Use "+" and "-" keys to increase or decrease the number of vertices while drawing. |
|
 |
Ellipse |
L |
Draw an ellipse. |
 |
Line |
\ |
Draw a line path. |
 |
Pen |
P |
Draw vector lines and curves, and adjust the shape with anchor points after drawing. Press and hold the left mouse button to draw curves. Double-click the endpoint or press "Esc" to finish the pen path. |
 |
AI Creation |
A |
Generate images via AI. |
 |
Smart Fill |
F |
Automatically fill the same element across multiple materials. |
¶ Menu
The menu provides commonly used functions.
File
Function |
Description |
Open |
Open a local file. |
Recent Files |
Open recently used files. |
Save |
Save the current file as .svg. |
Save As |
Save a separate copy. |
Export As |
Export as PNG / JPG. |
Preferences |
Software preference settings. |
Refresh |
Reset the current workspace. |
Edit
Function |
Description |
Undo |
Step backward. |
Redo |
Step forward. |
Cut |
Cut selected objects. |
Copy |
Copy selected objects. |
Paste |
Paste copied objects. |
Paste to Original Position |
Paste objects at their original location. |
Group |
Group selected objects. |
Ungroup |
Ungroup objects. |
Path |
Work with paths. |
Image |
Set image options. |
Optimize |
Optimize object arrangement for efficient use of engraving material. |
Clear Scene |
Remove all objects from the canvas. |
View
Function |
Description |
Zoom In |
Zoom in on the canvas display. |
Zoom Out |
Zoom out of the canvas display. |
Fit View to Window |
Automatically adjust the view to fit the window. |
Show Grid |
Display the grid on the workspace. |
Show Ruler |
Display the ruler on the workspace. |
Show Layer Color |
Show the layer color for objects in that layer. |
Anti-Aliasing |
Improve the appearance of jagged polygon edges to make them smoother. |
Machine
Function |
Description |
Connect Machine |
Connect to the machine. |
Network Check |
Check the network connection between the computer and target machine. |
Help
Function |
Description |
About |
Software version information. |
Tutorial |
Tutorial for machine operation. |
Page Intro |
Introduction to the page modules. |
Check for Updates |
Check for version updates. |
¶ Parameter Settings
Layer Parameters:
Power (%): The percentage of laser output power.
Speed (mm/s): The speed at which the laser head moves, in millimeters per second.
Run Count: The number of times a single layer is executed in a task.
Parameter Tips:
Since materials vary, it is recommended to first use built-in parameters to observe engraving results. Adjust them as needed for the desired effect.
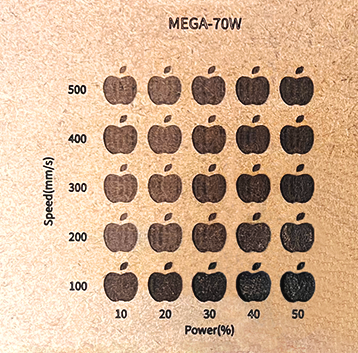
The parameter panel provides reference effects for different materials at various power and speed levels.
¶ Canvas Interface
The canvas interface is where you import images or draw objects. Note that objects should be placed within this area to proceed with tasks.
Zoom Options include: Fit to Window, 25%, 50%, 75%, 100%, 150%, 200%.
You can also zoom in and out by clicking the "+" and "-" buttons, with each click adjusting the zoom by 10%.
Canvas Navigation:
Hold the mouse scroll wheel to drag the canvas.
Use the canvas scrollbar to move the view.
Press Spacebar + Left Mouse Click to drag the canvas.
Click the “Drag” icon to move the canvas.
¶ 4. Basic Operation
¶ Connect the device
Before configuring the network, please prepare a USB Type-C data cable.
First set the Wi-Fi using USB.
If there is no network, you can connect the machine directly through USB,But please note that the USB speed is slow and it is not recommended to use it for a long time.
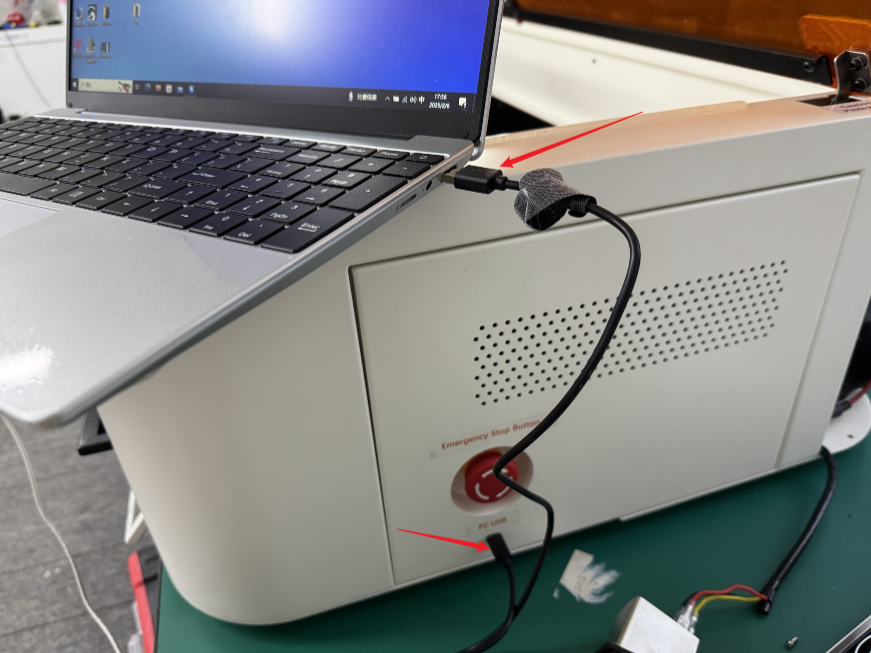
Step 1: Open the M-Design Hub
Step 2: connect the device via USB
Click "Connect Machine".
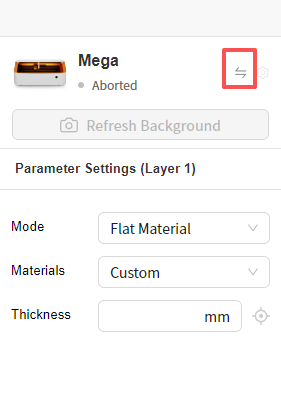
You will see your device name in the following location:
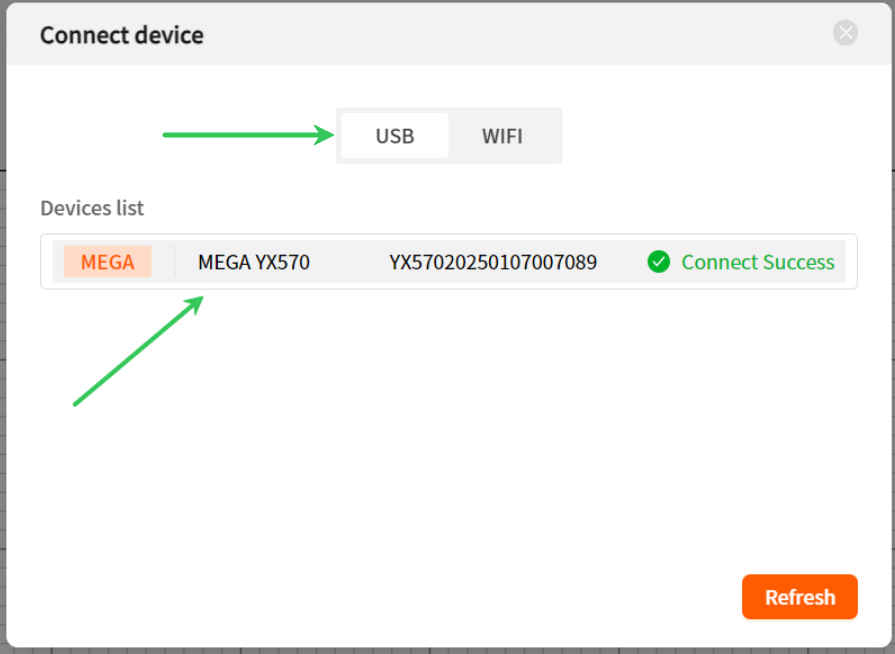
= = If the device connected to the USB does not recognize the COM serial port device, please download the serial port driver and install it and try again. = =
= = Important: = =
If there is a problem with the cable, please contact our after-sales service department.
Technical Support Email:support@monportlaser.com
Step 3: Connect the device via WiFi
After the USB connection is successful, click the icon next to the settings to configure the network.
Select your Wi-Fi network from the list and enter the password for completing the WiFi setup.
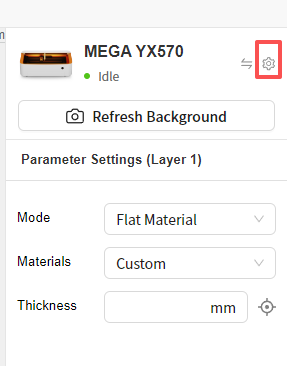
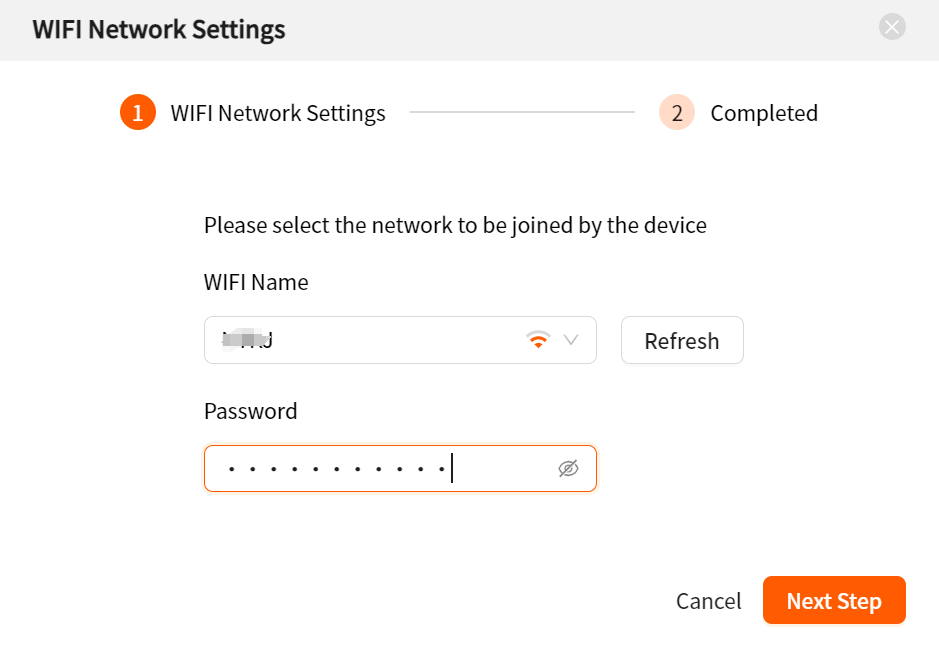
After the connection is successful, you can switch to the WIFI connection page.
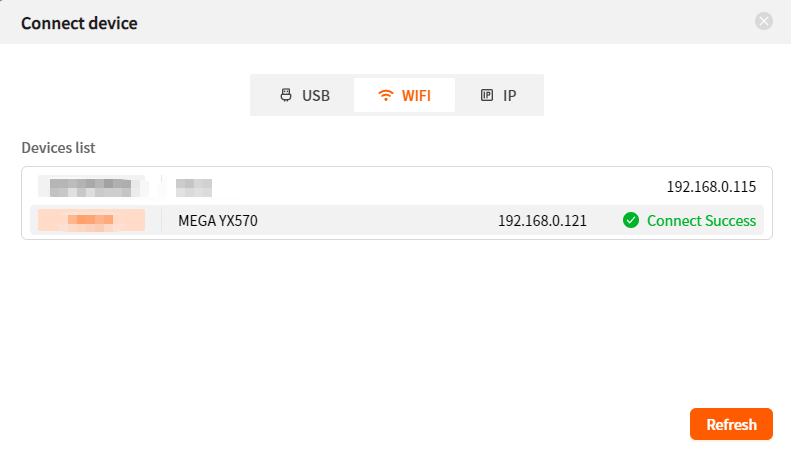
Now you can disconnect the USB cable, and you can use the Wi-Fi to connect later.
= = Important: = =
To ensure a stable connection, please avoid using special characters in the text for Wi-Fi names and passwords (for example,! @#$).
If you need to switch networks, please repeat the configuration process.
For more help, please contact customer service email:support@monportlaser.com
¶ Mode
¶ Flat Material
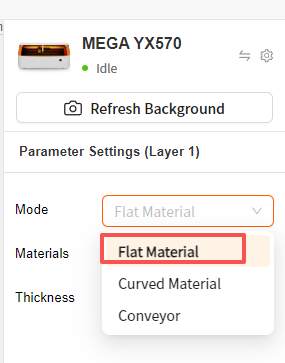
¶ Curved Material
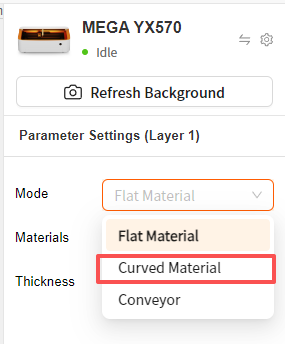
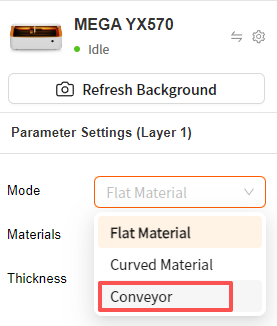
¶ Conveyor
How to use conveyor belt engraving?https://wiki.monportlaser.com/en/home/Conveyor/Conveyor-MDH
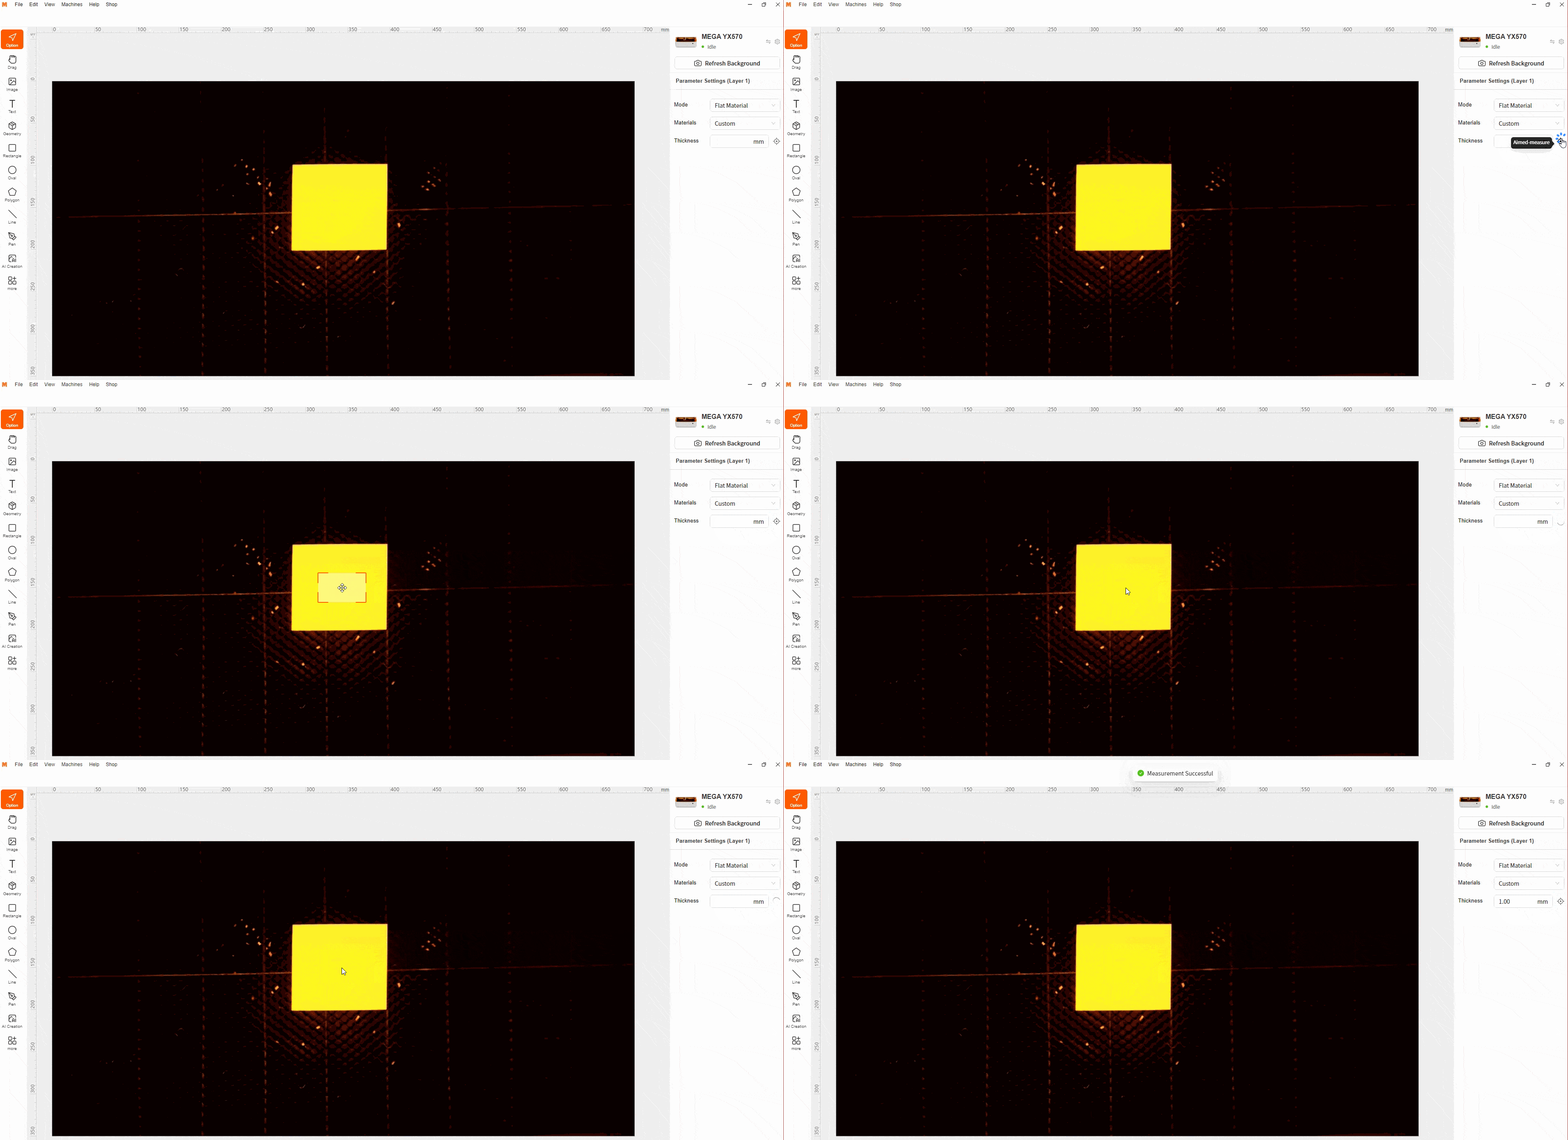
¶ Autofocus
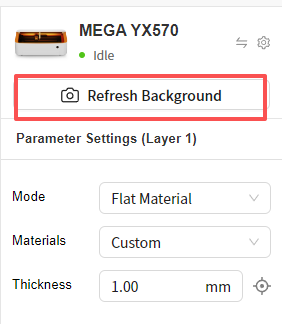
¶ Refresh
After closing the cover or connecting the machine, the canvas will show the real picture inside the machine, or you can manually click to refresh.
¶ Start processing
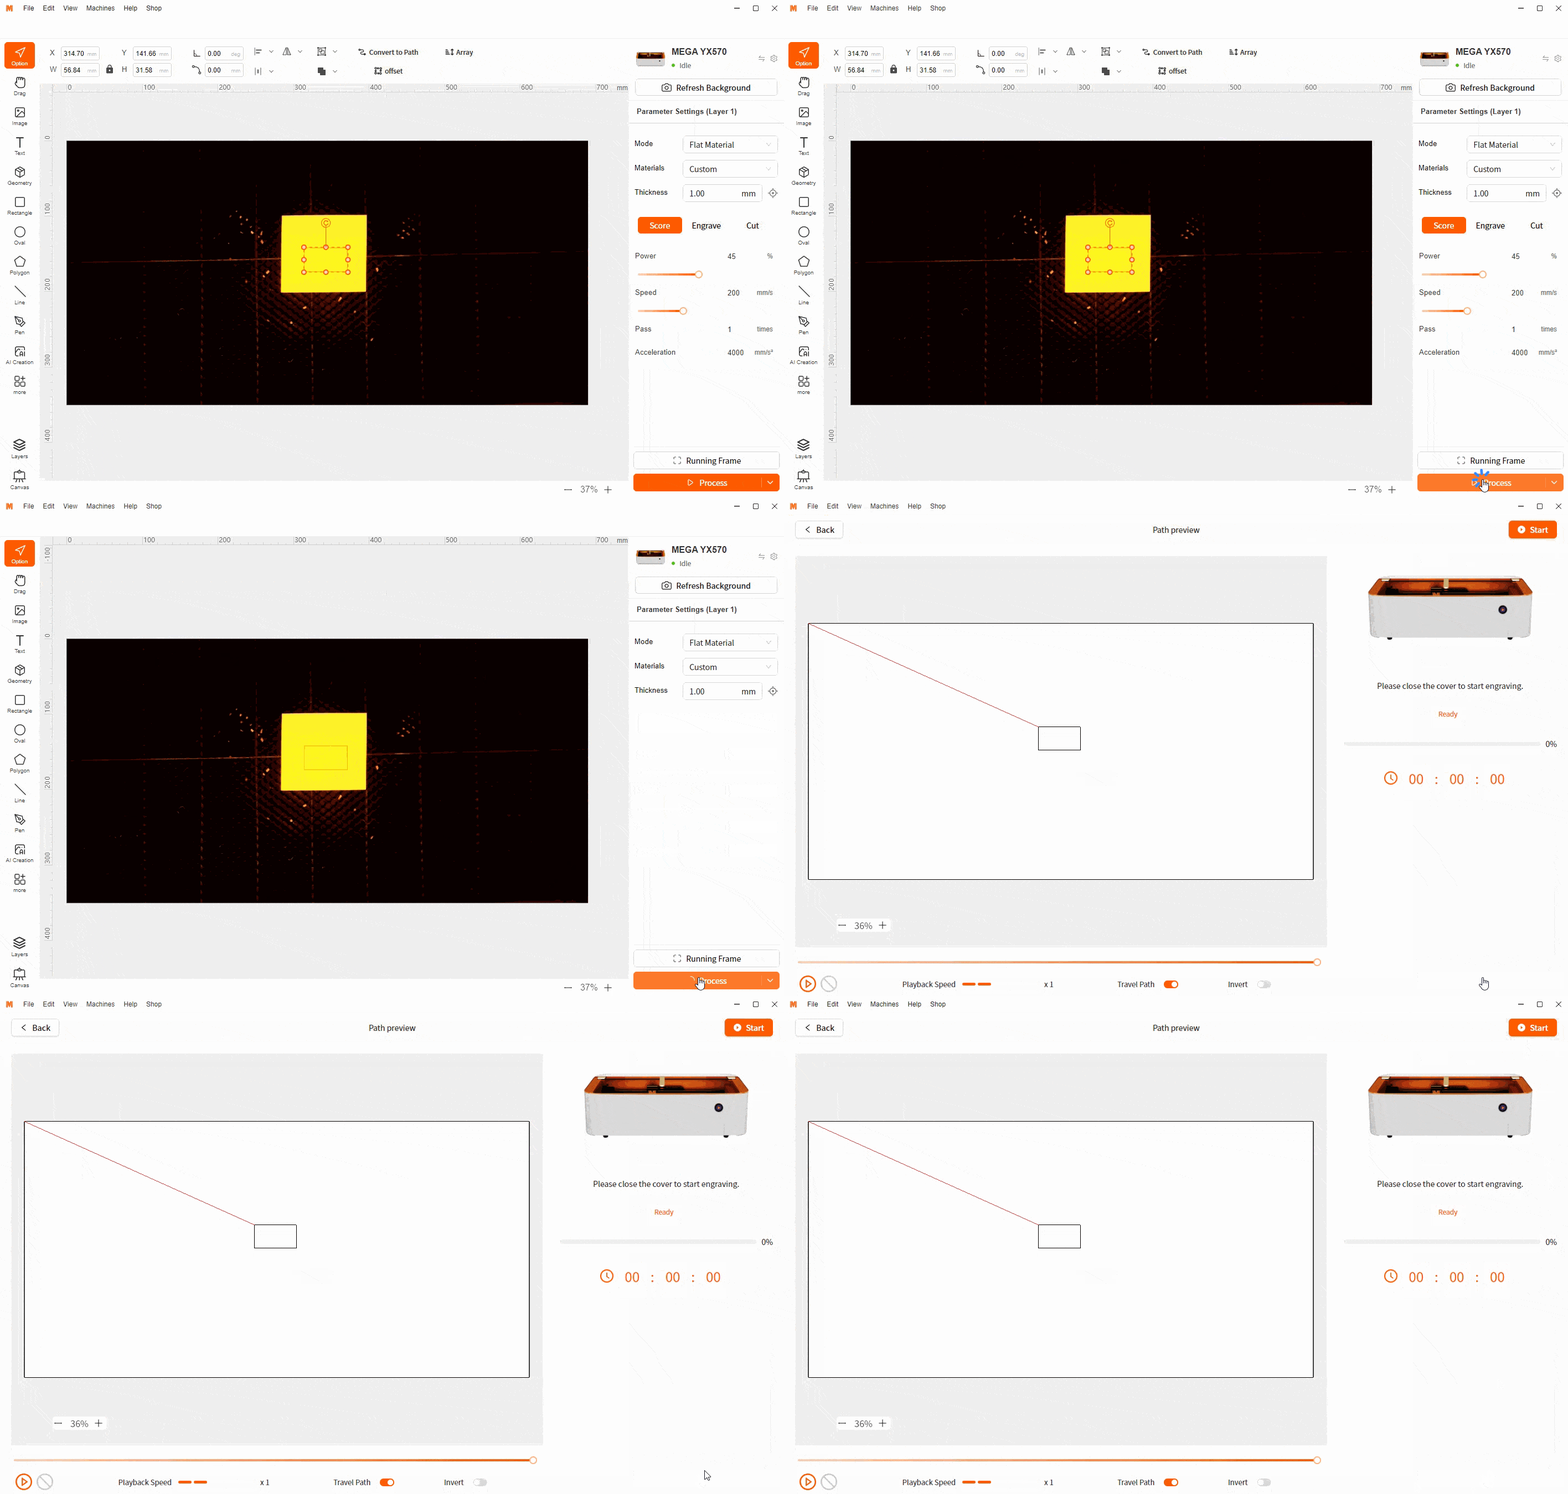
After editing the content and configuring the engraving parameters, click 'Process' to enter the preview page, and then click 'GO' to start engraving.
¶ 5 Editor function
¶ Basic Tools
The base toolbar contains:Option、Drag、Image、Text、Geomatry、Rectangle、Oval、Polygon、Line、Pen。

¶ High-order functions
¶ Intelligent Fill
How to use the Smart Fill feature:https://wiki.monportlaser.com/en/home/Conveyor/Smart-Fill
¶ Intelligent arrangement
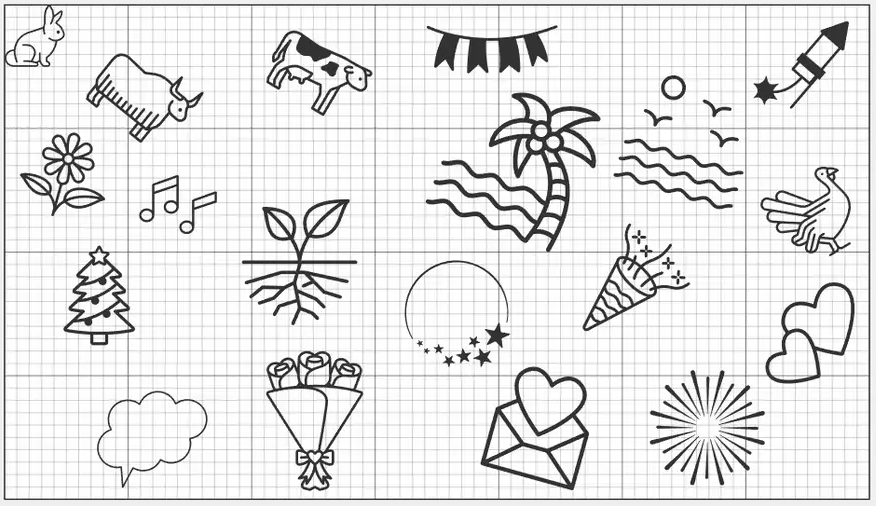
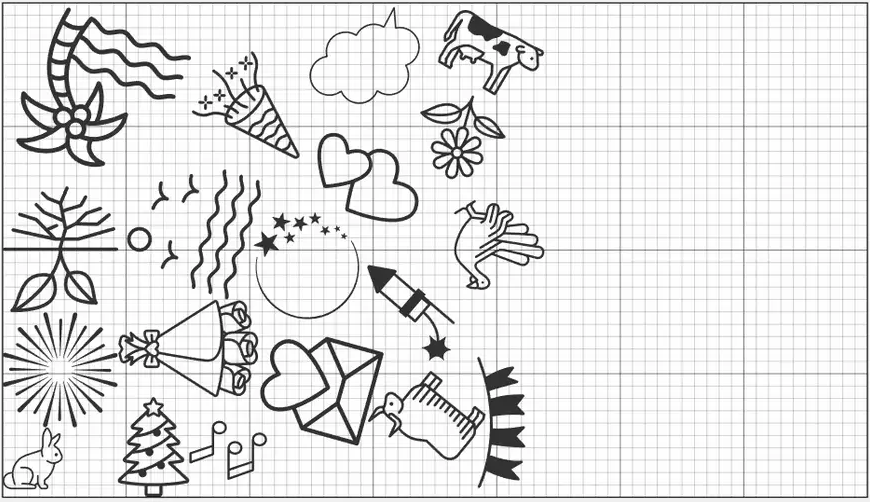
Smart NestingOptimize material utilizationthrough intelligent algorithms to automatically generate efficient nestingayouts。

¶ Material test array
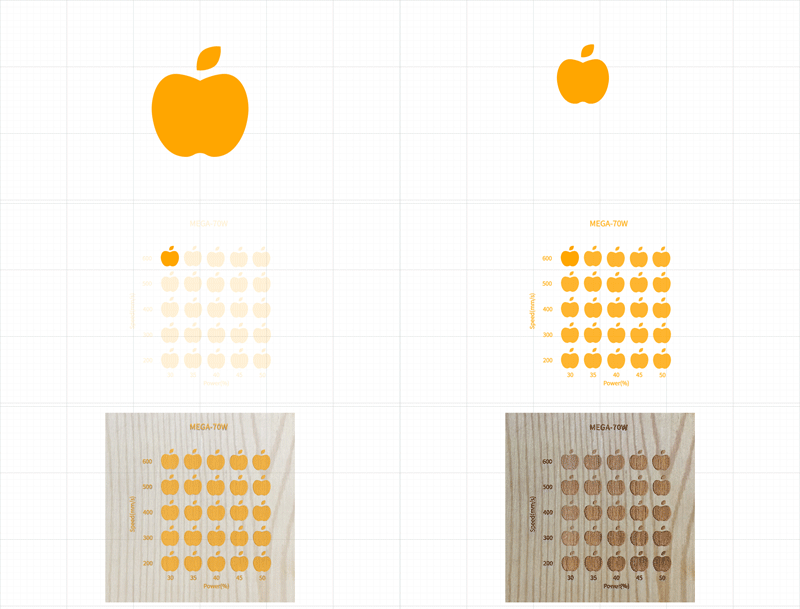
Material test arrayQuickly create arrays fortesting material parameters。
¶ Code generation
QR CodeGenerate barcodes by enteringtext and add them to your design。

¶ Measurement
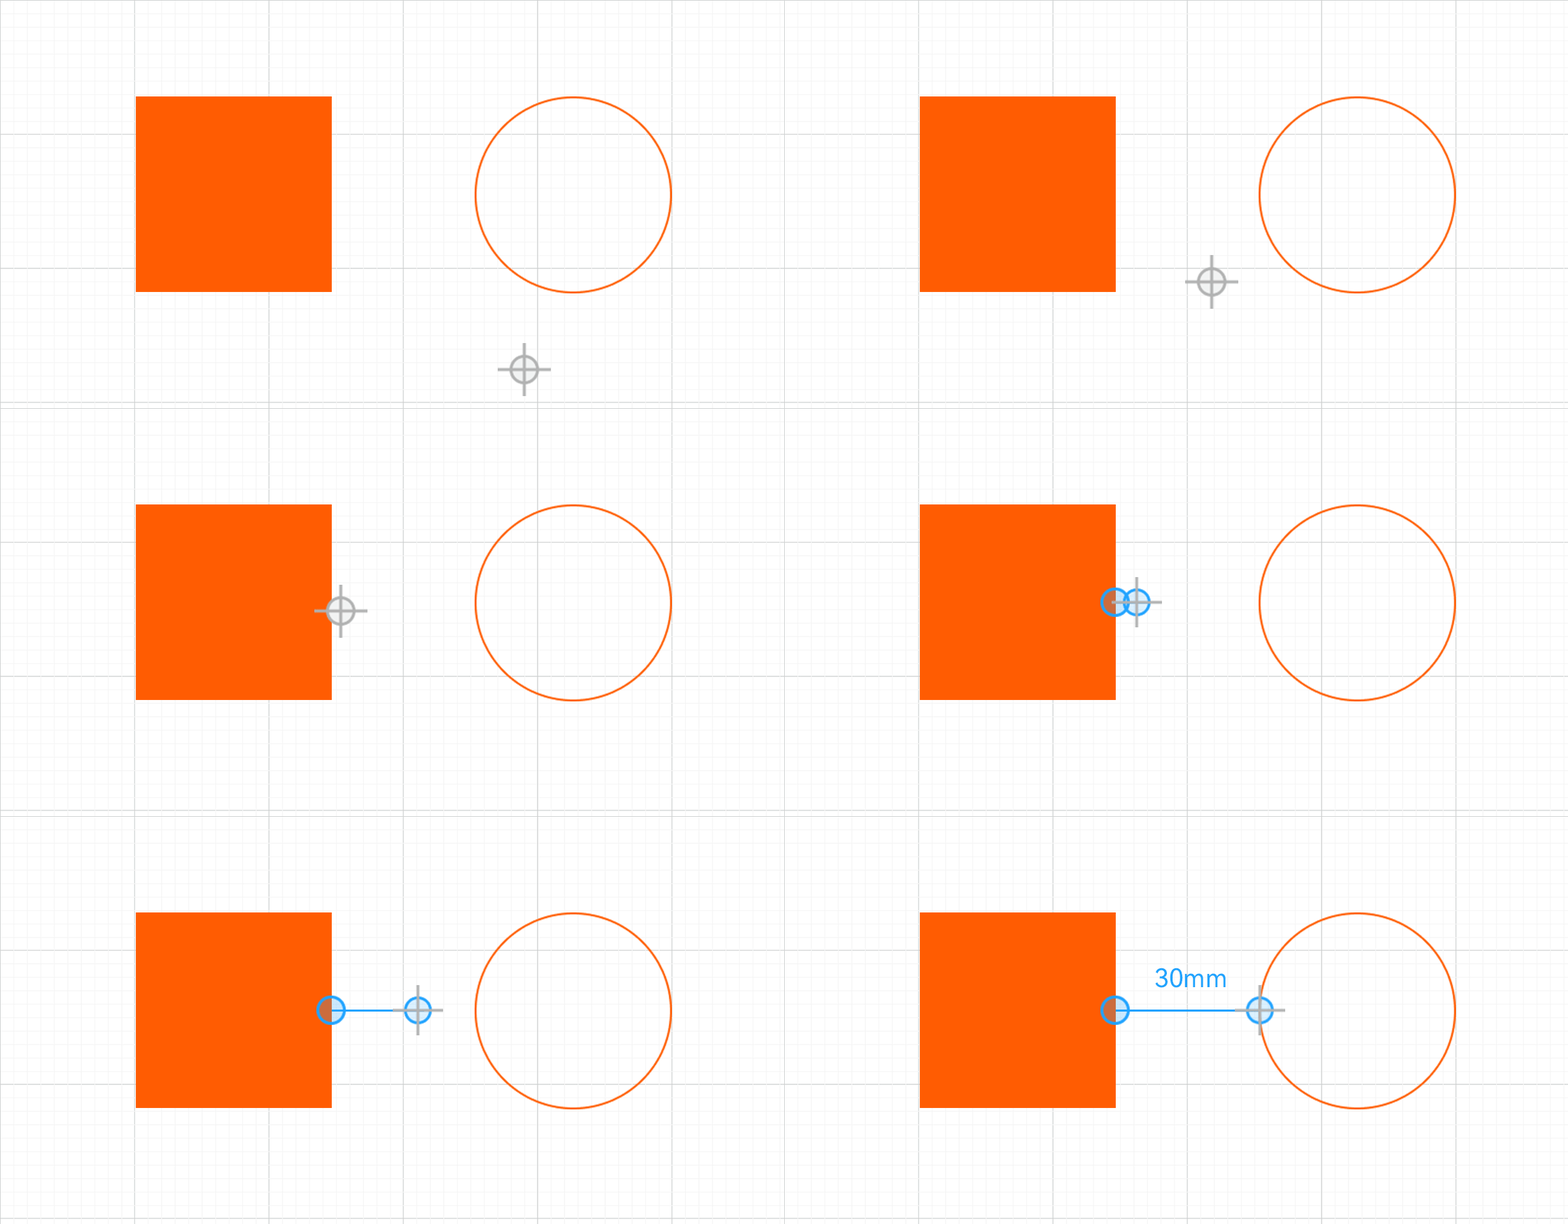
MeasurementEnable/disable measurement mode via the "MeasureDistance" button on the panel. Once enabled, click to set the start/end points。
¶ AI Creation
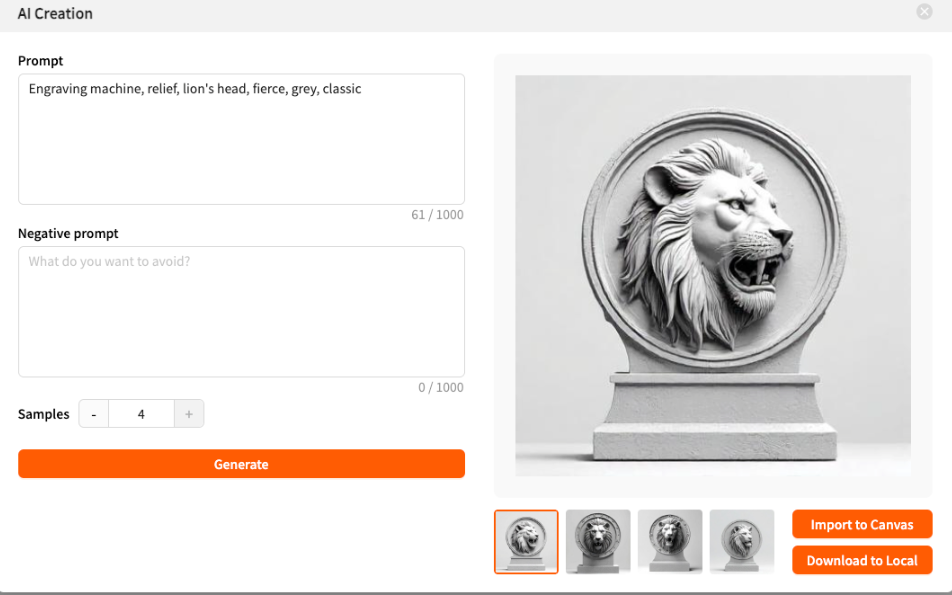
Advanced AI models and self-developed algorithms enables image generation with simple commands—perfect for both beginners and creative users.
¶ Laser Control
¶ Material Selection
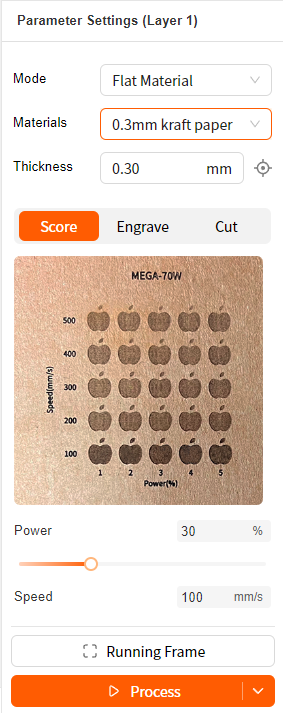
When placing materials in the machine, be sure to select the appropriate thickness and material from the BOM. Then the system will automatically select the best engraving or cutting parameters, these parameters are the results of our many tests, you can also see the corresponding renderings.
¶ Mode
In MDH software, "Score," "Engrave," and "Cut" represent three distinct processing modes, each with its unique method and purpose of application:
¶ Score
Definition: Engraving mode uses the laser to etch designs or text onto the surface of a material without cutting through it.
Characteristics: During engraving, the laser head moves at a higher speed with lower or medium power settings to remove only the surface layer of the material. This mode is suitable for creating surface patterns or text markings.
Applications: Ideal for producing detailed patterns or text on materials like wood, acrylic, leather, etc.
¶ Engrave
Definition: Fill engraving builds upon the basic engraving process by filling in selected areas, giving patterns or text a fuller appearance.
Characteristics: The laser head scans back and forth multiple times inside the design area to fill the entire selected region. The power and speed settings depend on the desired depth and fill density.
Applications: Used for designs that require emphasized visual effects of patterns or text, such as medals, commemorative items, etc.
¶ Cut
Definition: Cutting mode utilizes the laser's high energy density to penetrate and precisely cut through the material.
Characteristics: The laser head moves slowly with higher power settings to ensure the laser fully cuts through the material. The edges of the cut are typically very smooth.
Applications: Suitable for creating models, puzzles, woodcuts, acrylic pieces, and any situation where materials need to be completely severed to form separate parts.
Each mode can be used independently or in combination with others, depending on the design requirements and material types, to achieve the best results. Choosing the appropriate processing mode is crucial for enhancing product quality, efficiency, and expanding creative possibilities.
¶ Parameter Settings
Power
Controls the intensity of the laser emitted by the laser head. High power can deepen engraving or speed up cutting, but it may also scorch the material. The correct setting requires experimentation to find the optimal balance point based on the type and thickness of the material.
Speed
Controls the speed of the laser head movement. The faster the speed, the shorter the time the laser contacts the material, resulting in shallower engraving or cutting. The speed setting needs to consider the type of material and the desired processing depth.
Pass
Controls the number of times the laser head repeats processing the same area. For thick materials or situations requiring deep engraving, multiple processing may be needed to achieve the desired effect.
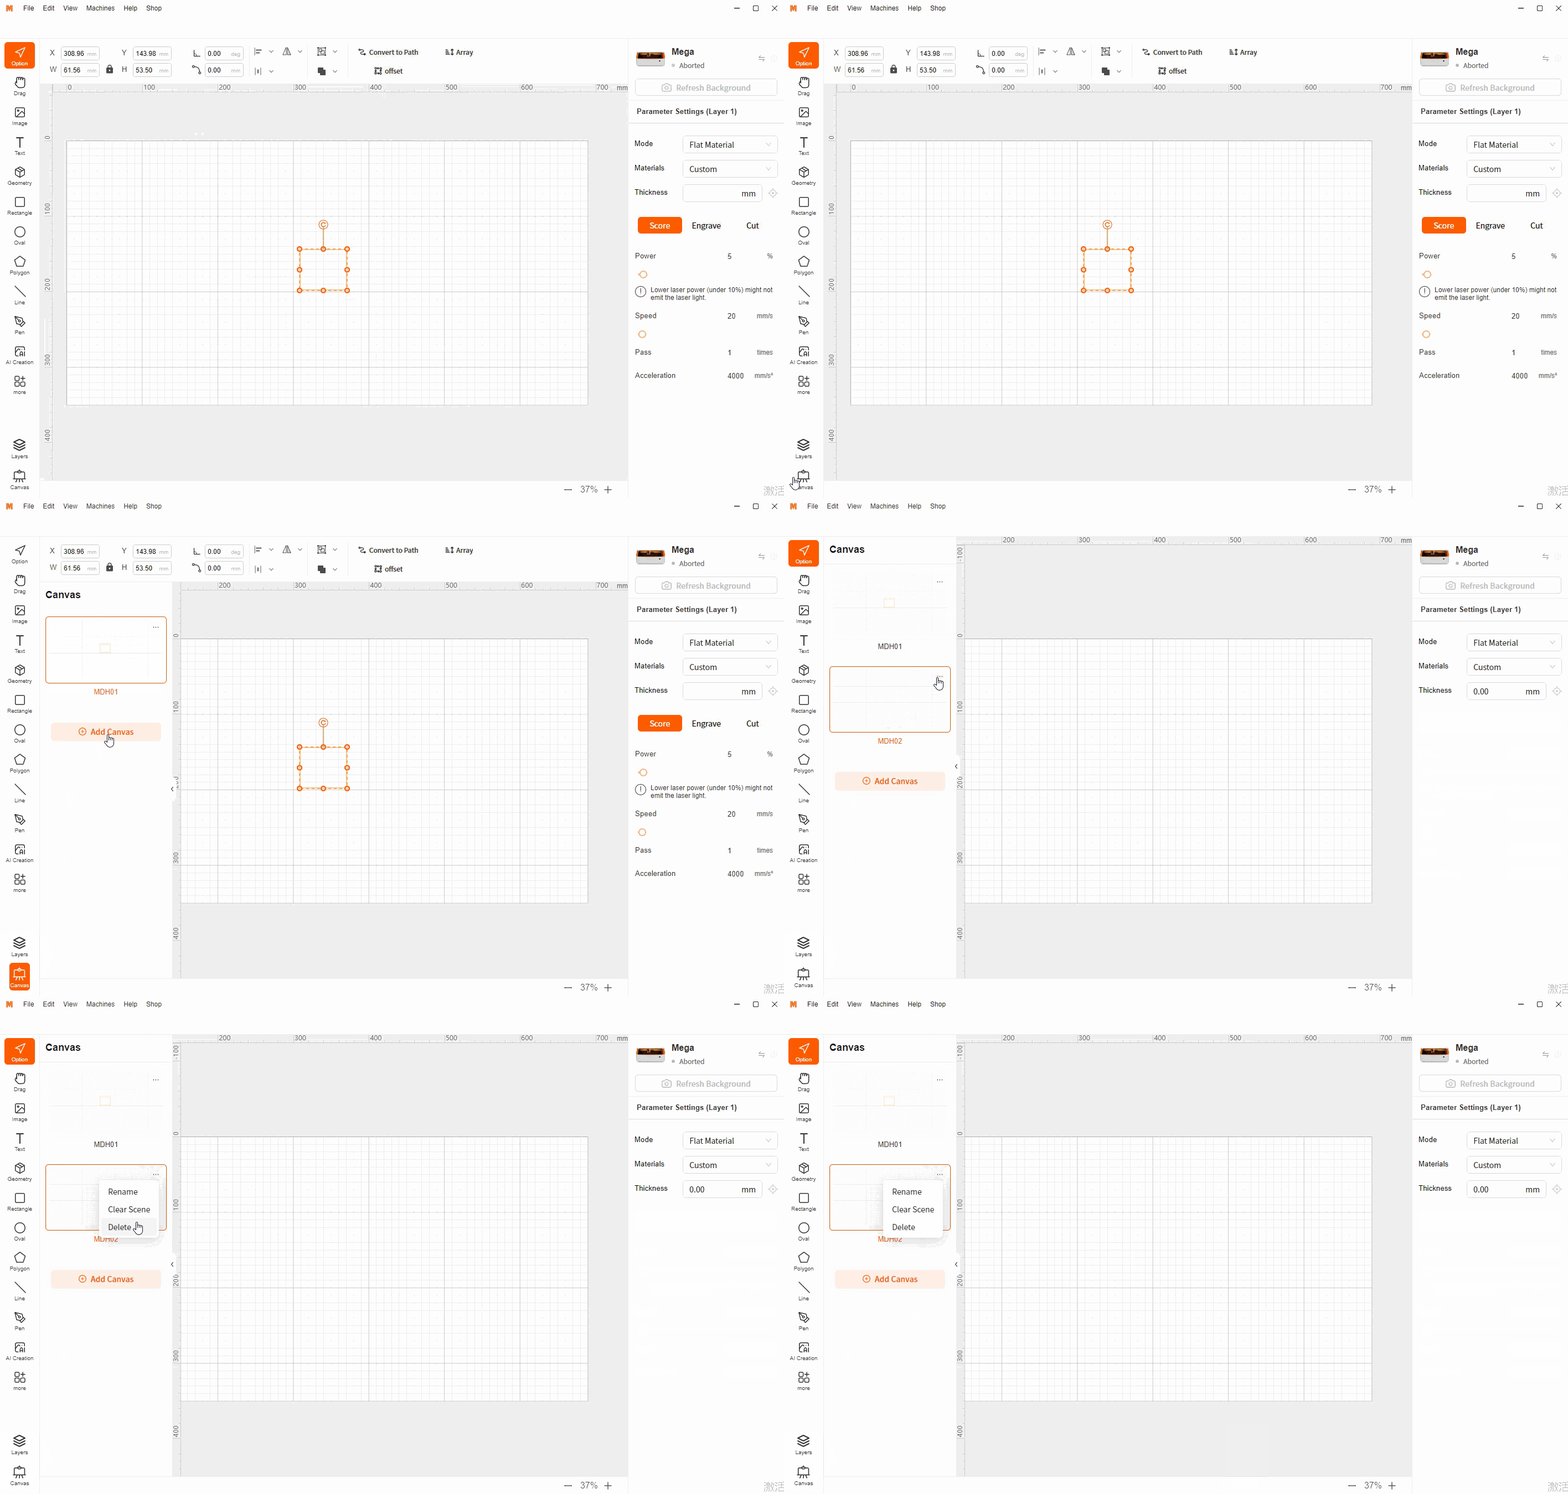
¶ Canvas Preview
Click the canvas icon in the left corner to manage the canvas.
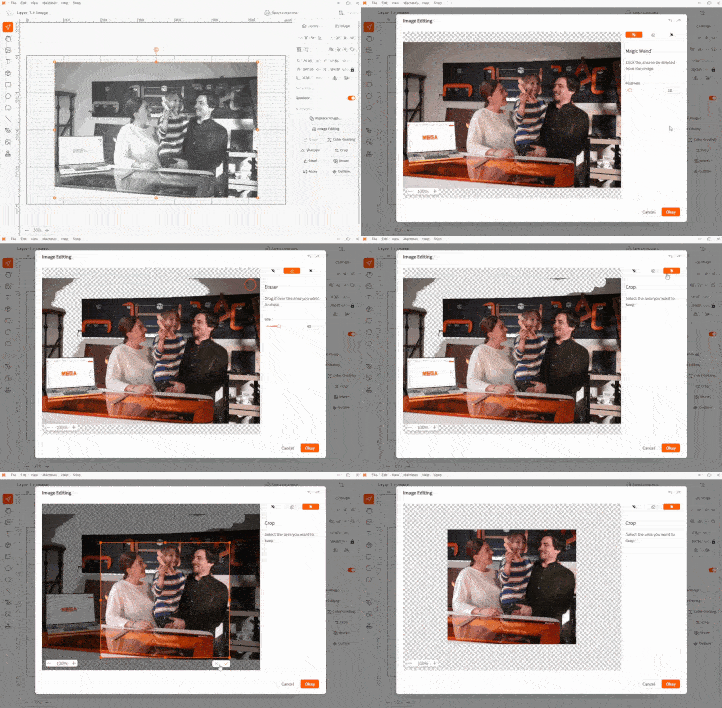
¶ Image editing
Quickly processes image with tools like Eraser, Magic Wand, and Crop—making adjustments fast and easy.
¶ Layer management
Layer management is a powerful tool in MDH software that significantly enhances control over the design and execution process, leading to better quality outcomes and more efficient use of laser machine.
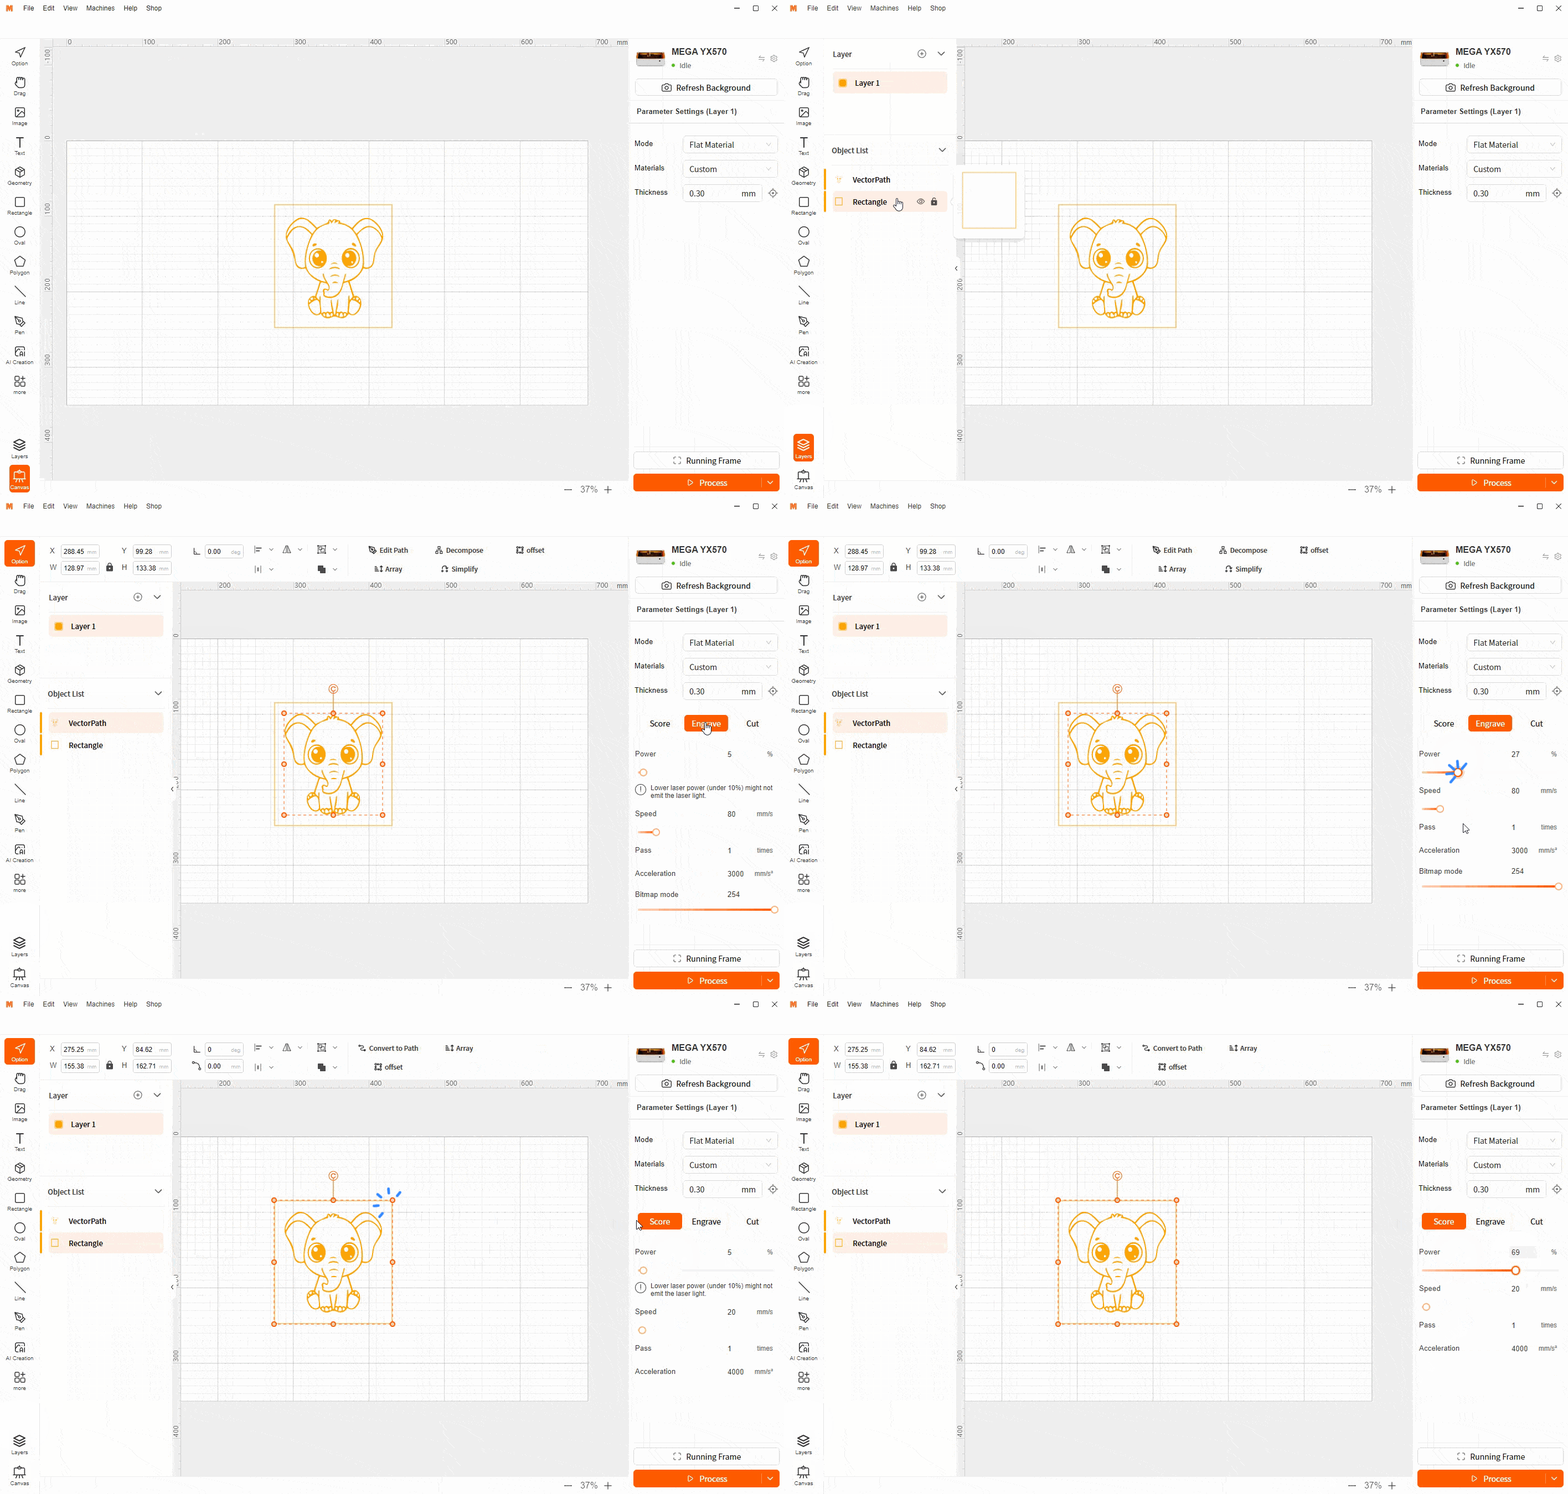
Layers are categorized according to processing modes, such as Score, engrave, and cut.
By assigning different design elements to different layers, users can more easily control the editing and processing of each element. This method is more conducive to improving work efficiency and the accuracy of the design.
Different laser power, speed, and other parameters can be set through different layers. This is because different design elements may require different processing methods, such as the depth and speed of cutting and engraving. Through layer management, users can more accurately control the processing effect of each element.
By utilizing layer management, users can achieve more complex and detailed designs. It provides the possibility to create designs with different processing depths and textures, thereby greatly expanding the application range of laser engraving and cutting.
¶ Case: Engraving + Cutting
¶ 6 Others
¶ Version Update
Software updates are crucial for several reasons and serve various purposes:
Fixing Known Vulnerabilities |
As software is used, developers might identify security flaws or defects. Updates can address these issues, ensuring user data safety. |
Improving Performance |
Developers continuously optimize software code. By updating, they enhance the software’s efficiency and speed, reducing resource consumption |
Adding New Features |
To meet users' new demands or keep up with technological advancements, software is updated to introduce new functionalities or services. |
Enhancing User Experience |
Based on user feedback, developers can improve the software’s interface design and workflow, making it more user-friendly and intuitive. |
Compatibility Issues |
Updates ensure that software remains compatible with the latest operating systems or other software, avoiding conflicts. |
How to Update Software:
1. Manual Updates: If a new version is released, a prompt will pop up when you open the software. You can click the update button to automatically start downloading the new software package. Once the download is complete, you can click on the installation package to install it.
You can also choose not to update and directly close the pop-up window by clicking X icon in the upper right corner. However, the pop-up will appear every time you open the software.