Quick testing method:
- Carve test grids (with different power/velocity combinations)
- Compare the focal point position (make fine adjustments along the Z-axis, observe the changes in the thickness of the lines)
- Re-test after replacing the lens or cleaning the optical path
¶ 1. Check the laser focusing status (the most common cause)
Is the focus correct?
- Use focusing tools (such as focusing rods or auto-focusing functions) to ensure that the laser focus is on the material surface
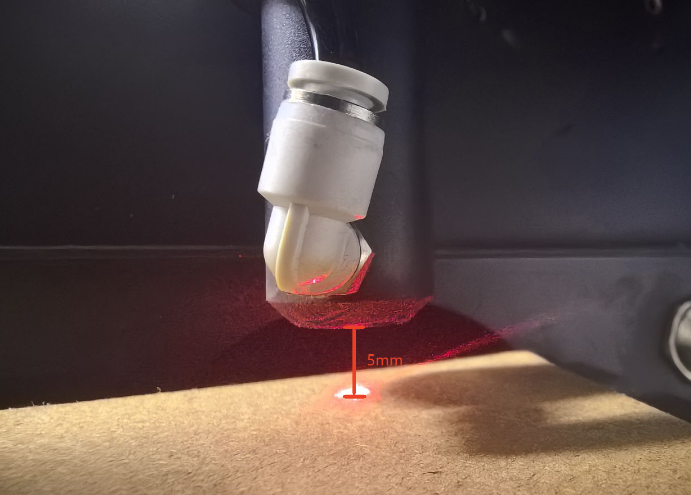
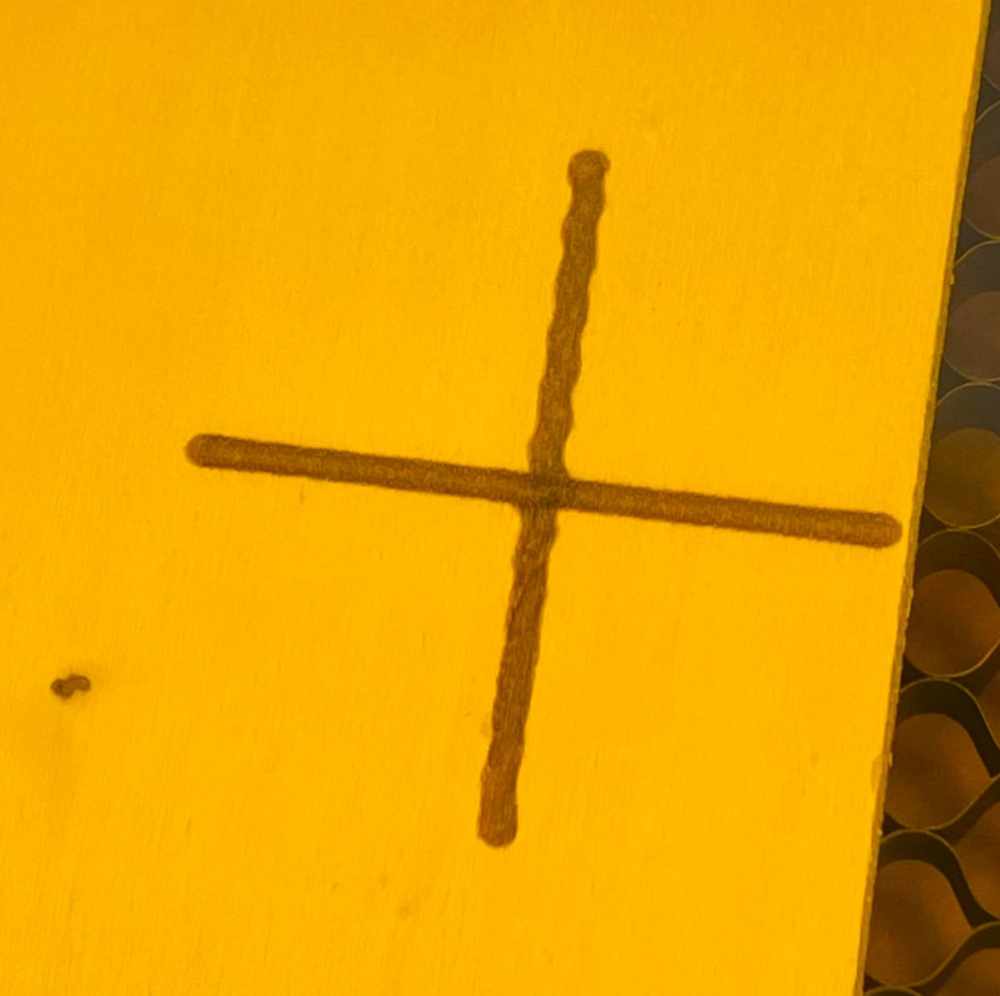
- Conduct a focus test before engraving (such as engraving small dots and observing if it is the finest and clearest)
Is the focal length appropriate?
- Check if the laser lens is installed correctly (check if the focusing lens has the convex surface facing upwards)
Cleaning Focus Lens TutorialMege Laser Head Cleaning and Maintenance Guide
- If the engraving depth varies greatly, it may be necessary to adjust the Z-axis height
¶ 2. Check the laser power and speed settings
Is the power too high?
- Excessive power will cause the material to be overly ablated and the lines to widen
- Test adjustment: Reduce the power (e.g. from 50% to 20%) and observe the changes in the lines
Is the engraving speed too slow?
- If the speed is too slow, the laser will stay at the same position for too long, resulting in an expanded ablation range
- Test adjustment: Increase the speed (e.g. from 50mm/s to 150mm/s)
Check if the minimum and maximum power settings of LightBurn are reasonable.
¶ 3. Inspect the optical system (lenses, reflectors, laser tube red light module)
Are the lenses dirty or damaged?
- Clean the output lens, focusing lens, reflector, and red light module with isopropyl alcohol and a dust-free cloth
Cleaning Focus Lens TutorialMege Laser Head Cleaning and Maintenance Guide
- Check if the lenses have scratches or burn marks (replace if necessary)
Is the optical path offset?
- Check if the laser is aligned with the center of the reflector (use the light target or tape in the accessories to test the position of the light spot)
- Re-calibrate the optical path (refer to the equipment manual)
Optical Path Adjustment Tutorial————Calibrate the optical path————
¶ 4. Material Factors
Is the material suitable for laser engraving?
- Some materials (such as acrylic, wood) will expand when heated, causing the lines to become thicker.
- Test different materials (for example, use plywood instead for comparison)
Is the material surface smooth?
- An uneven surface can cause laser defocusing, affecting the line accuracy.
- Use a fixing plug or fixture to secure the material.
¶ 5. Other possible causes
- Machine mechanical issues (loose belts, worn rails)
- Poor heat dissipation (laser tube or motherboard overheating leading to unstable power supply)
- Software version problems (attempting to update or replace the software for testing)