¶ Suggestion for regular cleaning and maintenance schedule
If the cumulative duration of the engraving is 24 hours, it is recommended to perform a component cleaning once.
If the cumulative duration of the cutting is 4 hours, it is recommended to perform a component cleaning once.
If the focusing lens is found to be dirty and cannot be cleaned thoroughly, it needs to be replaced
The following operations should be carried out after ensuring that the device has been disconnected from the power supply.
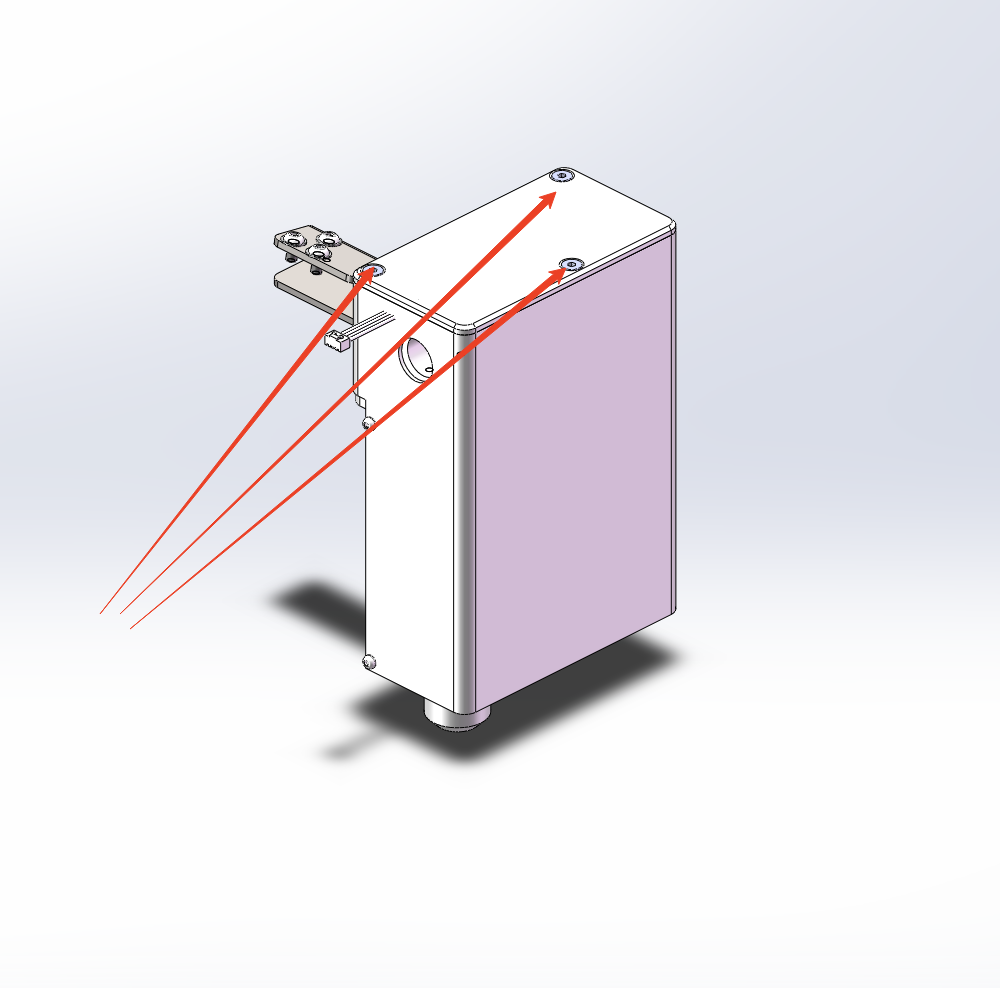
¶ 1. Disassembly of laser head housing
1) Remove the screws on the top cover and take off the top cover
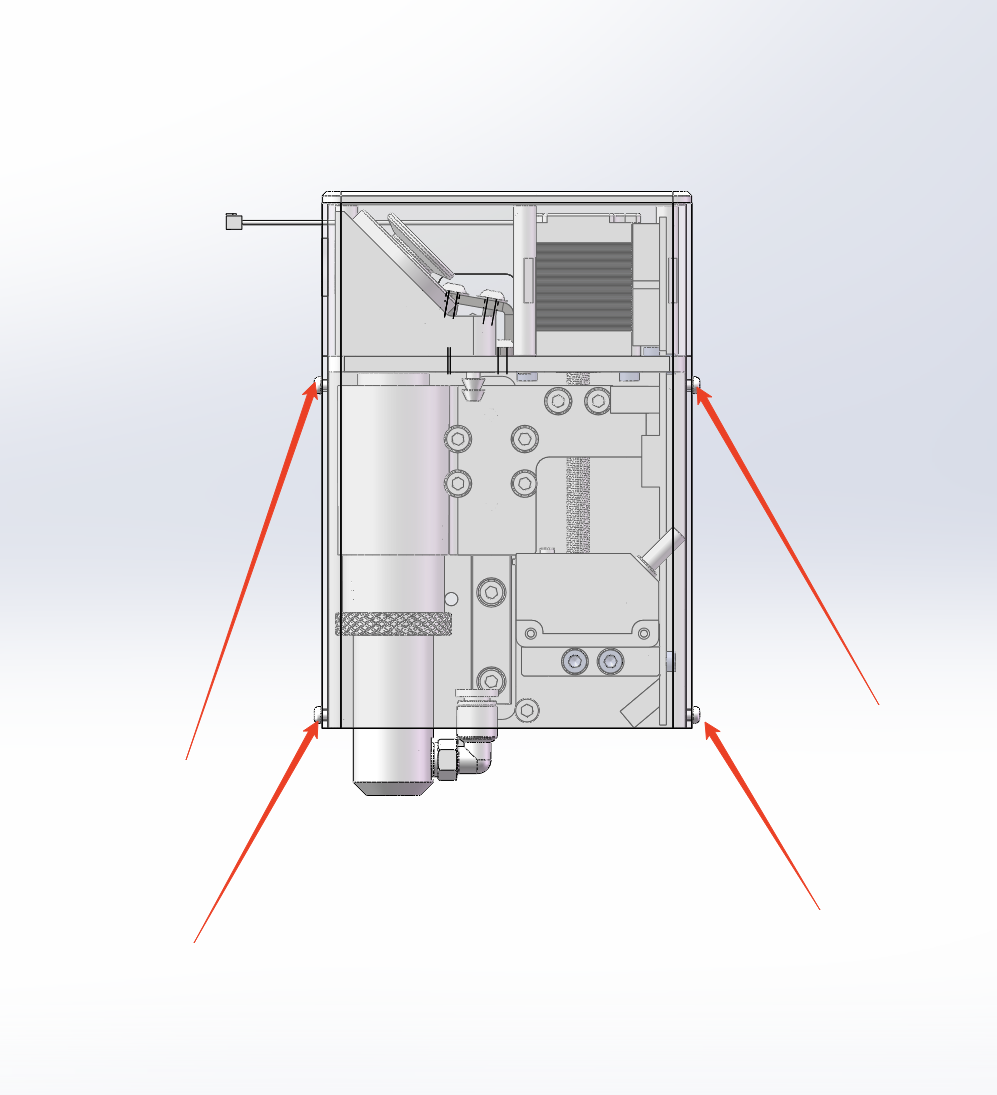
2) Remove the screws on the side of the cover and slide it upwards to remove it.
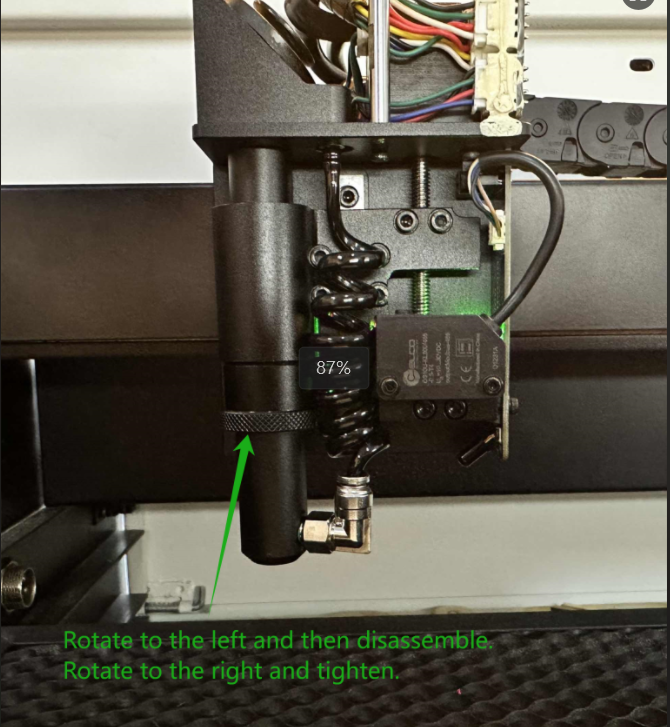
¶ 2. Disassembly of Laser Head Components
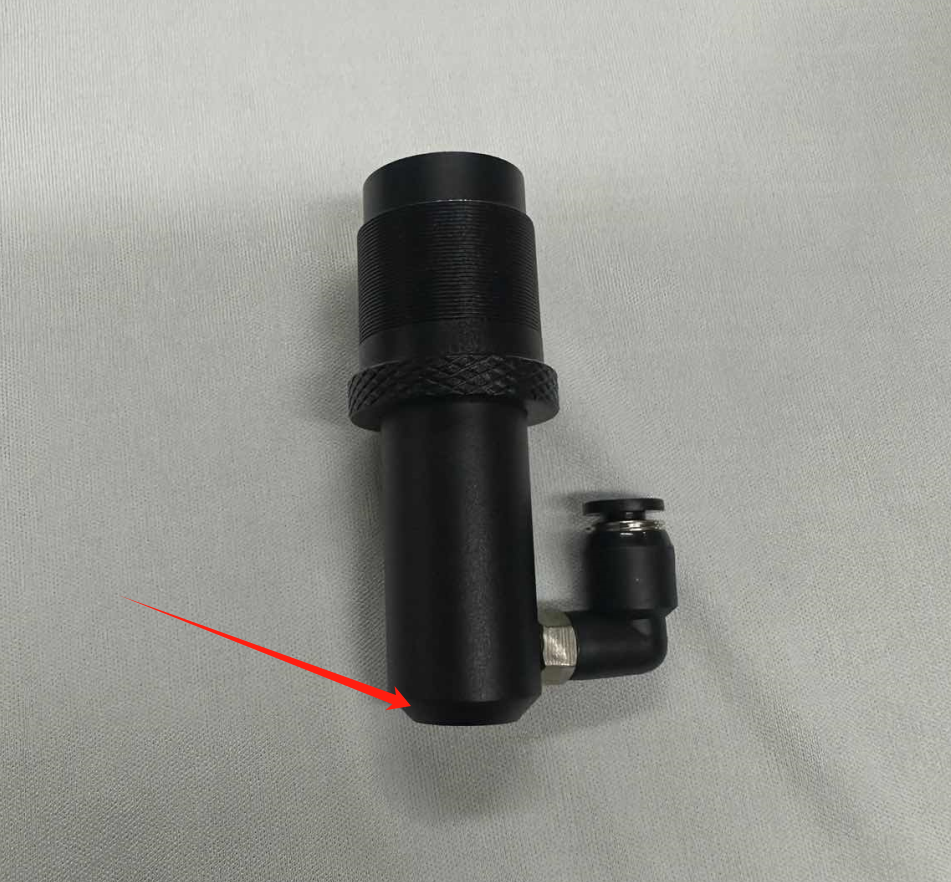
1) Remove the air nozzle component of the laser head and place it properly on a static-dissipative and clean work surface.
2) Remove the focusing lens mounting base and clean the base with alcohol and a dust-free cloth.
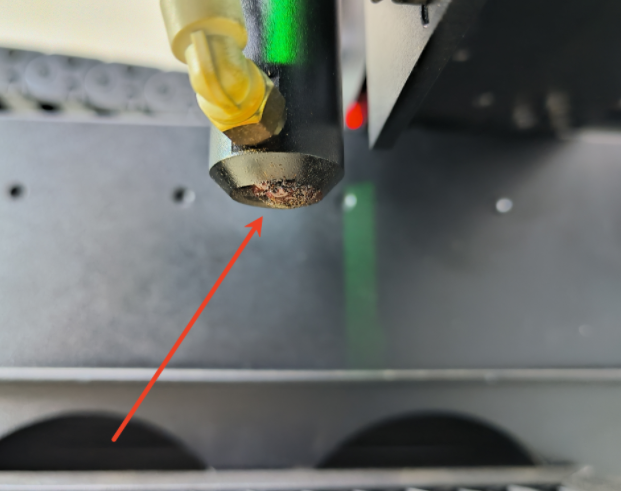
Clean the stains on the laser head. (It is necessary to clean it daily to prevent blockage caused by prolonged use.)
¶ 3. Lens disassembly
1) Remove the silicone sealing gasket and the focusing lens assembly one by one. Pay attention to recording the disassembly sequence of each component.
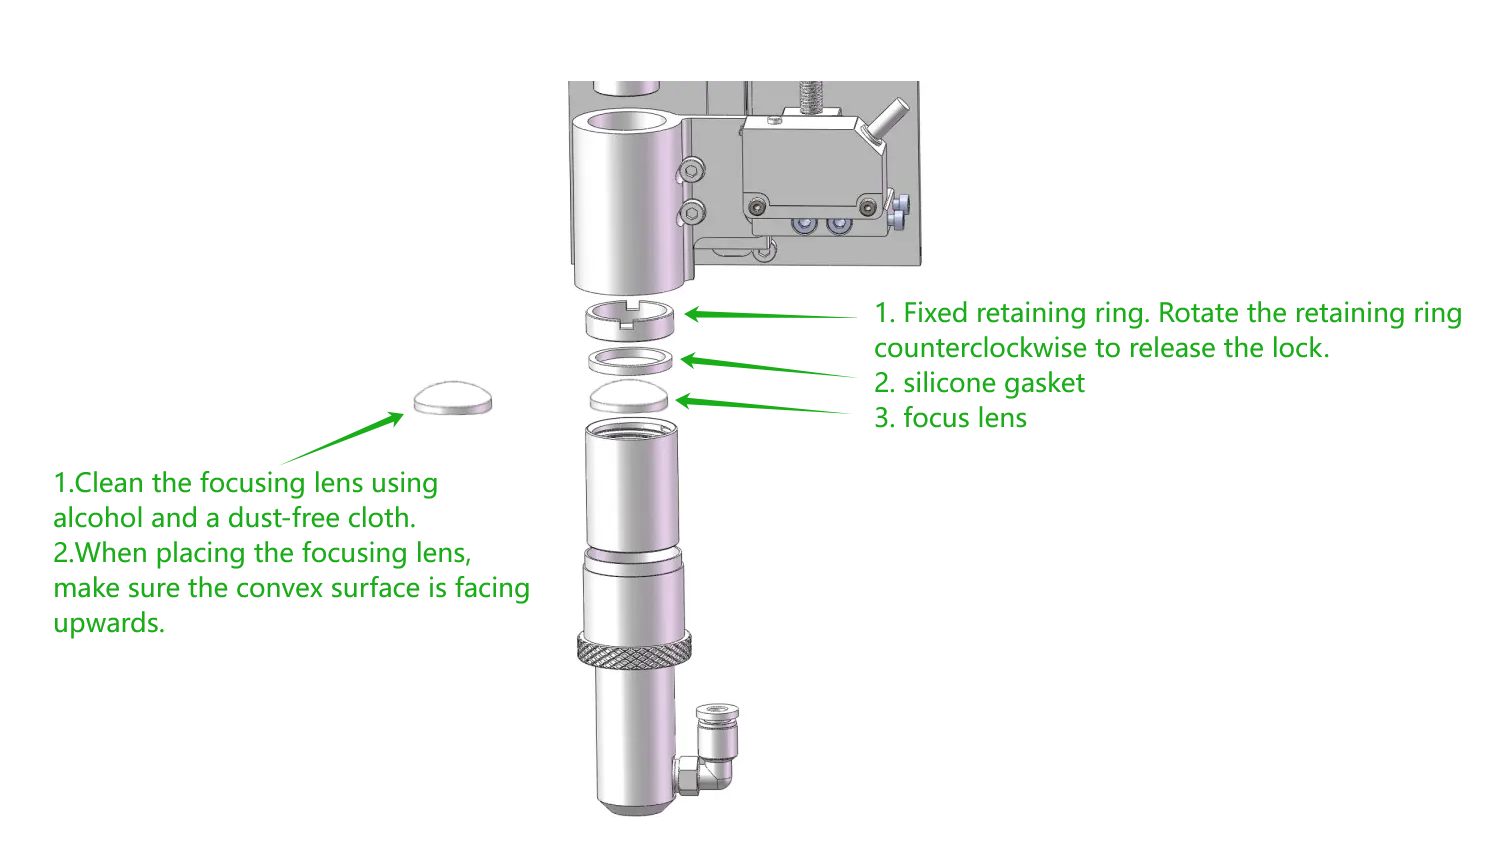
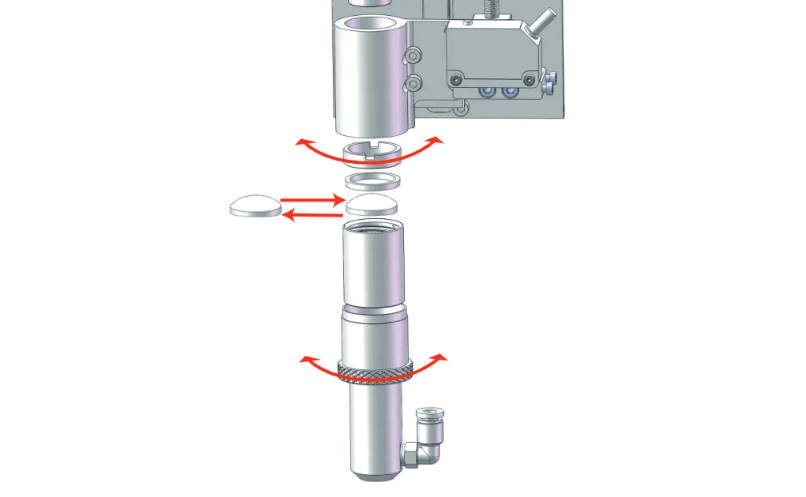
Rotate the thread as shown in the following figure and replace the focusing lens.
Convex side up (when you can see the entire face as convex from the focusing lens)
¶ 4. Cleaning Operations
1) Regularly clean the focusing lens with alcohol and a lint-free cloth.
2) Wipe the lens radially in a single direction (do not rotate while wiping).
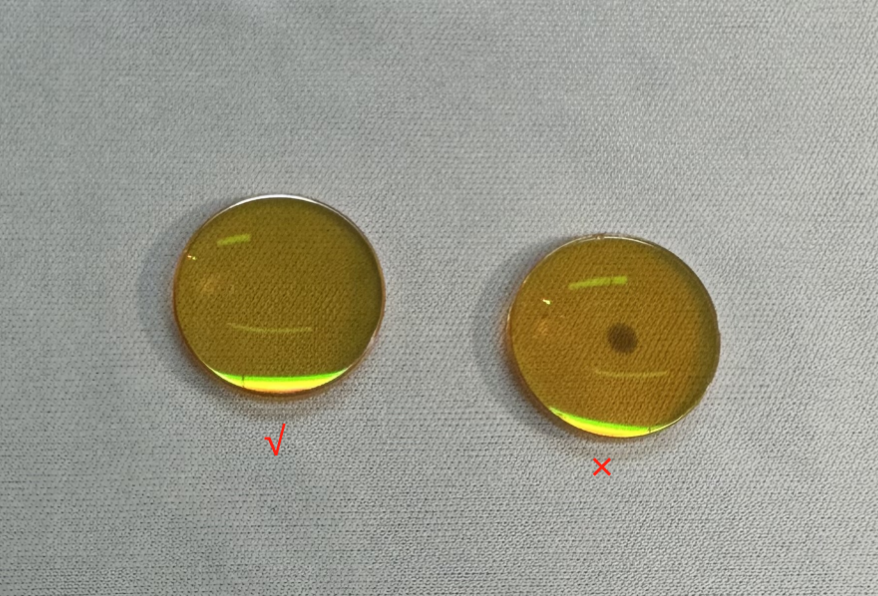
3) Check the integrity of the lens surface and confirm there are no scratches or burn marks.
¶ 5. Assembly and Reset
1) Ensure that the convex surface of the focusing lens is facing upwards.
2) Install the sealing components in reverse order according to the original disassembly sequence.
Notes:
● Avoid touching the focusing mirror surface with bare hands.
● The working environment should be kept clean.