Please read this manual carefully before using Mega. Following the instructions will
help you complete the setup efficiently.
The entire setup process takes approximately 120 minutes.
¶ 1. Preparations
¶ 1.1 Inspect for Visible Damage
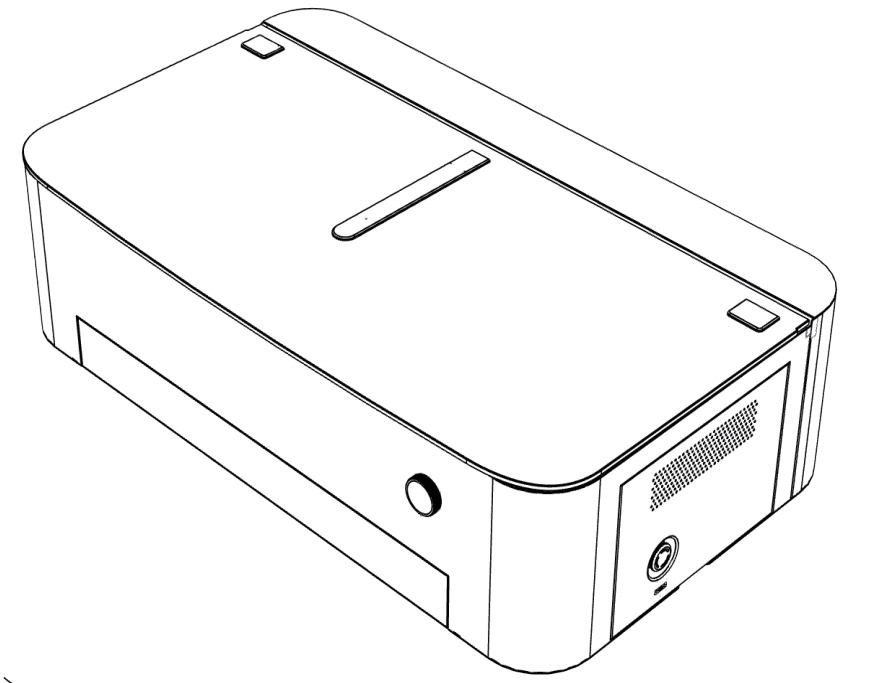
Before using Mega, check for any visible damage:
- Damage to the packaging
- Deformation of the machine’s outer shell
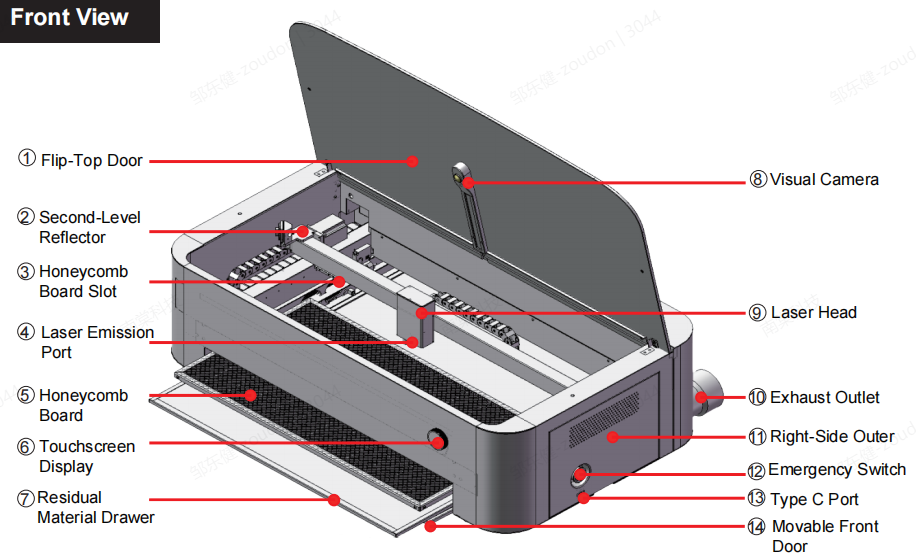
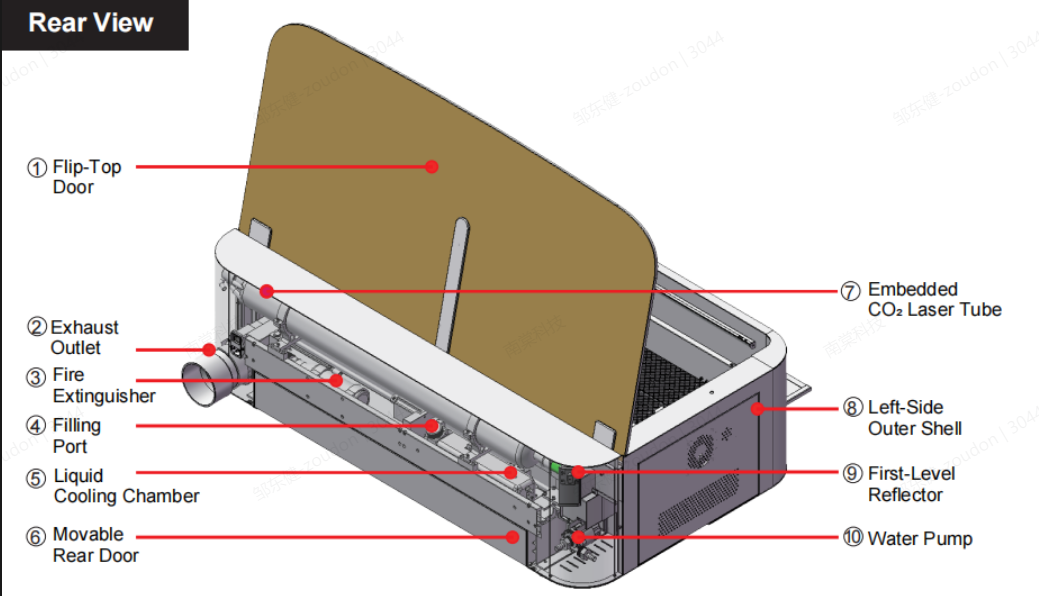
Below are the front and rear views of Mega:
¶ 1.2 Accessories Checklist
Upon opening the package, you should find the following accessories.
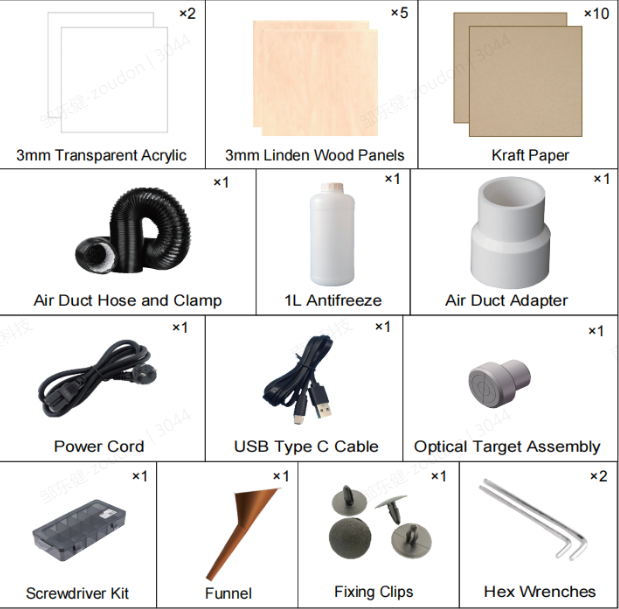
Please carefully check and if anything is missing, contact us at:mailto:support@monportlaser.com
¶ 1.3 Add Coolant
(Water Pump Must Be Turned On First, Then the Machine Turned Off)
Mega requires coolant (water or antifreeze) before use. Turn on the water pump first to
allow circulation and prevent air from entering the system.
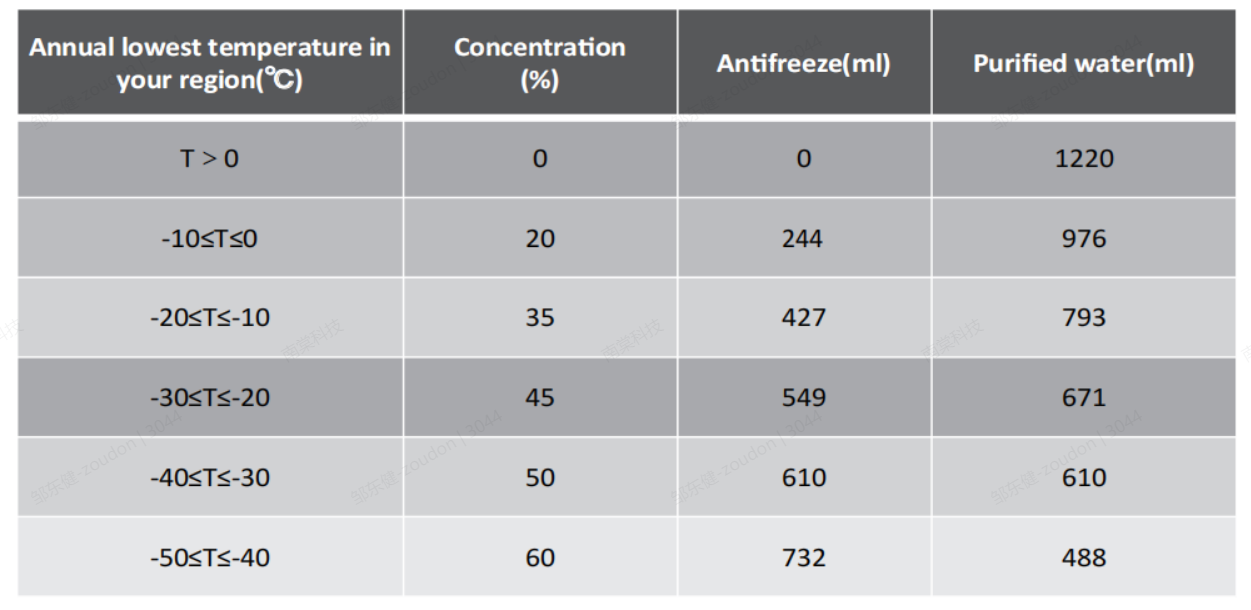
Use different coolant ratios depending on the temperature. Refer to the table below for details:
Steps to Add Coolant:
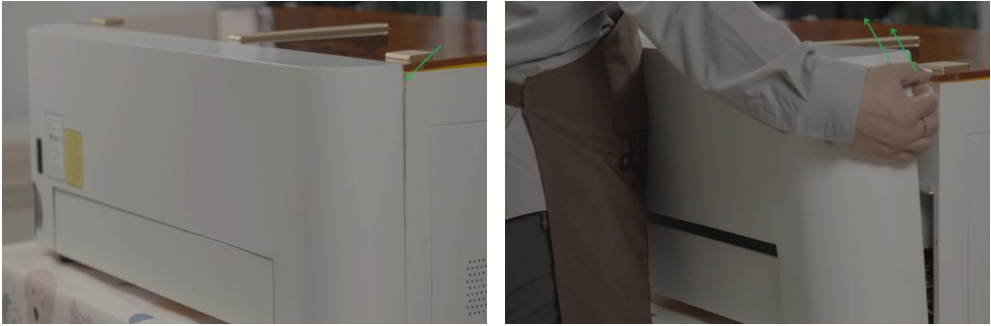
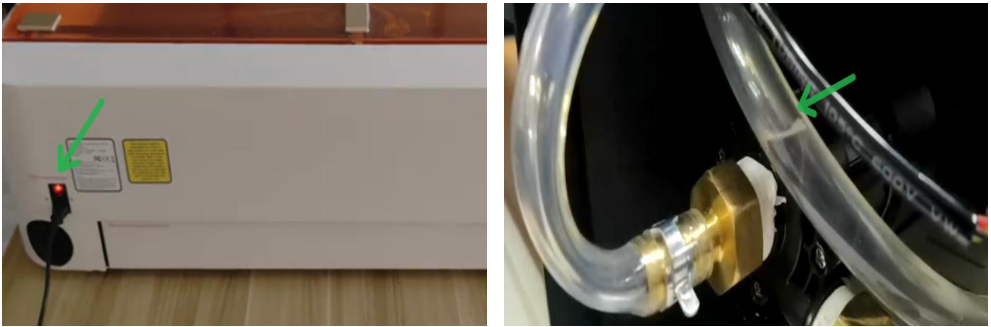
Step 1: The machine’s back cover is not screwed in by default. Remove it as shown:
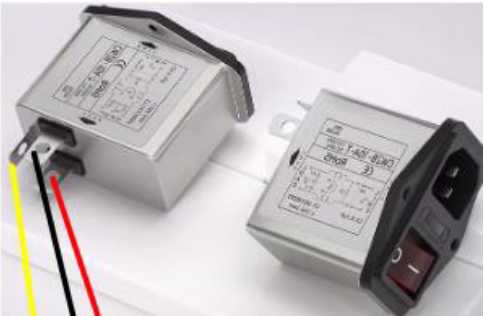
Important: If you accidentally disconnect
the power cord while removing the cover,
reconnect it as shown:
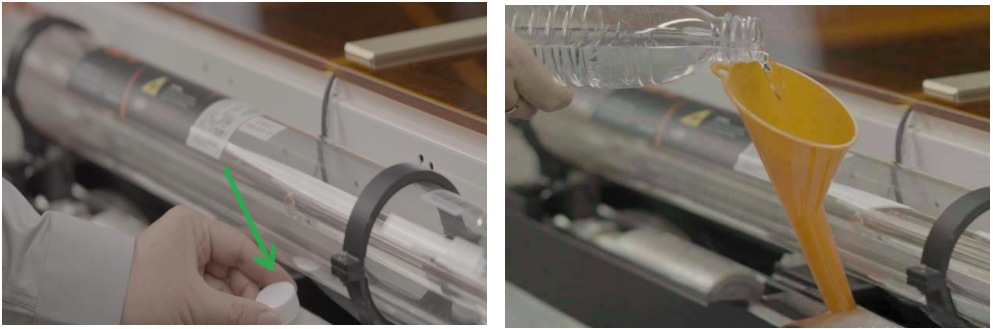
Step 2: Unscrew the water tank cap.
Step 3: Fill the tank until it’s at least two-thirds full.
Step 4: Turn on the machine to activate the water pump. It will automatically circulate
water through the pipe.
Once the water pipe is filled, the water level in the tank will drop significantly. Refill
the tank until it is again at least two-thirds full. The coolant setup is now complete.
¶ 1.4 Remove the X-Axis Fixing Bracket
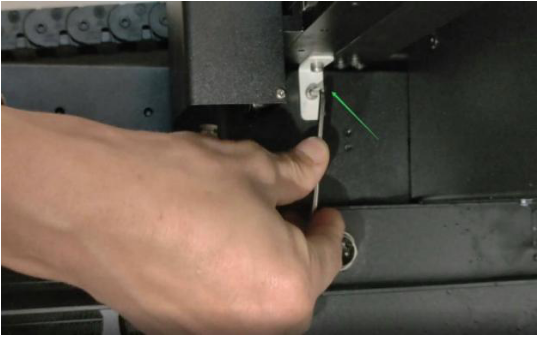
Remove the fixing brackets on both sides
of the machine.
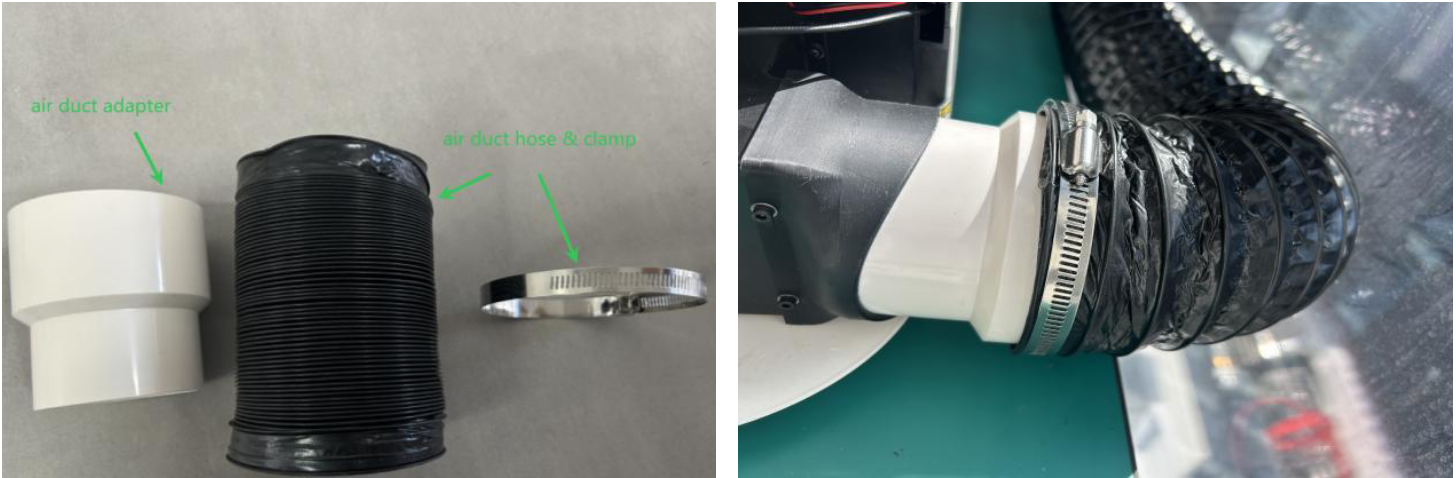
¶ 1.5 Connect the Air Duct Hose
To ensure proper ventilation, we recommend installing the exhaust duct before using
Mega.
Step 1: Gather the required parts: duct adapter, duct hose, and hose clamp.
Step 2: Insert the duct adapter into the machine.
Step 3: Attach the duct hose to the adapter.
Step 4: Secure the hose with the clamp.
¶ 1.6 Ensure a Stable Network Connection
To ensure smooth operation, place the Mega engraving machine in an area with a strong
and stable Wi-Fi signal. Many of its functions rely on Wi-Fi, and a poor connection may
affect performance.

The Wi-Fi antenna is located on the side of the machine. For the best signal strength:
- Position the antenna-facing side toward
your router.
- Avoid placing metal objects near the
antenna, as they may interfere with the
signal.
¶ 2. Network Configuration & Firmware Upgrade
¶ 2.1.connecting device
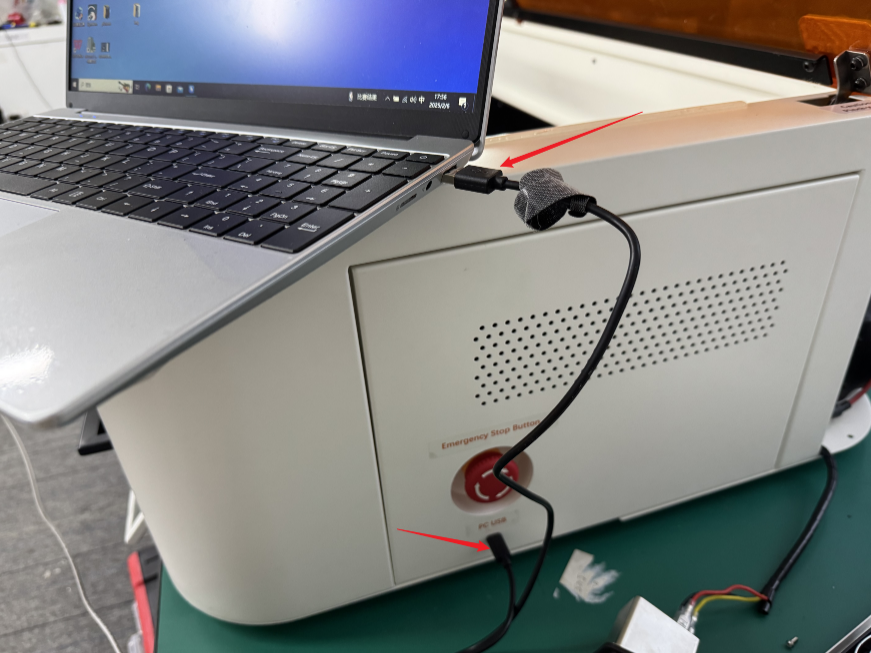
Before connecting to the network, you need to prepare a Type C data cable first.
The picture shows how to connect the data cable to the machine.
If the USB-connected device fails to recognize the COM serial port device, please download the serial port driver and install it before trying again. ——CH341SER.EXE——
Important: If your device doesn't show
up in the USB Devices list after plugging
in the cable, contact our after-sales
support at: support@monportlaser.com
Before starting to use the machine, we recommend that you modify some default motion parameters to achieve the best engraving and cutting results.
Here, we recommend using Lightburn for configuration.
¶ 2.2 Download the Lightburn configuration file for Mega.
————Mega Configuration.lbdev————
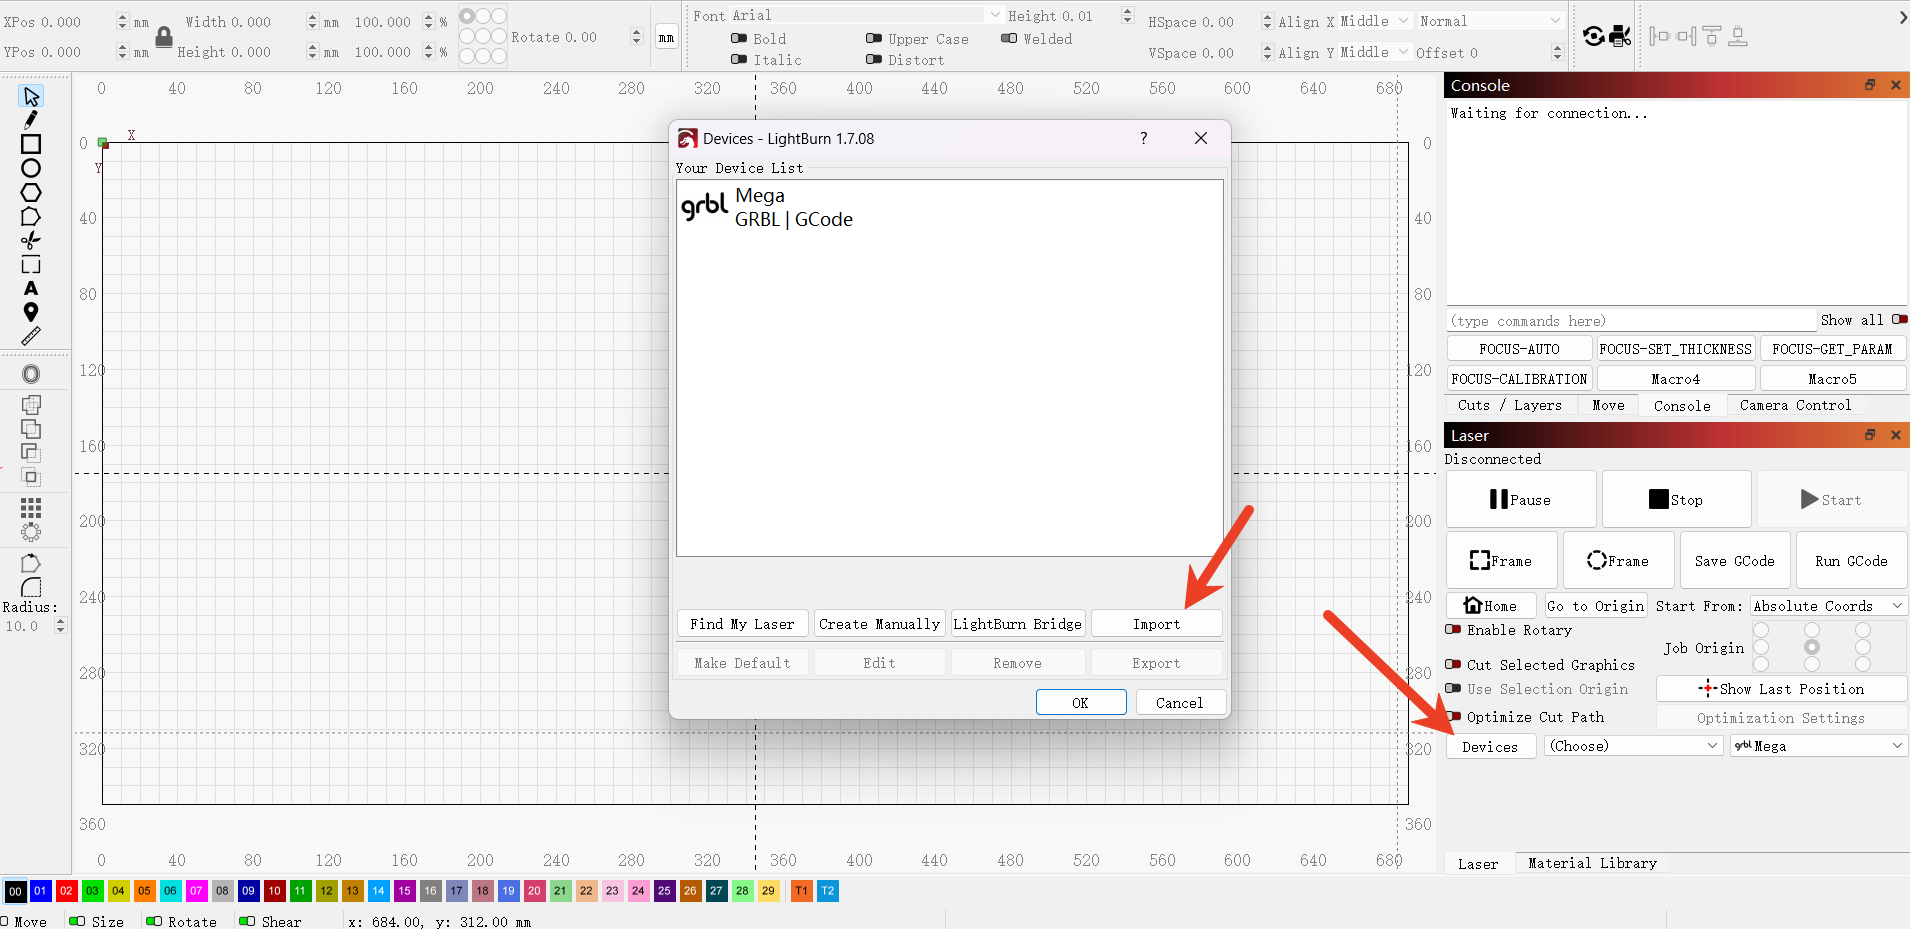
¶ 2.3. Import the file into Lightburn
Drag the file to any position in the Lightburn window or click "Devices" -> "import" to import it.
¶ 2.4.Configure the network
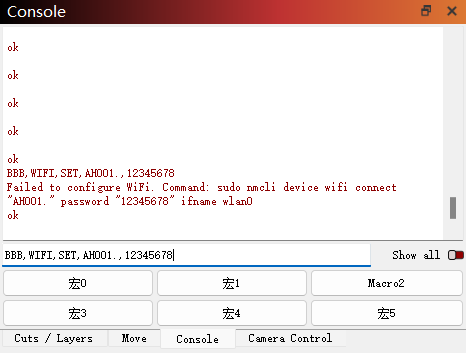
- Distribution network instruction:BBB,WIFI,SET,AH001.,12345678
(AH001. This is the Wi-Fi name, and 12345678 is the Wi-Fi password.)

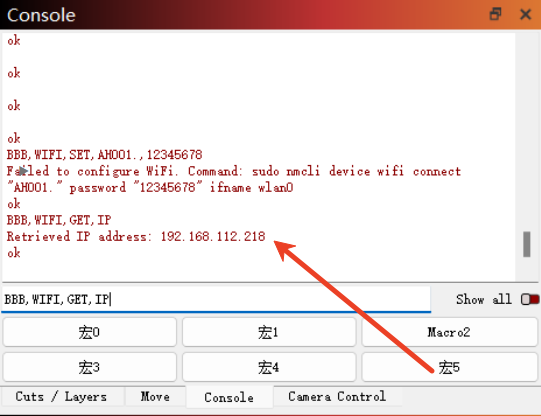
- Query IP:BBB,WIFI,GET,IP
¶ 2.5.Upgrade the firmware
To ensure the best user experience, we recommend upgrading your Mega engraving
machine’s firmware to the latest version before use.
Step 1: Download the upgrade tool
————————megaUpdate_1.0.4.0.zip————————
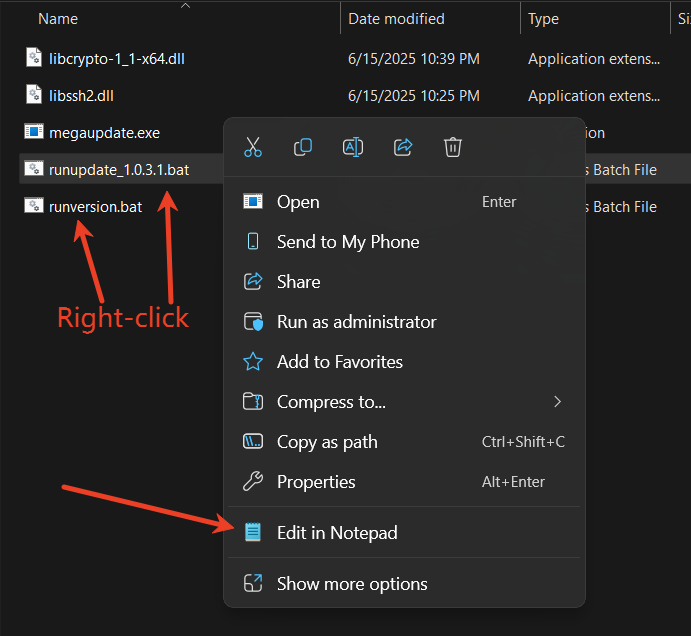
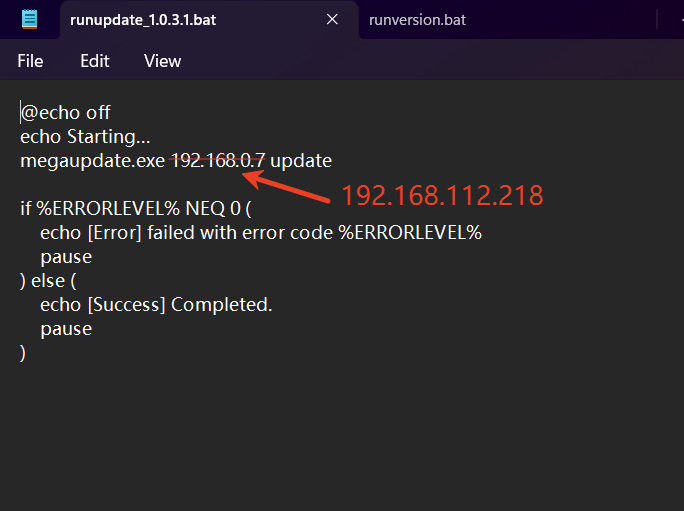
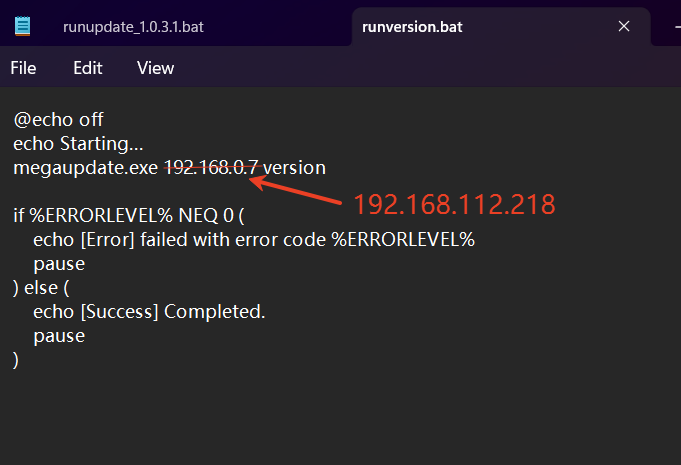
Step 2: Right-click on the "runupdate_1.0.3.1.bat" and "runversion.bat" files, and open them with Notepad.
Step 3:Input the device IP address retrieved from Lightburn and save it.
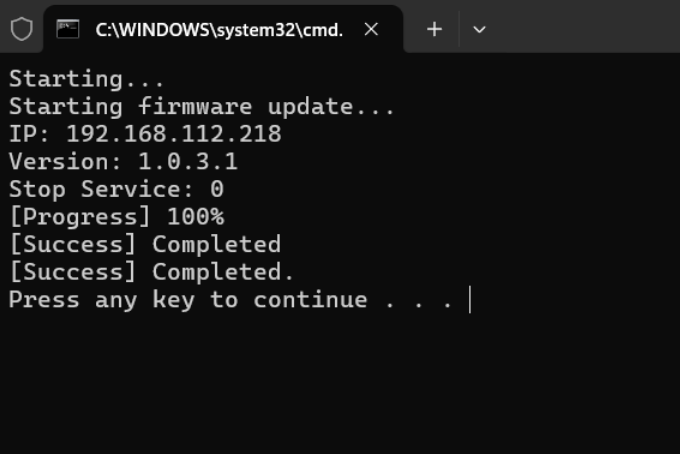
Step 4:Double-click the"runupdate_1.0.3.1.bat" file and wait for the upgrade progress to reach 100%. Then press any key to end the upgrade process.
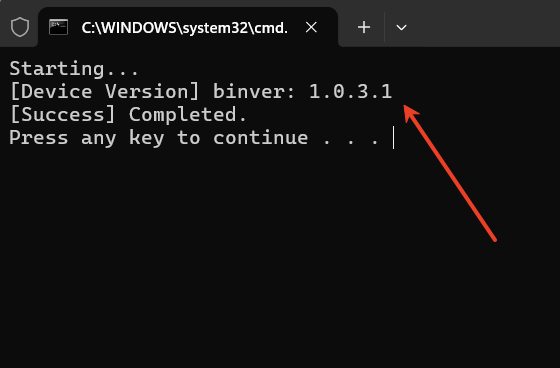
Step 5:After the equipment restarts, you can double-click to run the "runversion.bat" file to check the current version number. Confirm whether the upgrade was successful
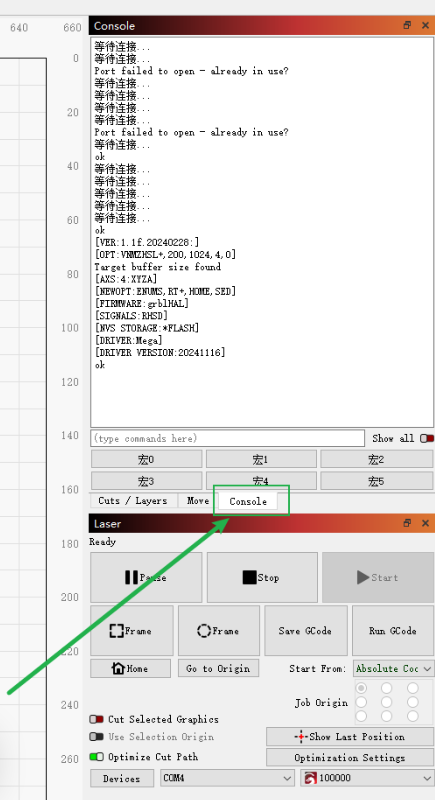
¶ 3. Preparation before carving
¶ 3.1 Machine Settings & Default Parameters
Step 1: Name & Set Work Area
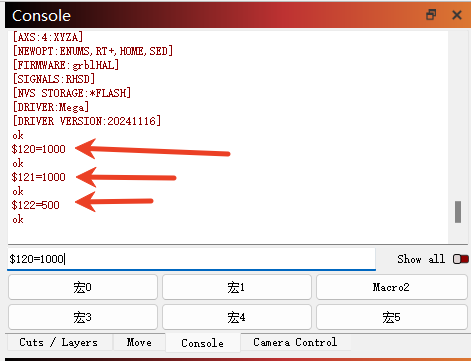
Step 2: Enter the following commands in sequence to set the optimal acceleration and
deceleration parameters: $120 = 1000、$121 = 1000、$122 = 500
¶ 3.2 Adjust the Light Source & Focus the Beam
Step 1: Adjust the First Mirror
After successfully connecting the MEGA machine, the auxiliary red light will automatically turn on when Lightburn is operating.
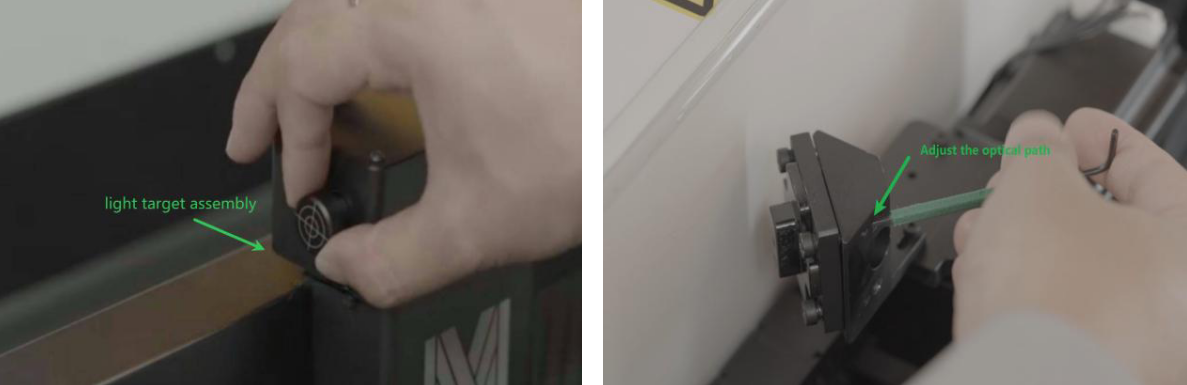
Detailed dimming tutorial can be viewed in the video.——>Check the optical path video<——
- Place the optical target into the second mirror holder.
- Move the X-axis up and down to verify the optical path alignment between the first and second mirrors.
- If misaligned, use a hex wrench to adjust the first mirror holder.
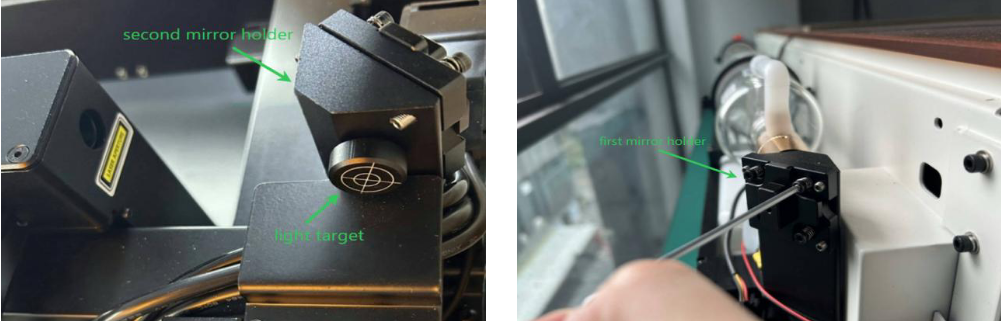
Step 2: Adjust the Second Mirror
- Place the light target into the laser head.
- Move the laser head left and right to check if the optical path between the second
mirror and the laser head is aligned.
- If misaligned, use a hex wrench to adjust the second mirror holder.
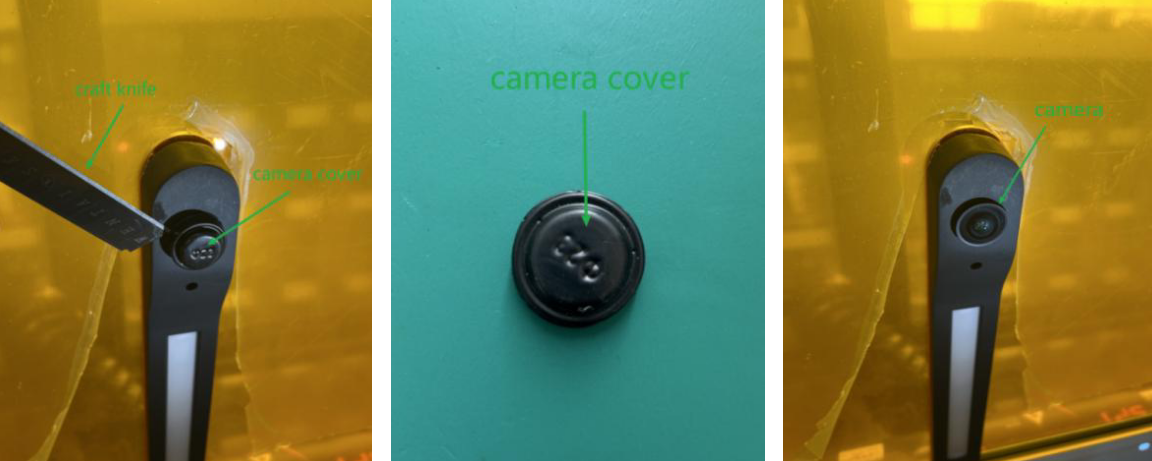
¶ 3.3 Remove the Camera Cover
Use a utility knife or other sharp tool to open the cover from the side. Do not rotate the
cover, as it may change the focal length and blur the captured images.
¶ 4. Using Lightburn to Complete Your First Project
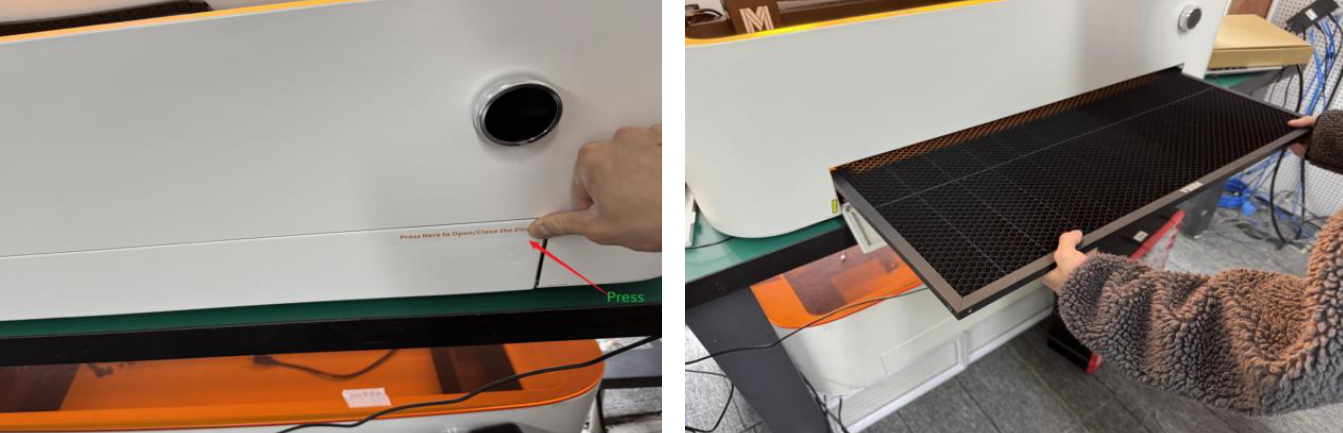
¶ 4.1 Place the Honeycomb Board
Open the bottom door of Mega, and insert the honeycomb board into the machine as
shown below, ensuring it is securely positioned.
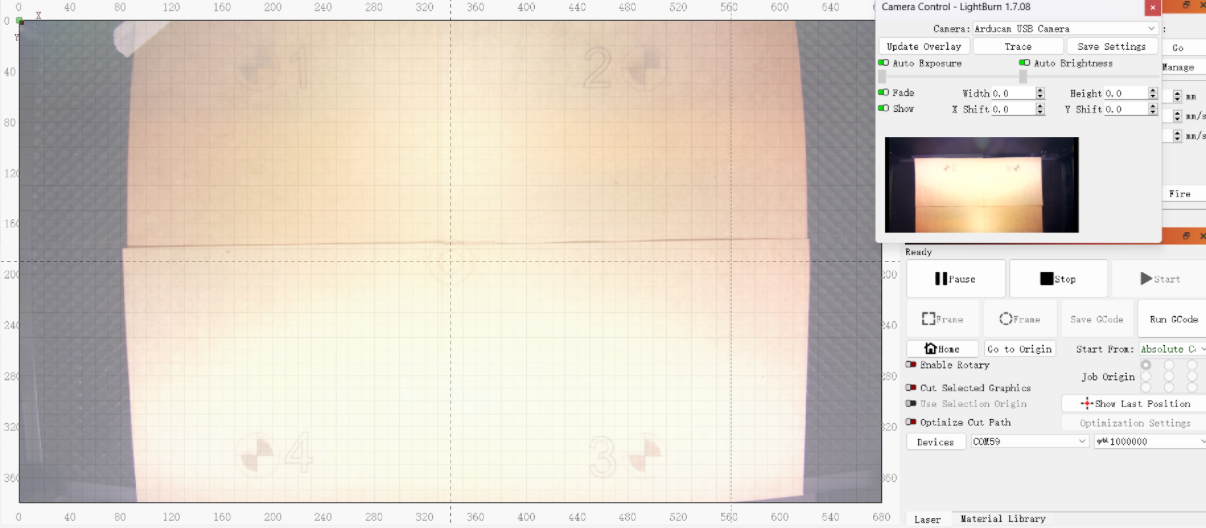
¶ 4.2 LightBurn's camera connection function
The relevant setup instructions can be found here:MEGA How to Set Up the LightBurn Camera (Import Preset Calibration File
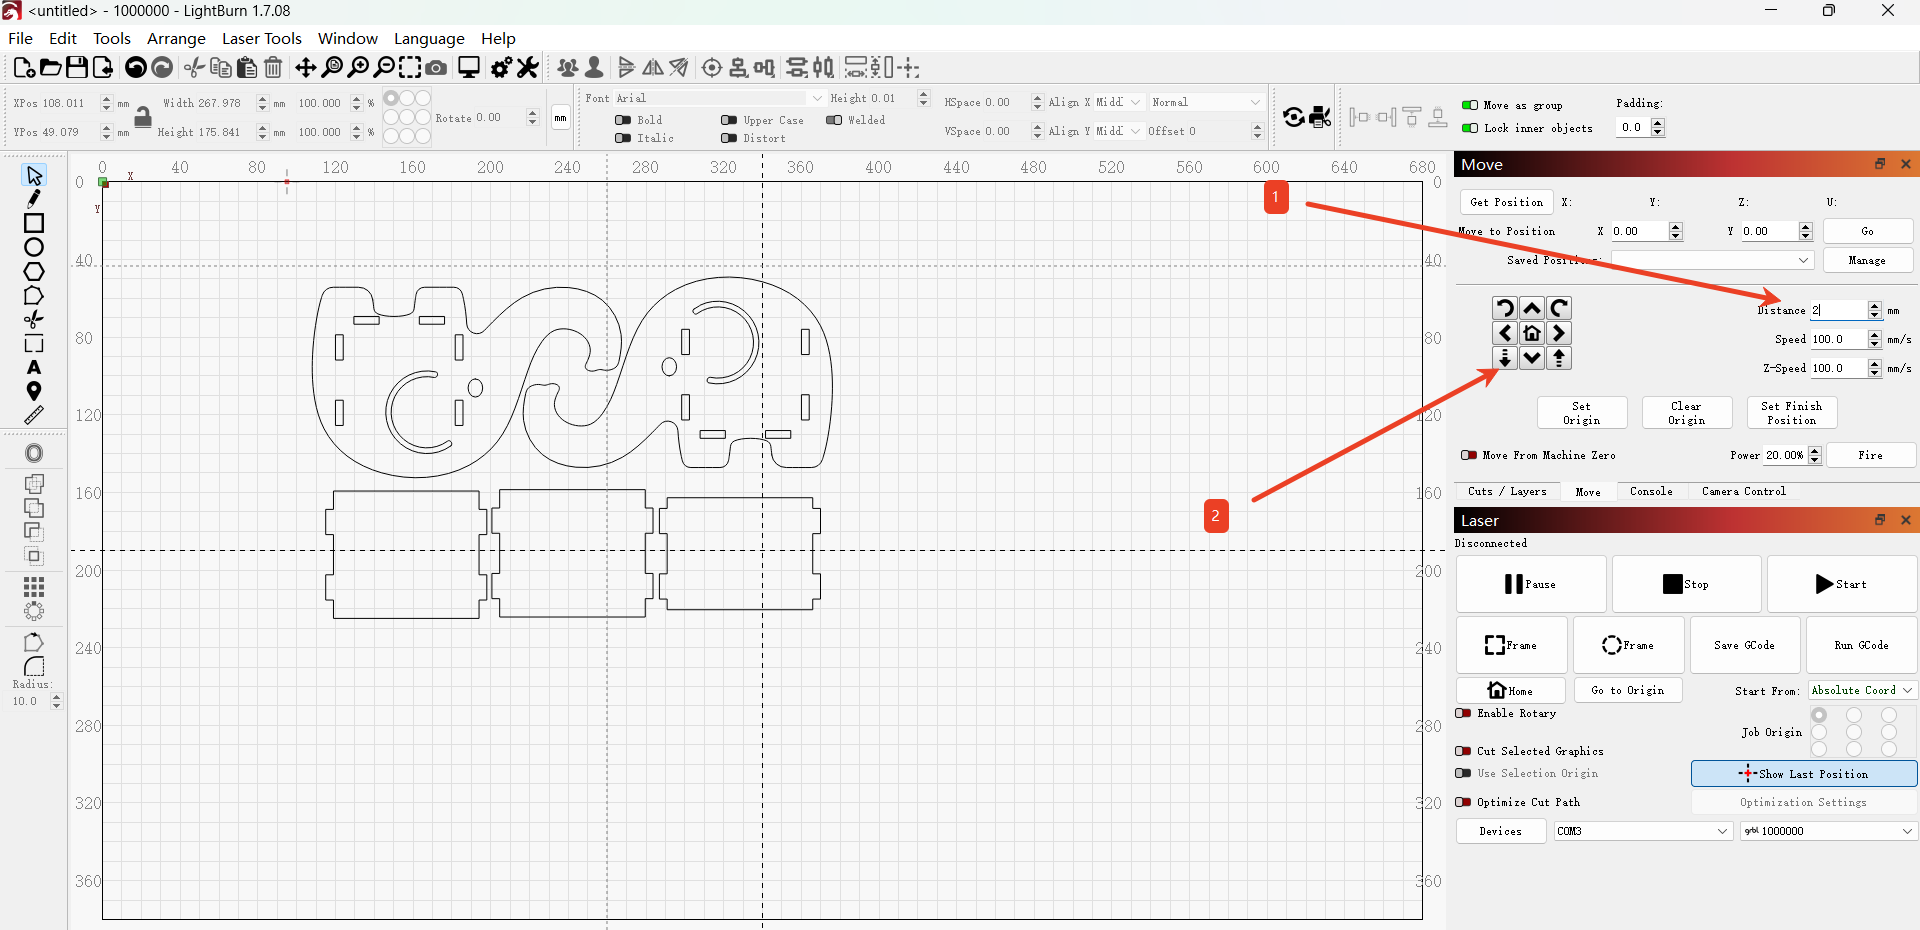
¶ 4.3 Importing files for engraving
1.Download this file and import it into LightBurn.
——————elephant.svg——————
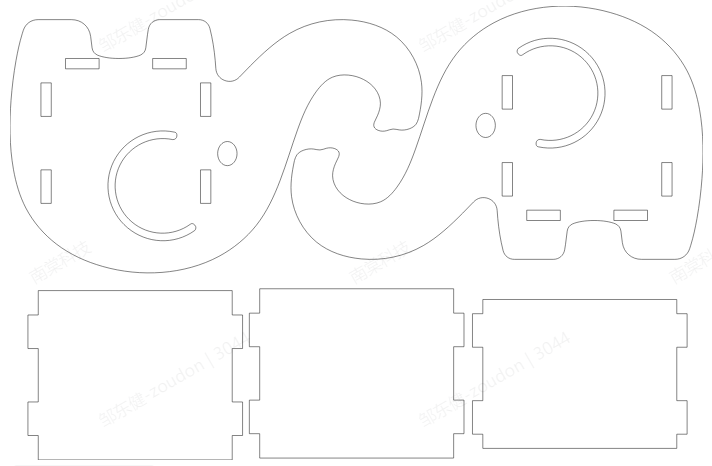
2.Place the 3mm plywood sheet at the center of the honeycomb board.

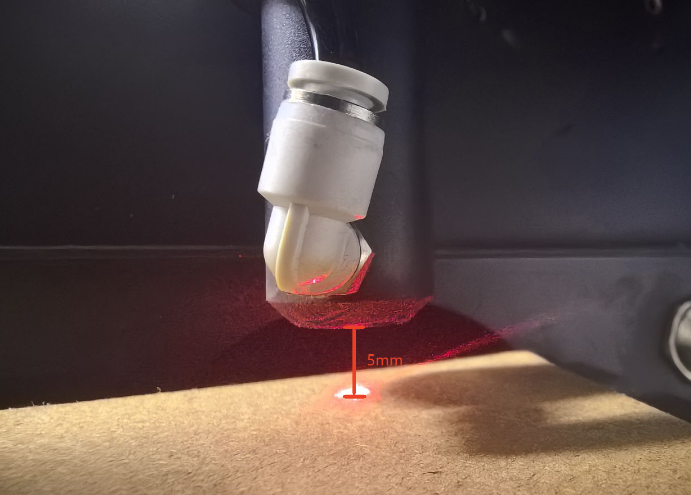
3.Lower the Z-axis, and set the laser head 5MM away from the engraved material.
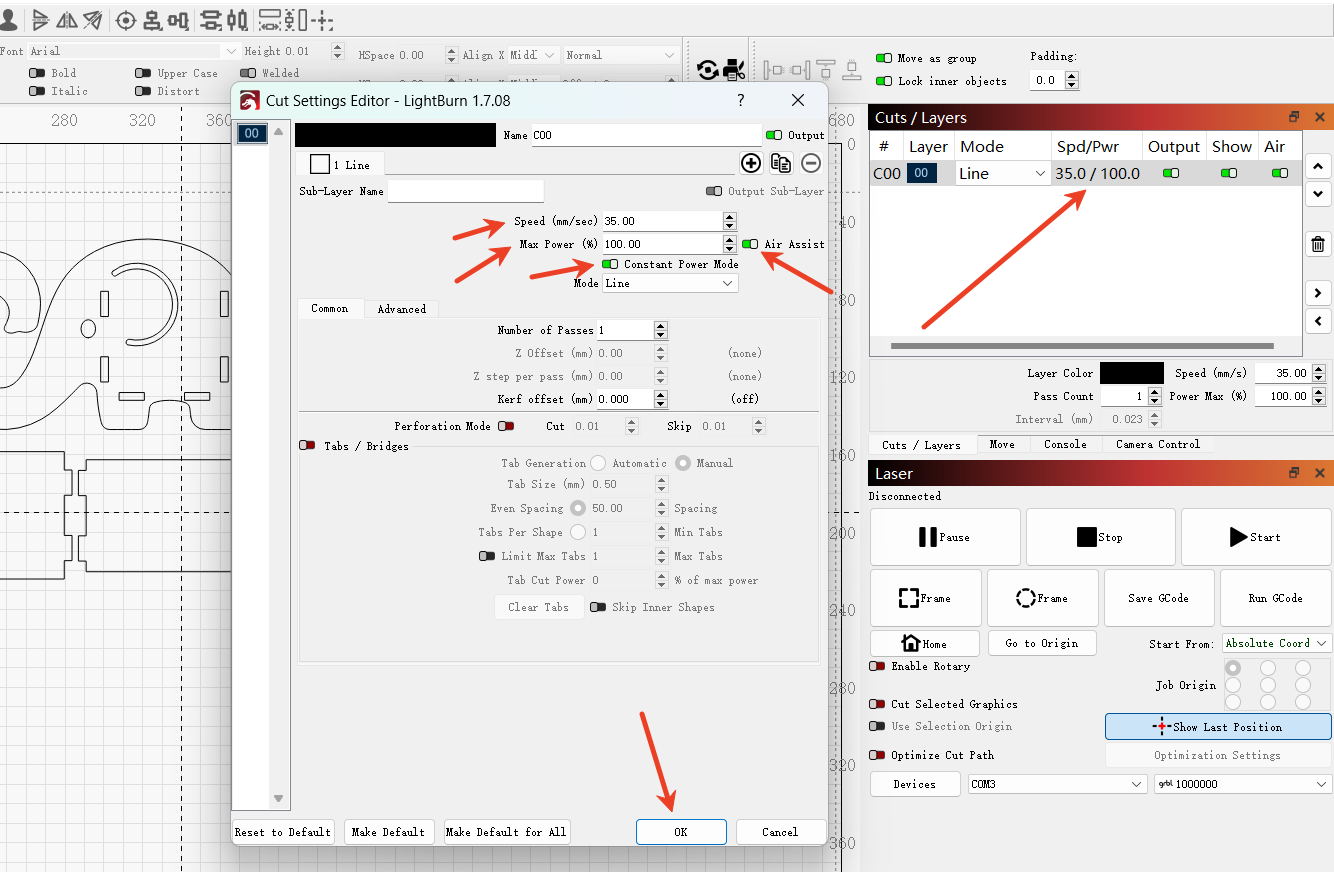
4.The following is the reference for the cutting power of 3MM wood boards.
Speed : 35 mm/s
Power :100%
Constant power on
Gas-assisted opening
After the modification is completed, click "OK" to save the settings.
The picture shows the final product:
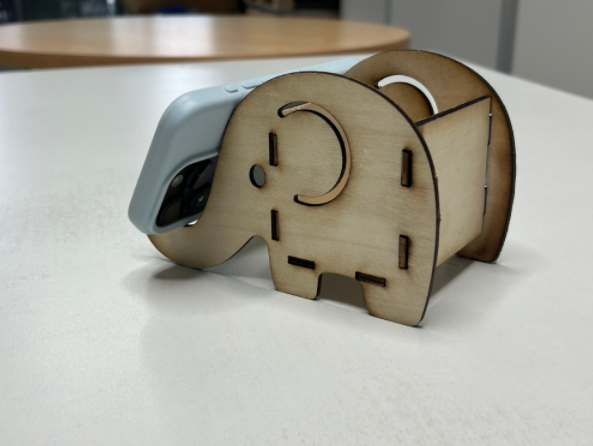
Congratulations! You have completed the first work with Mega. We look forward to seeing more interesting works created by you using Mega in the future.
¶ 5. Explore Other Features
- Mega Batch Filling Guide
- Mega Curved Surface Engraving Guide
- Mega Conveyor Belt Batch Operation Guide
- Mega Common Troubleshooting
- Mega Daily Maintenance
¶ 6. Contact Us
Support Email: support@monportlaser.com
Mega After-Sales Number: +1 303 210 9328
WhatsApp: https://chat.whatsapp.com/GTTrZQ0FqKv9Ex58vq8ZXw
WhatsApp QR code:

Facebook Official Group:
https://www.facebook.com/groups/8651579938232034