MEGA Rotary Axis Usage Tutorial - Lightburn
¶ 1.Introduction to the Rotating Axis
- Function: It is used for 360° circumferential engraving of cylindrical objects (such as glass cups, metal tubes, wooden sticks, etc.).
- Compatibility: Supports objects with diameters ranging from 25mm to 100mm and lengths not exceeding 280mm (refer to the equipment manual for specific parameters).
- Core Components:
〇 Rotation axis motor
〇 Chuck/Spindle (for fixing objects)
〇 Rotation axis fixing bracket
¶ 2. Installation and Connection
¶ 2.1 Hardware Installation
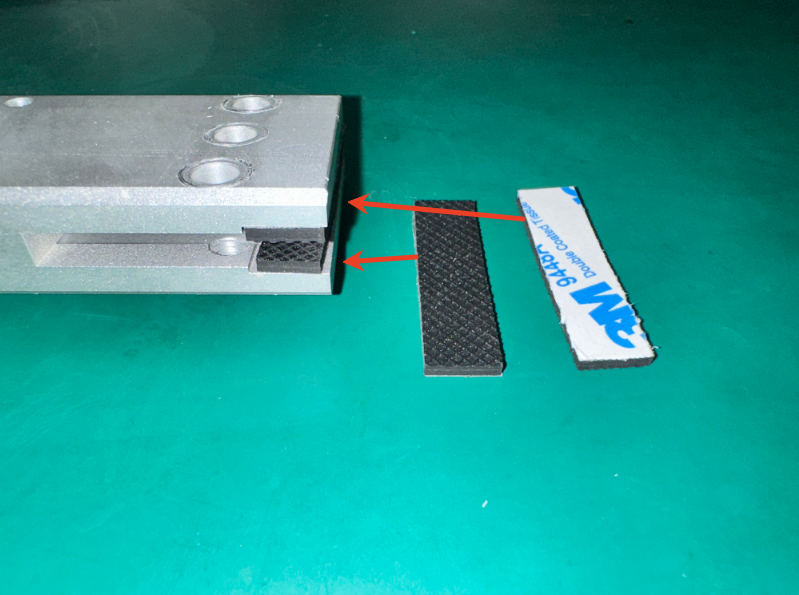
1. Fixing the Rotating Axis: Adhere the rubber anti-slip pads to the fixing positions on both sides, and install the rotating axis base onto the worktable of the engraving machine.
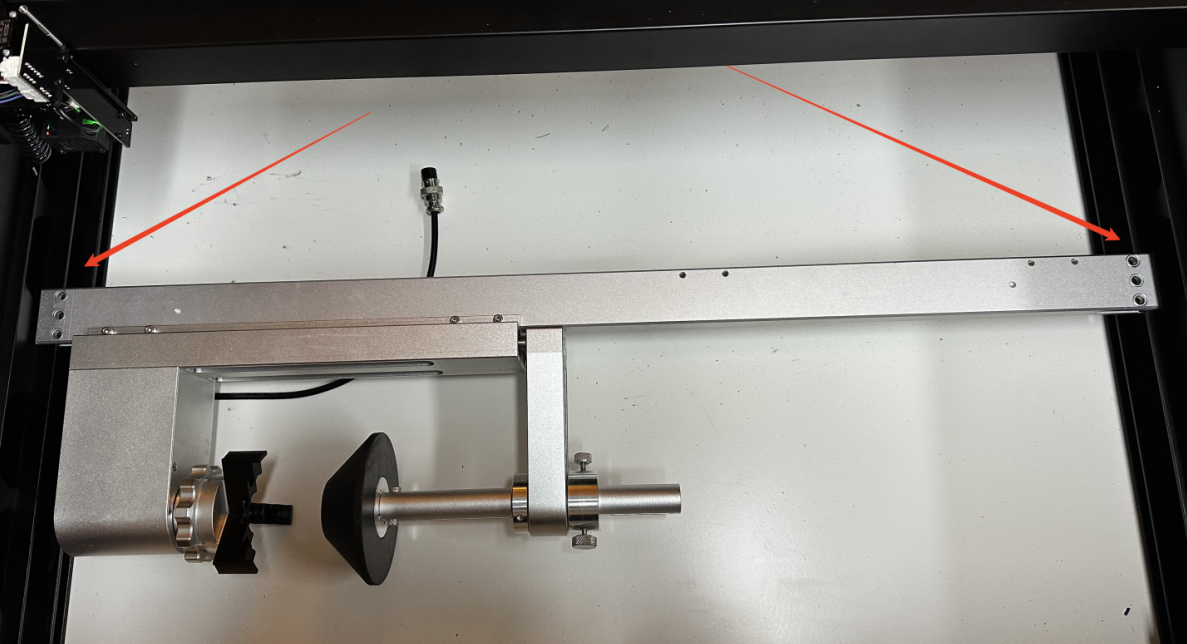
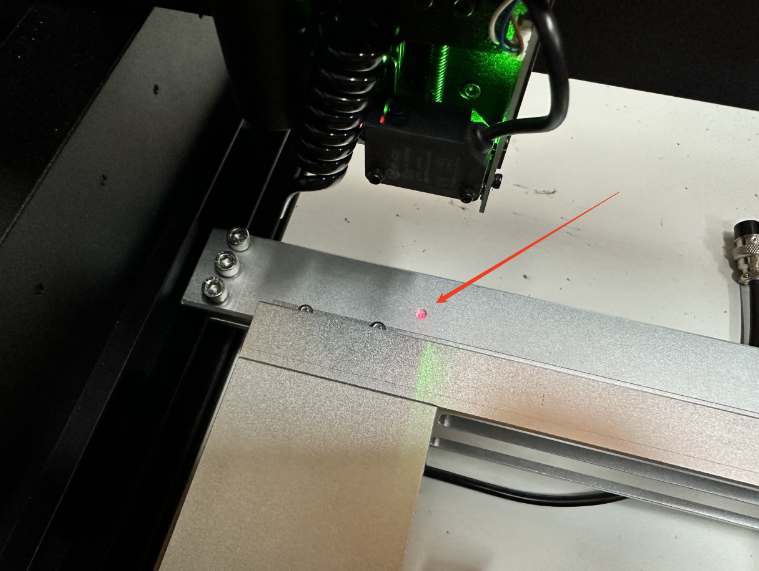
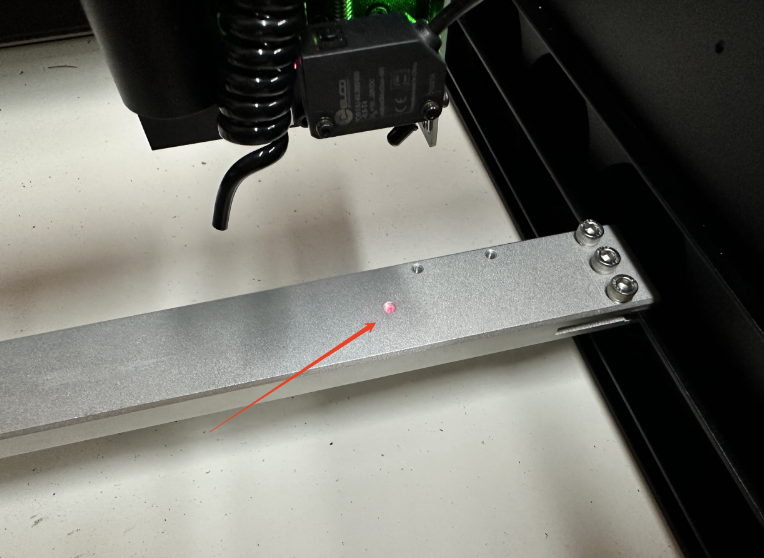
2. Adjustment of the fixed bracket position:
- Turn on the device, use the red light emitted by the distance measurement to align with the positioning hole on the left side of the fixed bracket, and then move the laser head horizontally to align with the positioning hole on the right side of the fixed bracket.
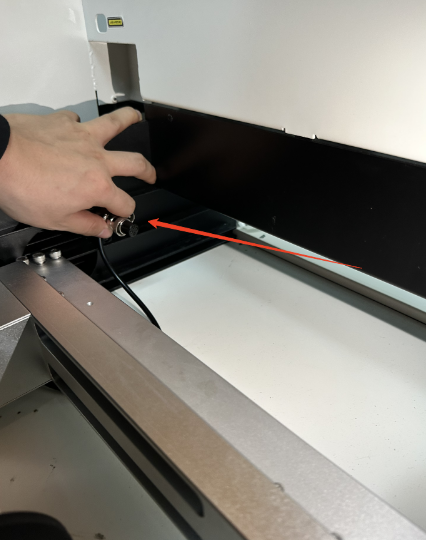
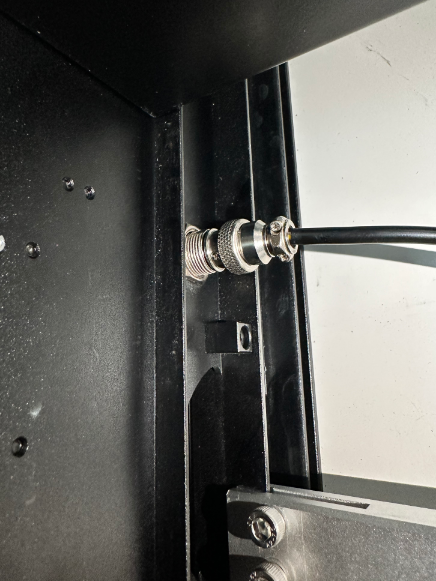
3. Connect the motor:
- Align the concave surface of the male end of the motor's rotating shaft wire with the convex interface of the engraving machine for connection.
- Ensure the power cord is securely connected.
¶ 3.Software Settings
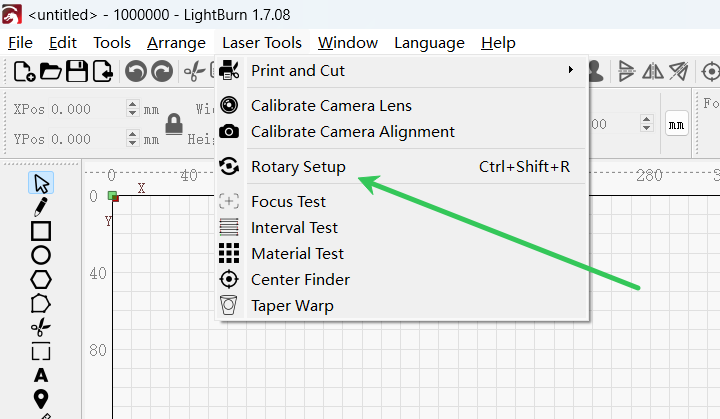
1. Open the laser engraving software LightBurn
2. Add the rotation axis:
〇 Go to the top left "Tools" → "Rotation Settings" → Check "Spindle-style" → Enable "Rotation" → Check "A-axis" function.
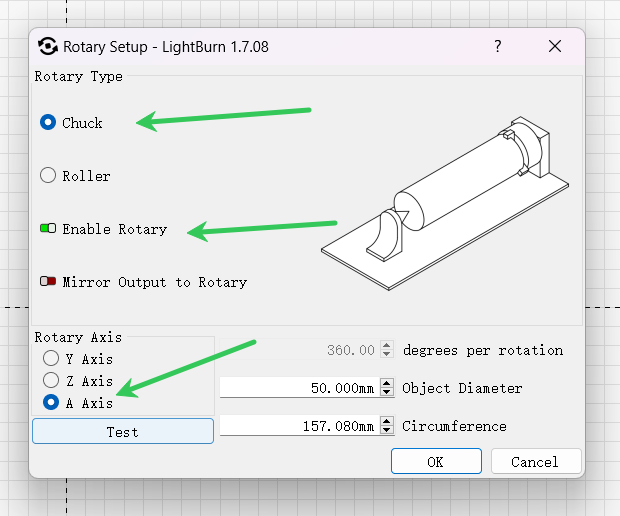
Set the engraving perimeter:
- Measure the diameter D of the object and input it into the software (perimeter = π × D).
Test the engraving:
- Draw a horizontal line and observe if the closure is seamless.
- If there is any misalignment, adjust the pulse count or the pressure of the roller.

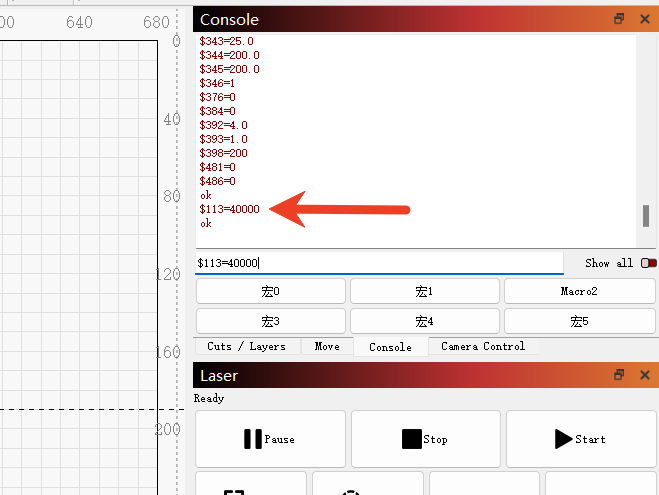
3.Send $113 = 40000, $103 = 15.5 (Change the maximum speed of axis A to 40000 and the precision of axis A to 15.5)

¶ 4. Calibration and Testing
¶ 4.1 Object Fixation Calibration
1. Place the cylindrical object between the rollers, ensuring that both ends are securely clamped and can rotate freely.
2. Manually rotate the object to check if it slips (applying masking tape can increase friction).
¶ 5. Sculpting Operation Steps
¶ 5.1 Design File Processing
- Expanding the Cylindrical Surface: The essence of rotational engraving is to unfold the cylindrical surface into a flat plane for engraving. When designing, please note:
- The width of the expanded design = the circumference of the cylinder (π × diameter).
- The height = the height of the cylinder.
Example:
- A cup with a diameter of 50mm → Expanded width = 157mm (π × 50).
- Create a canvas of 157mm (width) × 100mm (height) in LightBurn, and the design content will automatically wrap around the cylinder.
¶ 5.2 Start Engraving
1. Fix the object to ensure that the rotation axis can cause the object to rotate smoothly.
2. Set the laser power/ speed (it is recommended to test with a low power first).
3. Click "Start" and observe if the first circle of engraving is aligned.
¶ 5. Safety and Maintenance
⚠️ Important Notes:
- Do not touch the rotating parts during engraving to prevent hair or clothing from getting caught.
- Metal/reflective objects should be coated with a protective layer (such as matte tape) to prevent laser reflection.
Maintenance Suggestions:
- Clean the rollers regularly to prevent slipping caused by dust.
- Check if the motor wires are worn.
¶ 6. Frequently Asked Questions (FAQ)
❓ Q: The engraved pattern is distorted?
✅ A: Check if the object is slipping or adjust the pulse count/ circumference.
❓ Q: The rotation axis doesn't rotate?
✅ A: Confirm that the motor wiring is correct and the A-axis function in the software is enabled.
❓ Q: The rotation axis motor is sluggish?
✅ A: Confirm if the engraving speed is too fast.