¶ MEGA/MEGAS How to set up the camera in LightBurn 2.1 and above versions
Before setting up the camera network for your MEGA/MEGA-S machine, please make sure that the Lightburn version has been updated to version 2.1.0 or above, and that your MEGA/MEGA-S machine has been configured for network.
¶ Query the IP address of the device
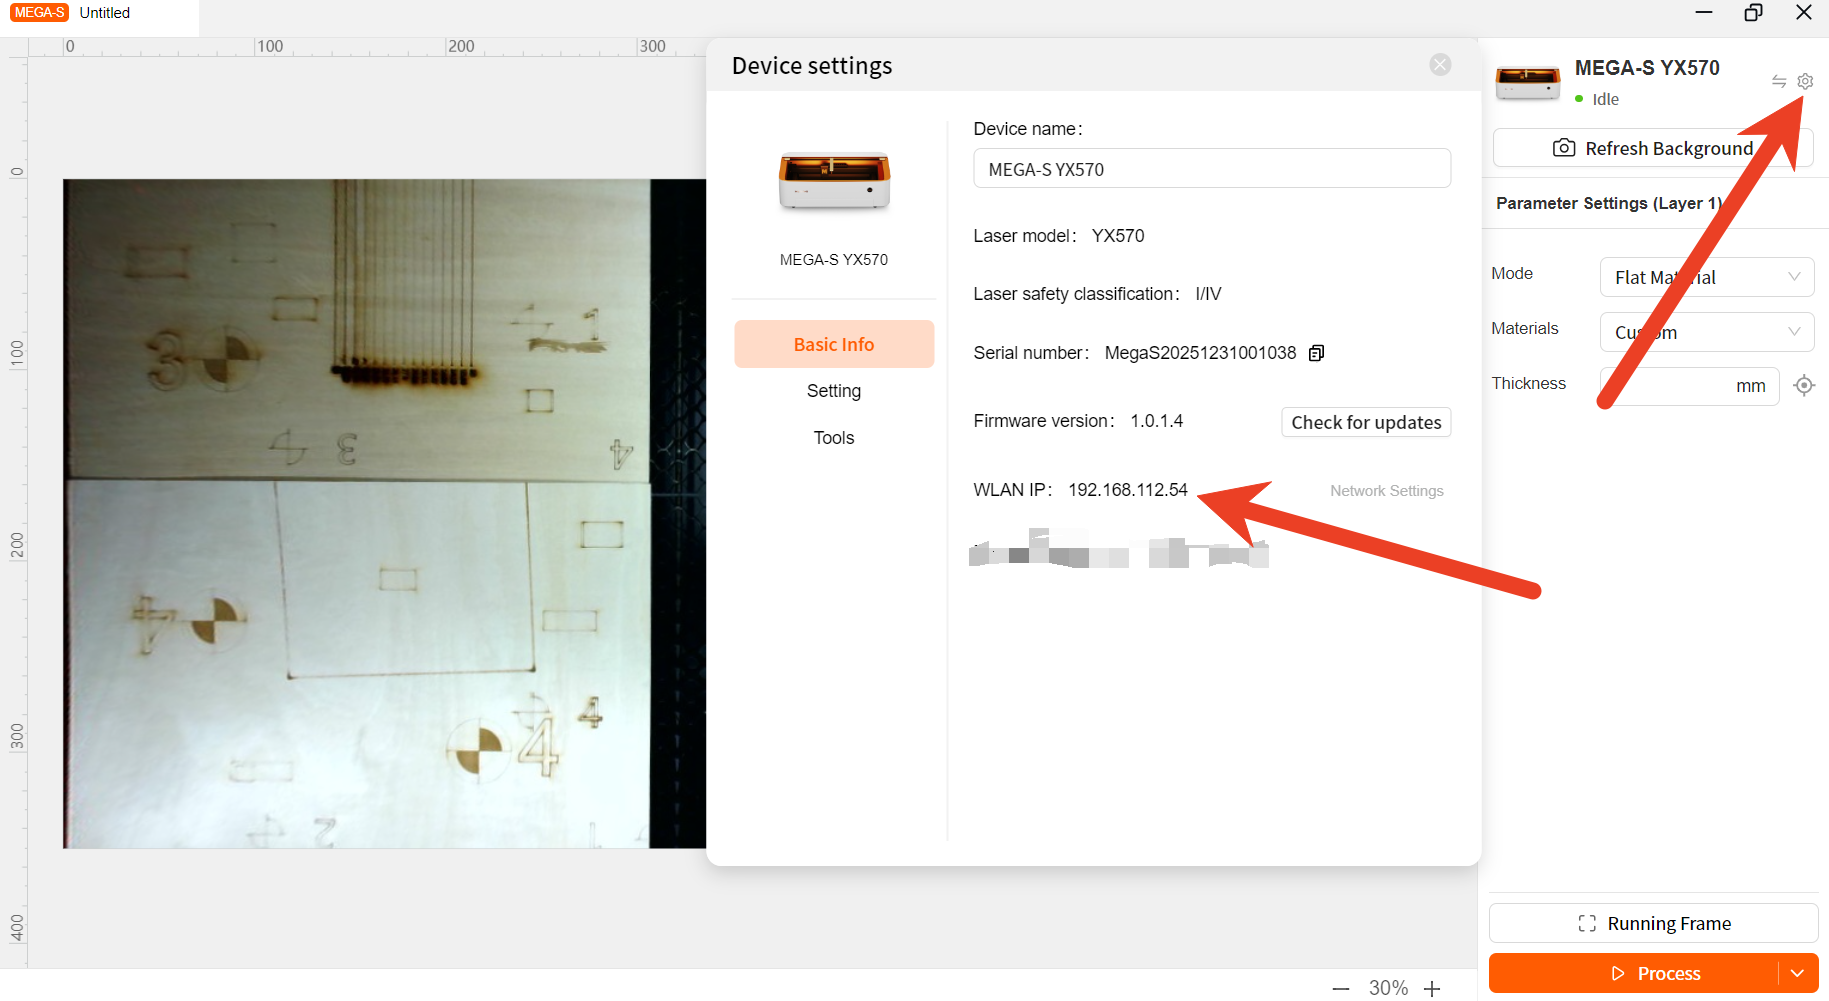
Method 1: Configure the network of the machine using MDH. And check the device IP in the device settings.
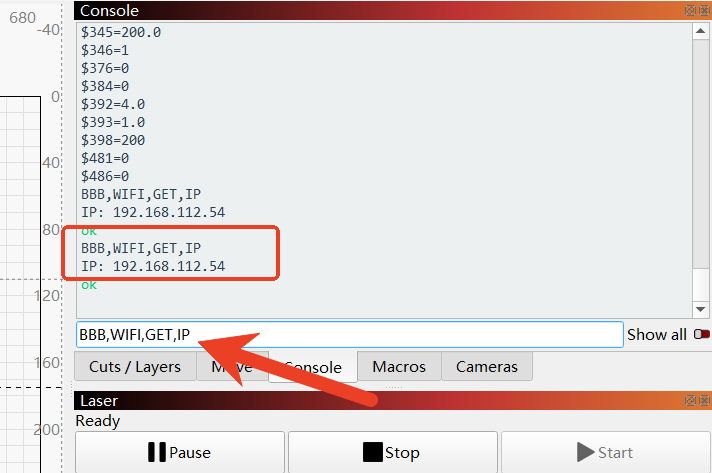
Method 2: Query the IP address of the Lightburn device, and send "BBB, WIFI, GET, IP" in the console.
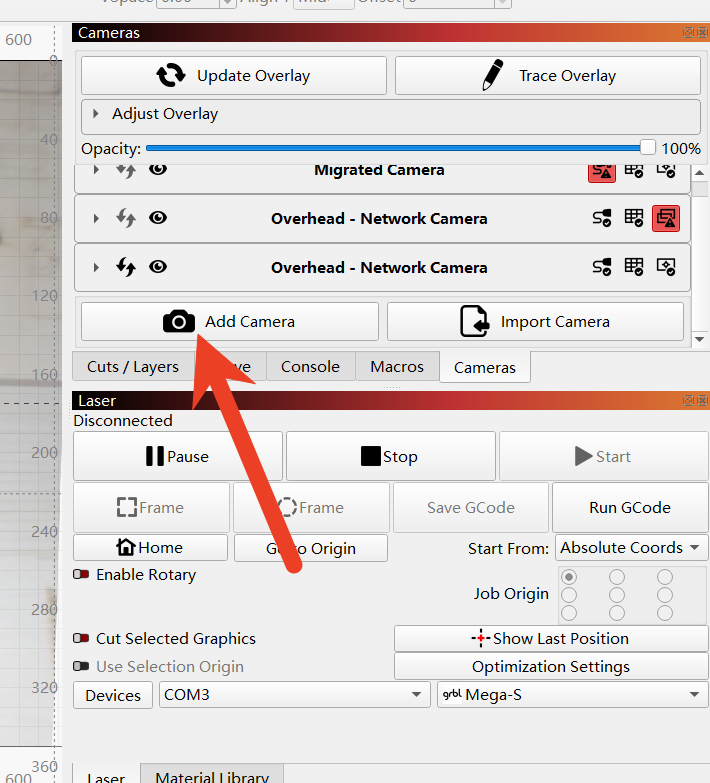
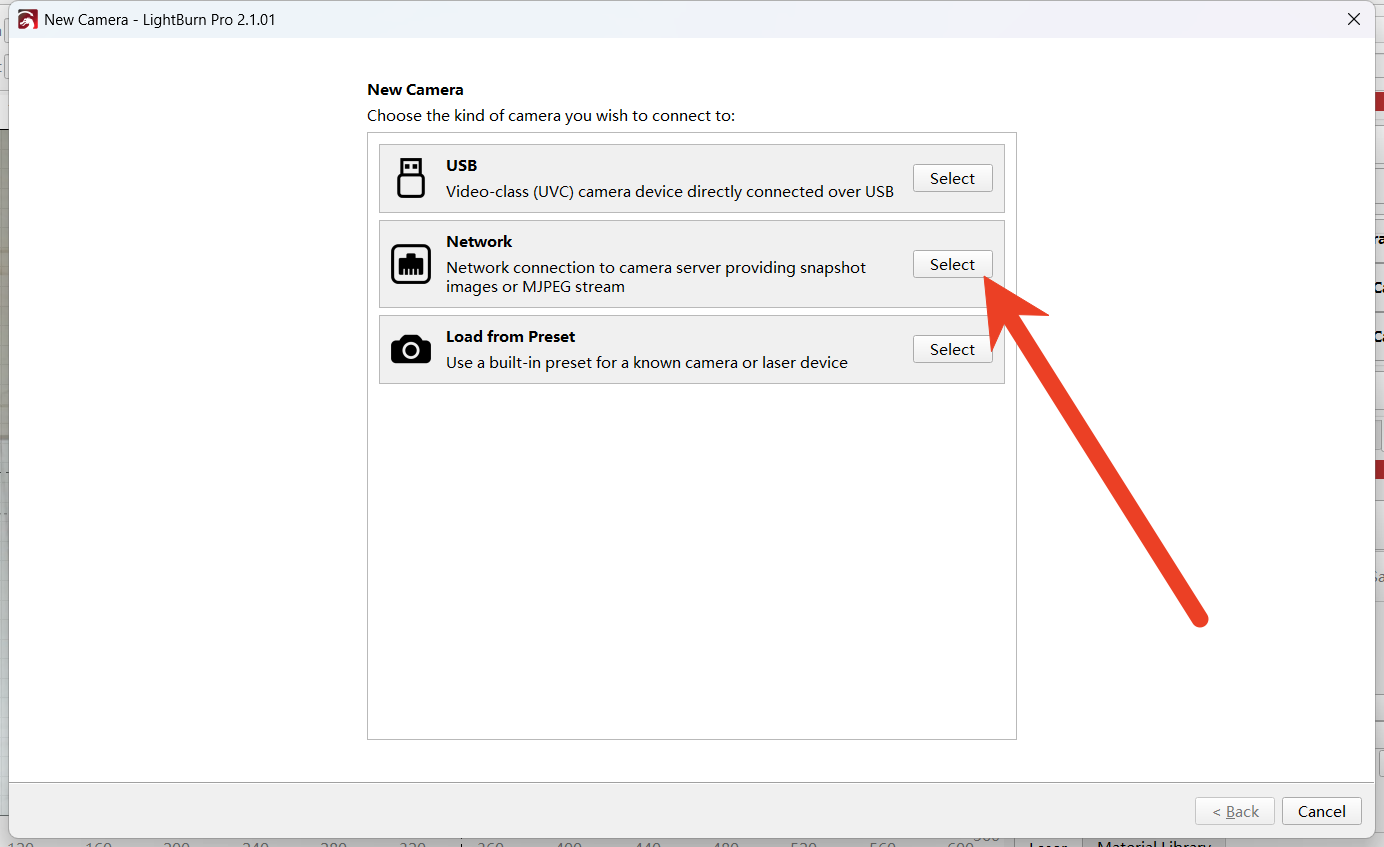
¶ Add the camera and select the network mode
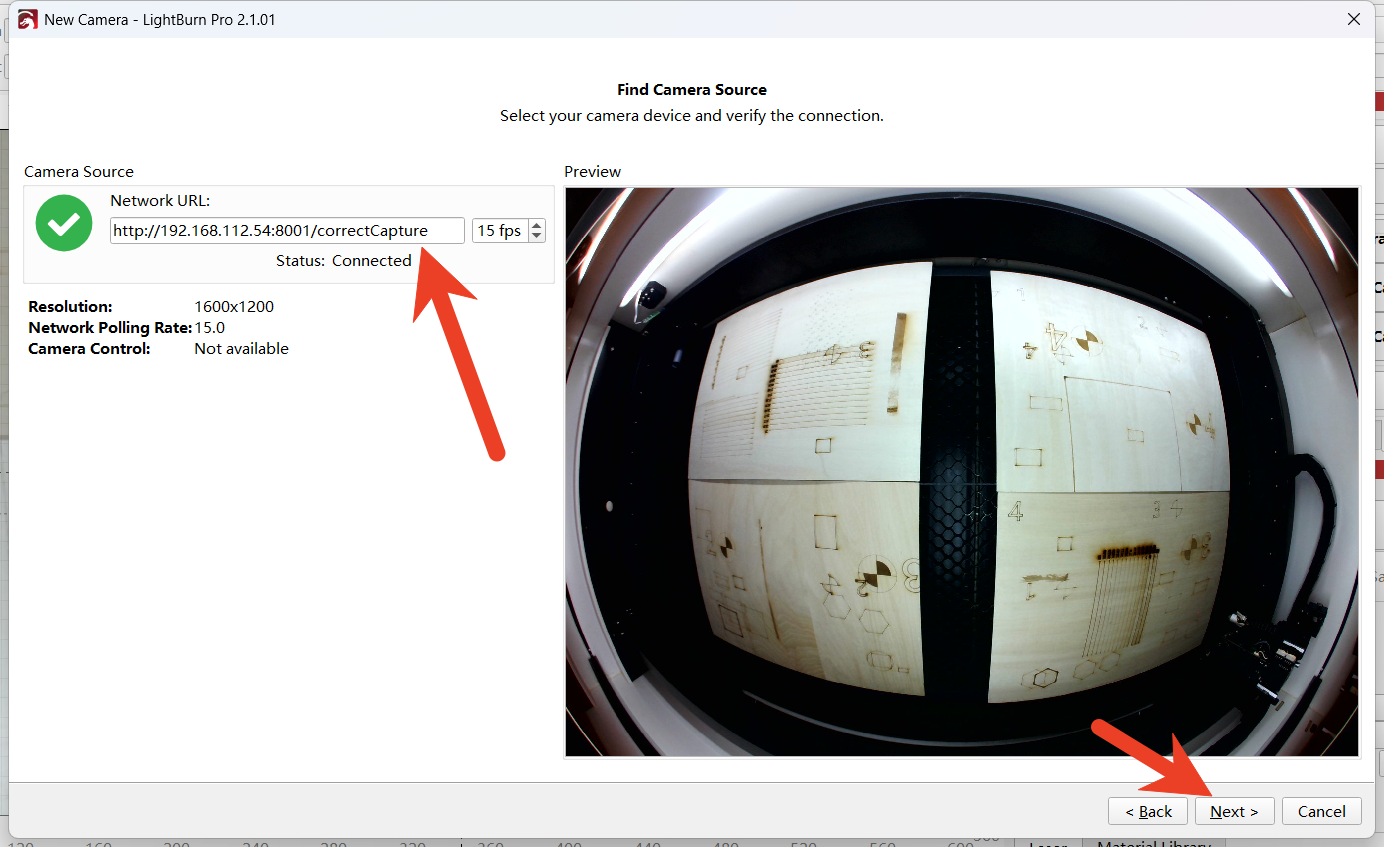
Enter the URL address for obtaining the camera image. 192.168.112.54 is the IP address assigned to your machine after completing the network configuration. The format of the camera URL is as follows: http://192.168.112.54:8001/correctCapture. Please replace 192.168.112.54 with your device's IP address.
After entering the URL address and pressing the Enter key, it will establish the connection.
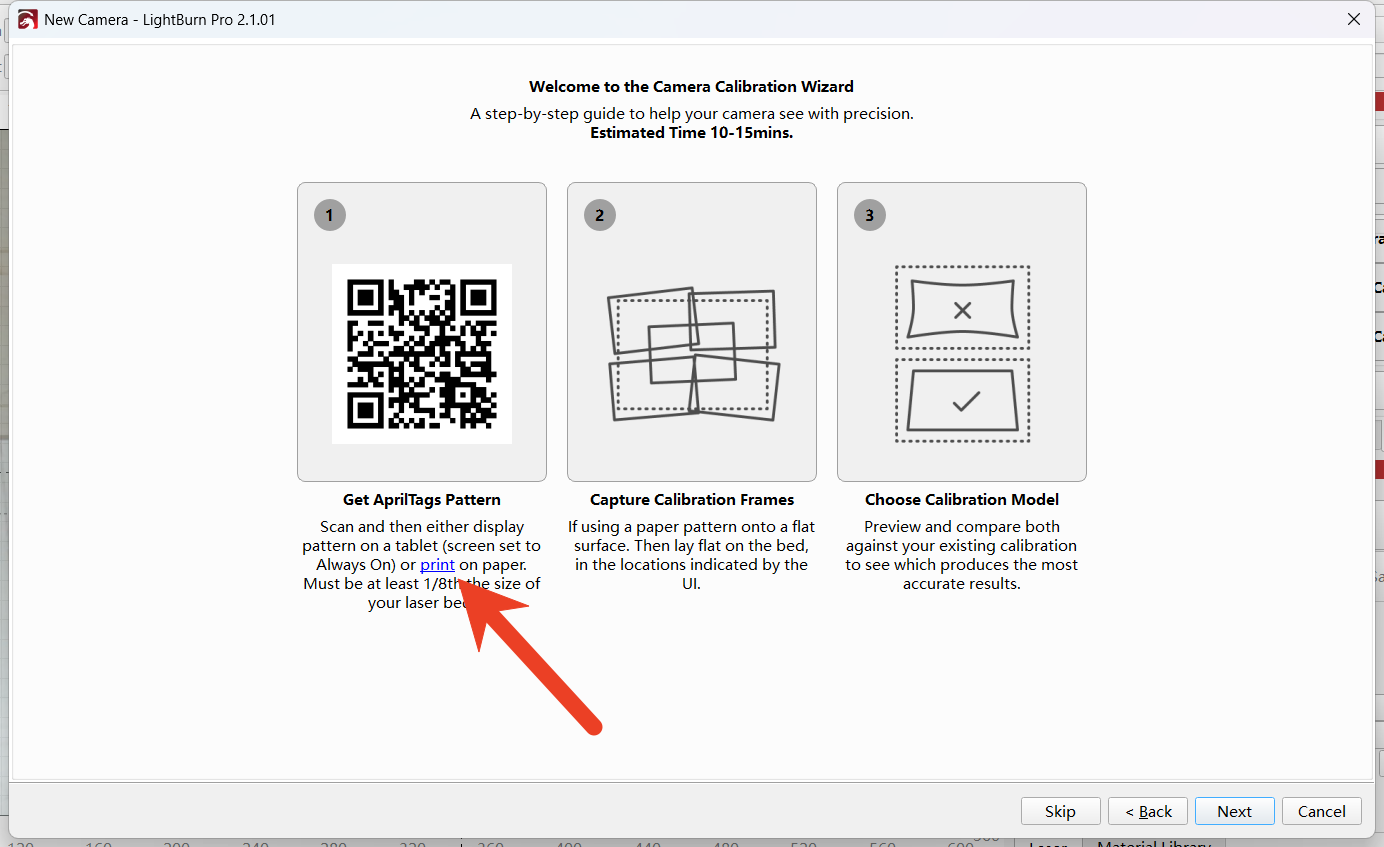
Create new lens calibration
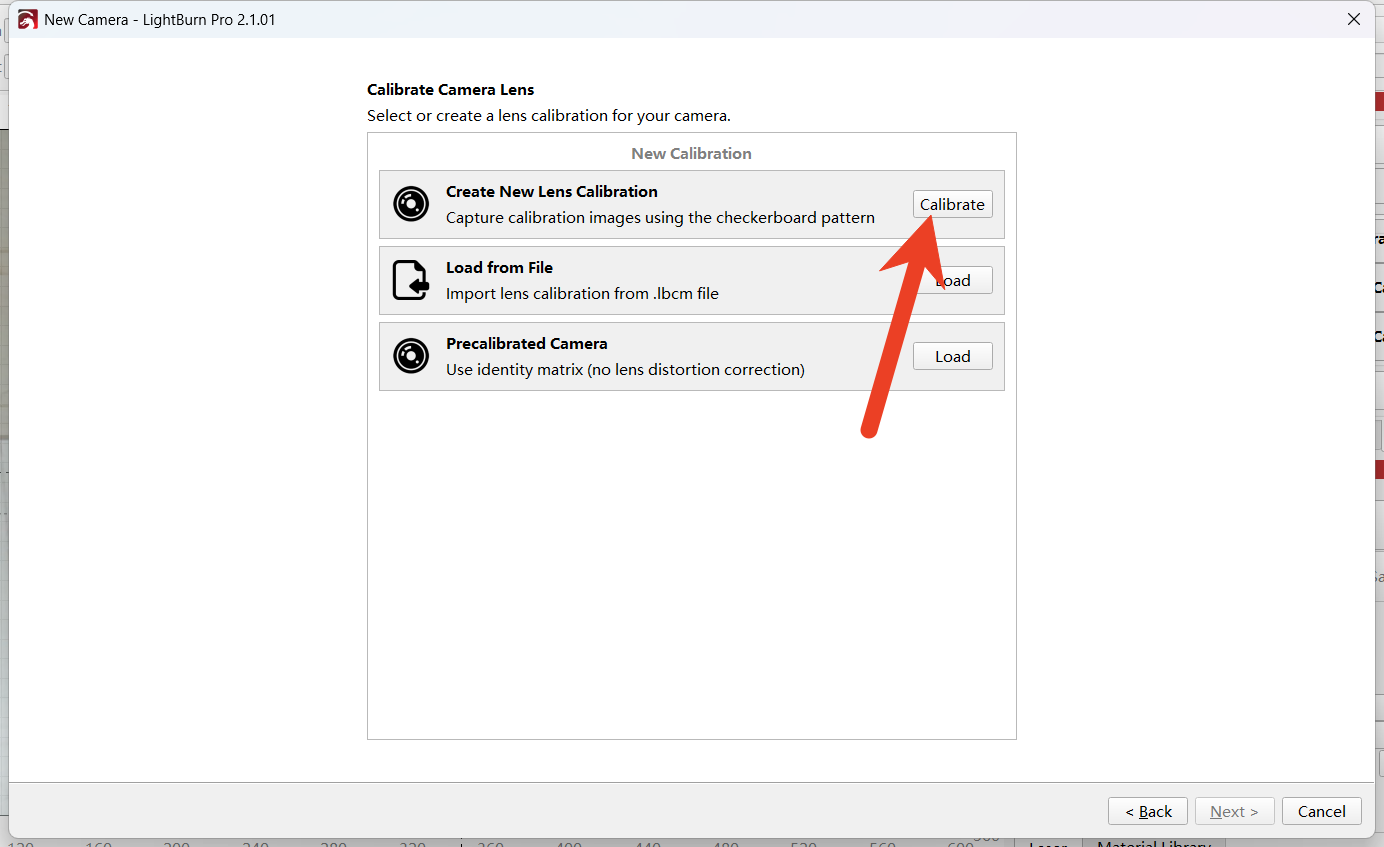
Click to jump to the download link of the graphic and print it on an A4 size paper. Stick the A4 paper onto the wooden board. After completion, click "Next" to proceed to the capture and calibration process.
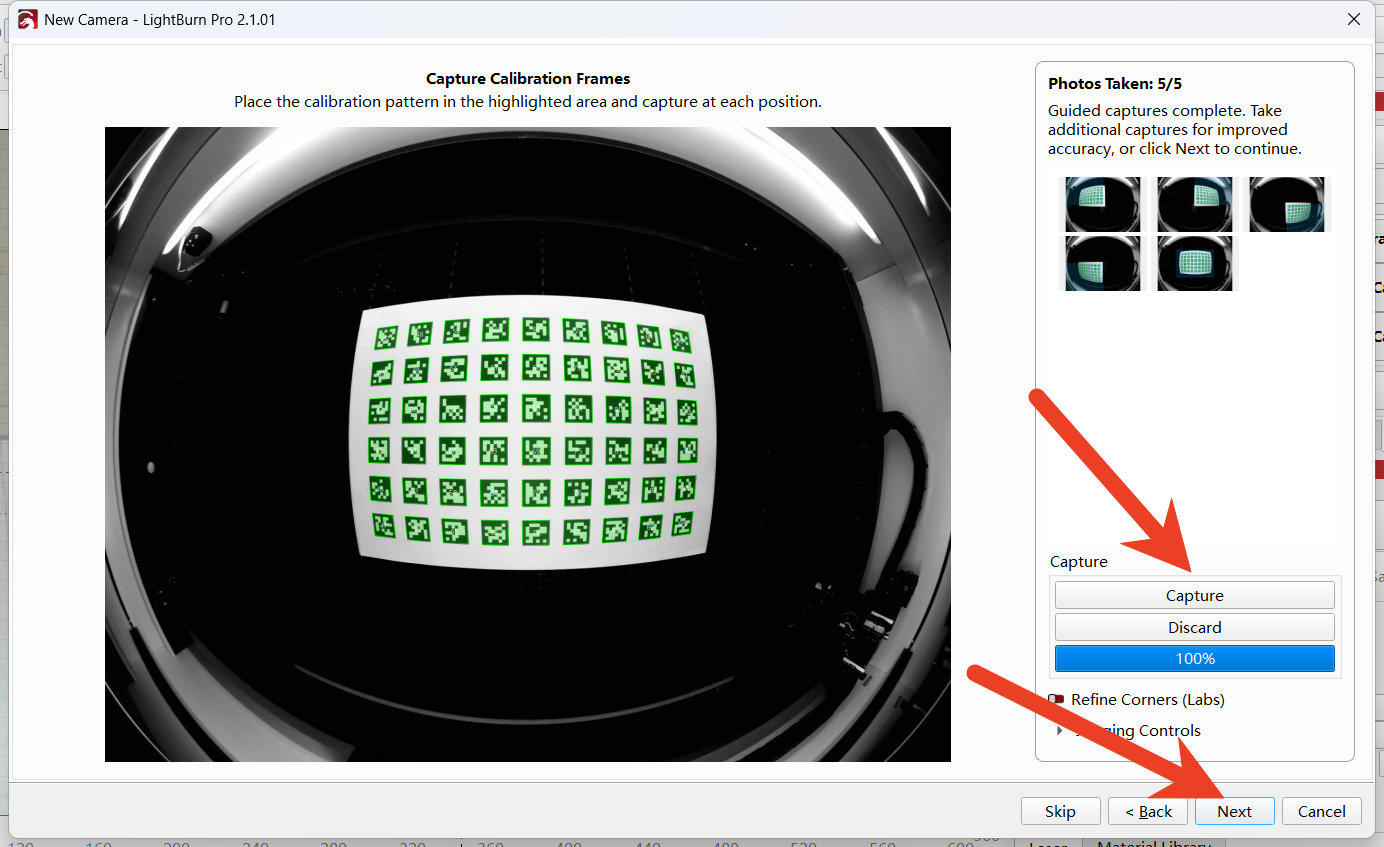
Place according to the instructions and successfully recognize the QR code graphic

Please follow the instructions to place it, and successfully scan the QR code image. After taking 5 pictures according to the instructions, you can either repeat the shooting or take more pictures. This way, you can obtain a better score.
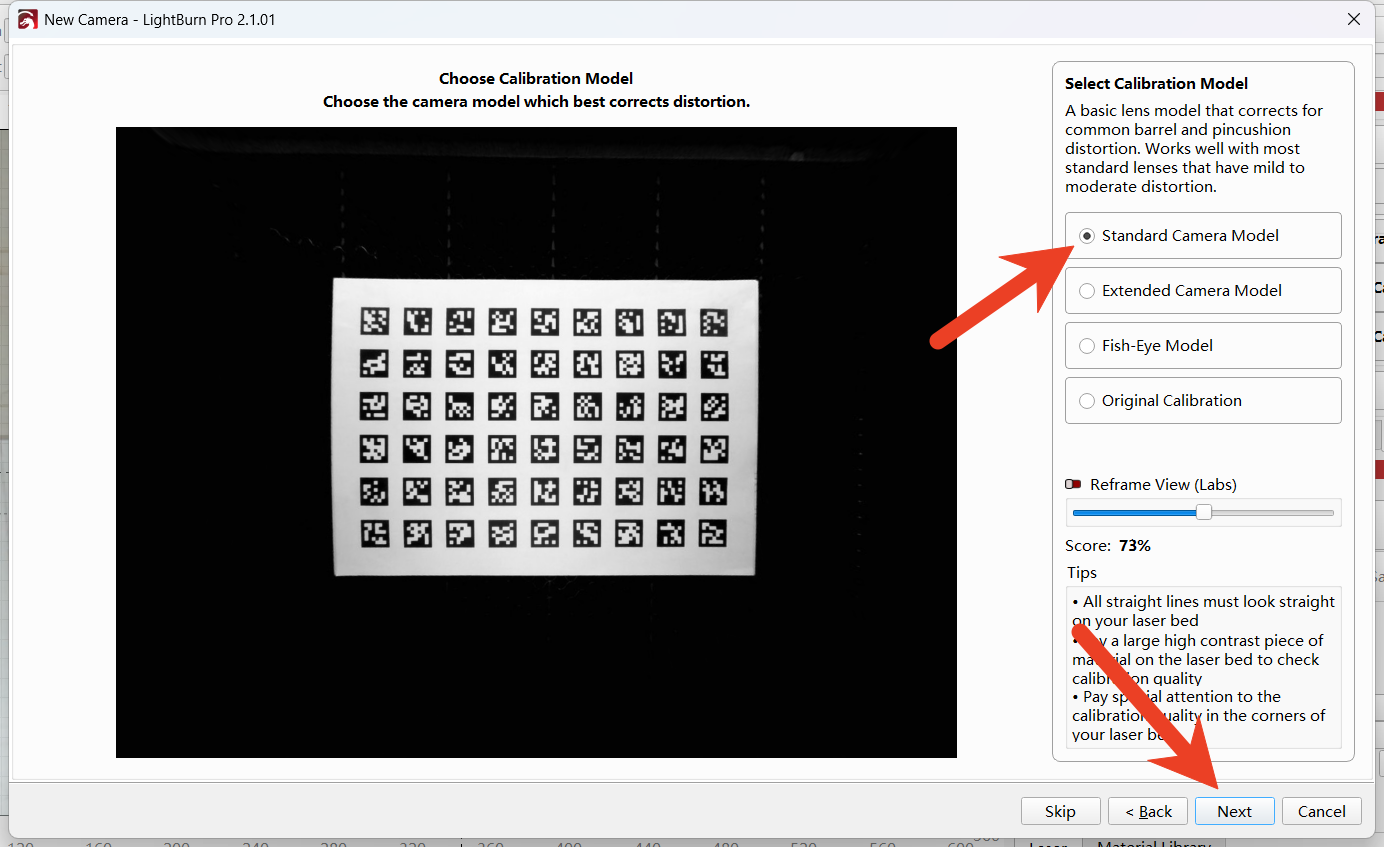
After selecting the standard camera, click "Next" and complete the correction.
Click "Next" to proceed with the workspace alignment calibration.
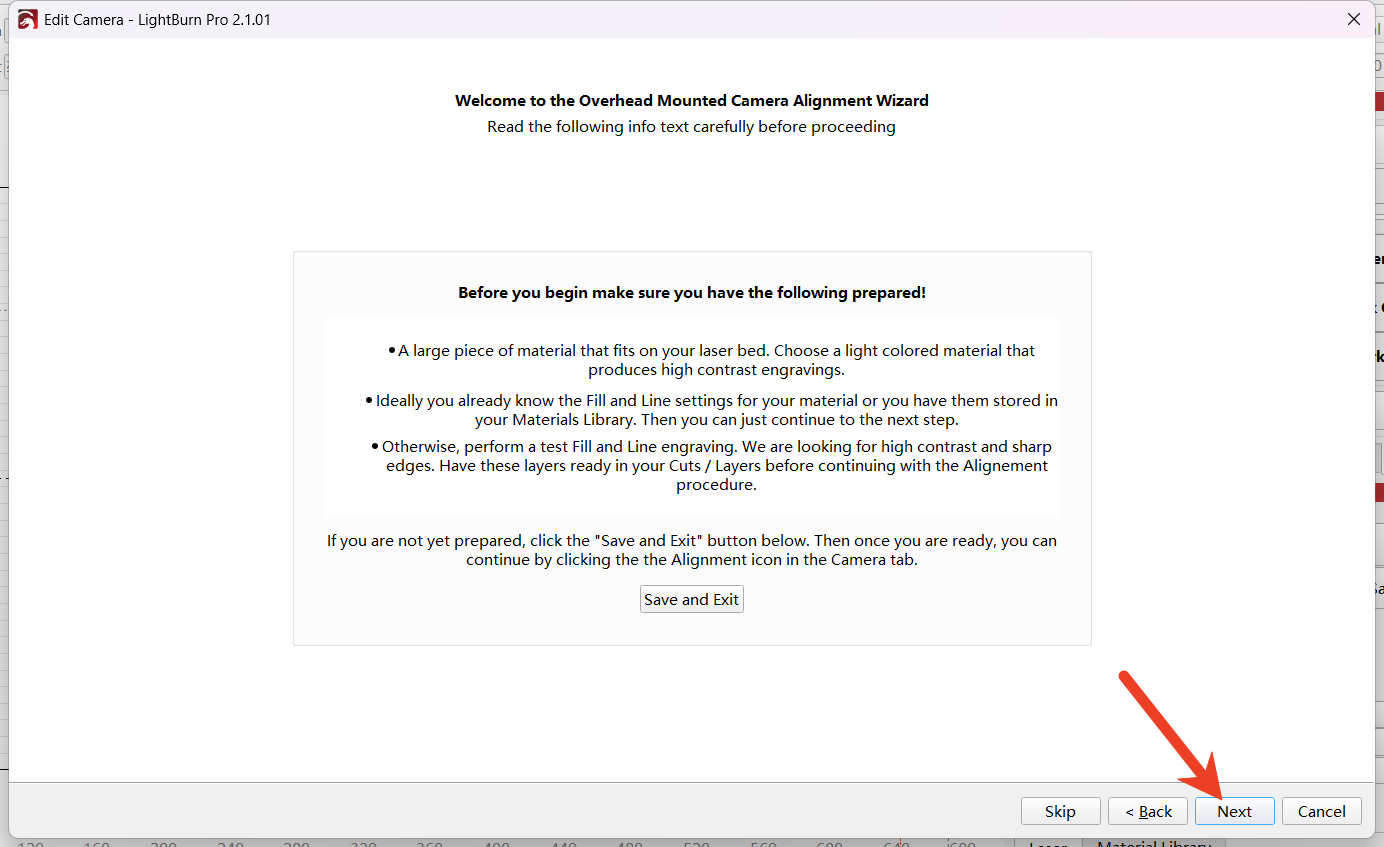
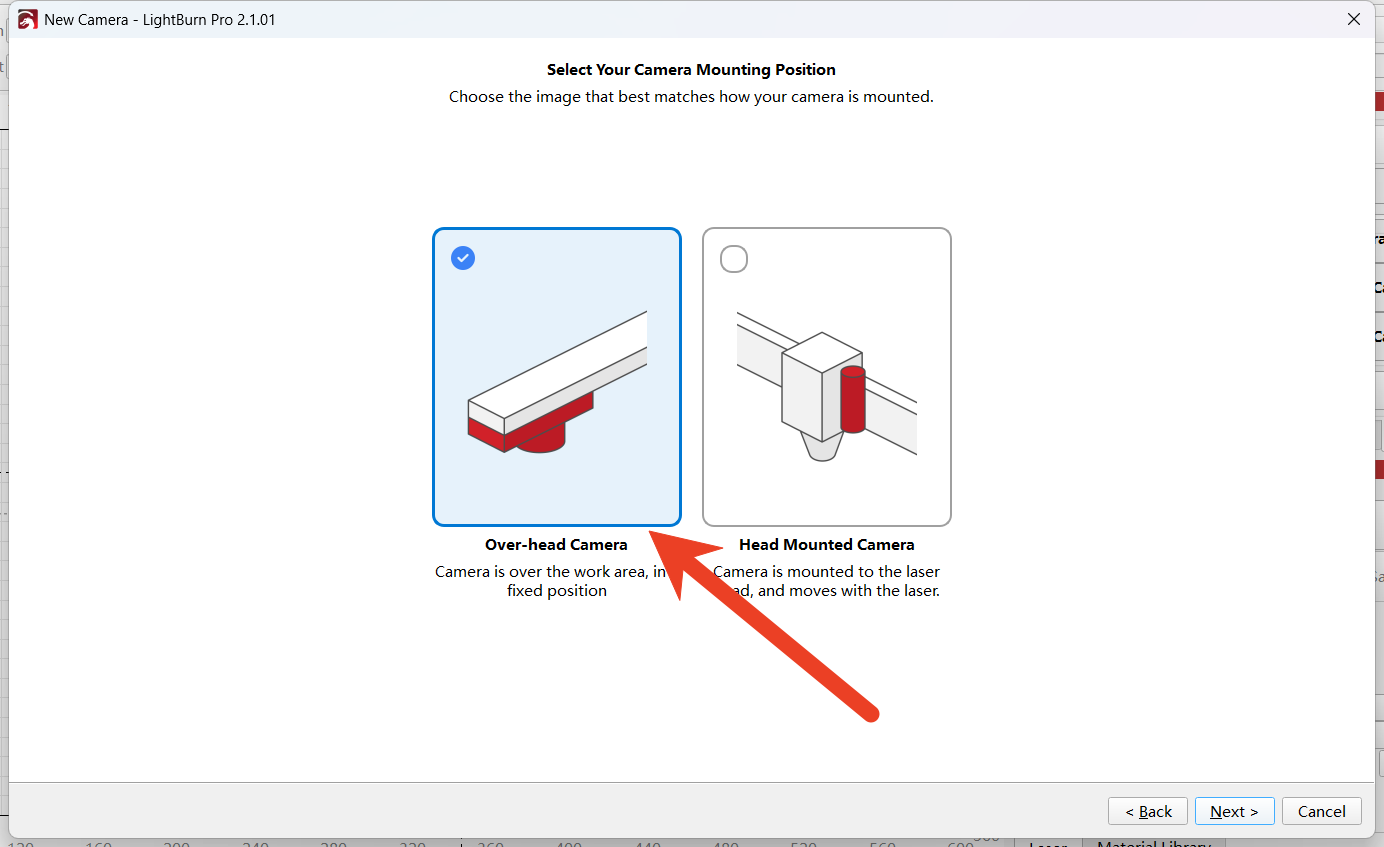
Select the overhead camera style
It is recommended to choose the automatic alignment mode. You can also select the manual alignment mode, but in this case, you need to manually mark four positions for alignment.

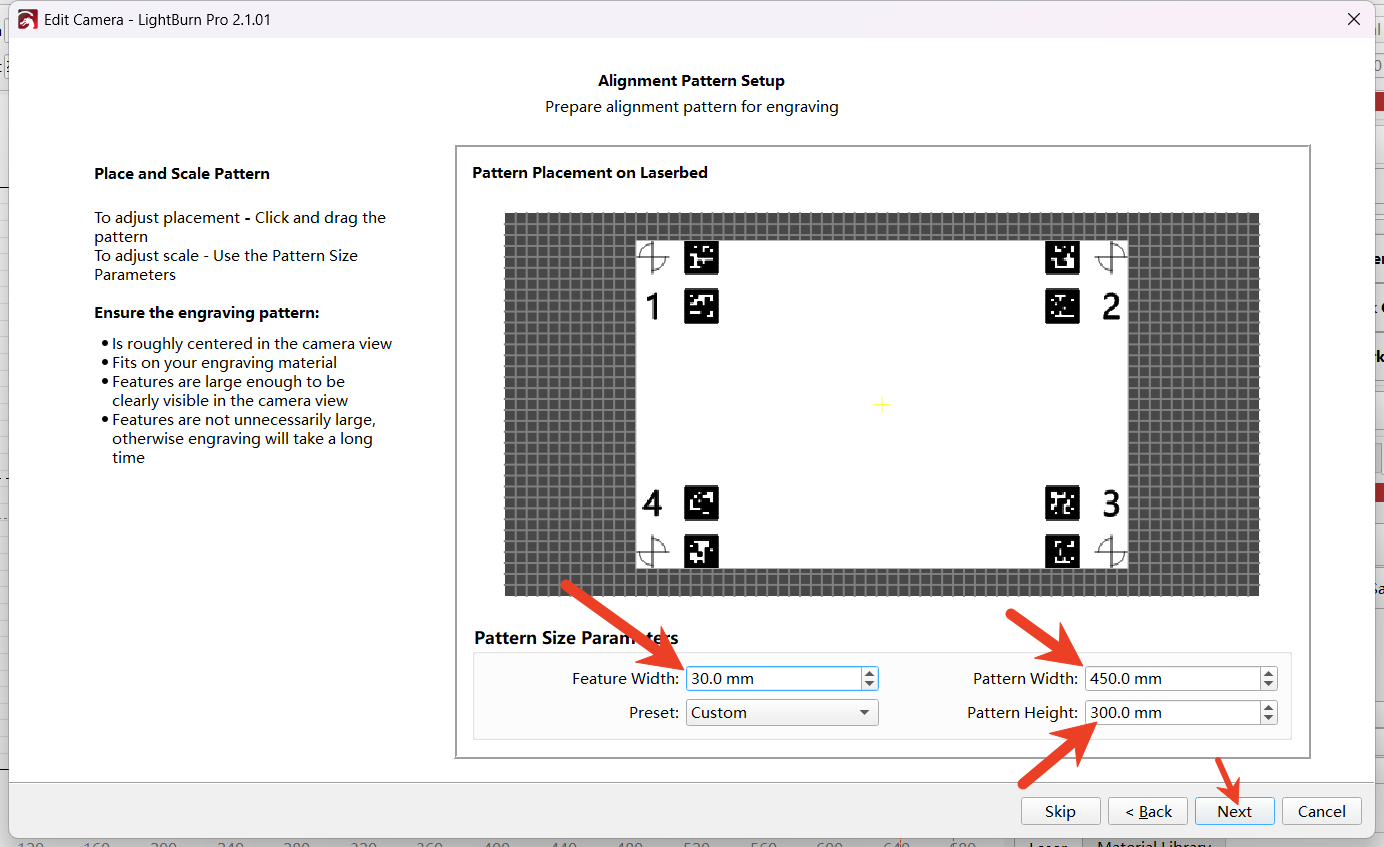
Refer to the parameters in the figure to modify and set the range and size that need to be engraved.
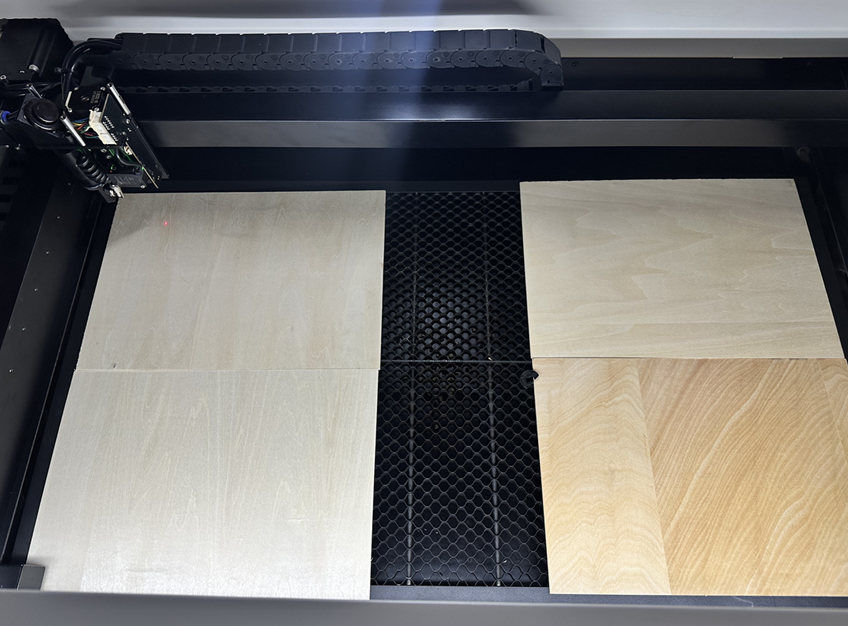
Please prepare four 3mm-thick wooden boards and place them on the honeycomb panel. Try to position the boards as flat as possible. You can use clips to fix the boards to prevent them from warping.
(After calibration with a 3mm thick wooden board, it is recommended to use a wooden board of approximately the same thickness (around 3mm) for the carving work. This way, there won't be excessive deviations between the camera image and the actual carving position. If you often use materials with a thickness of 10mm for carving, please replace the calibration board with one of 10mm thickness when performing the calibration.)
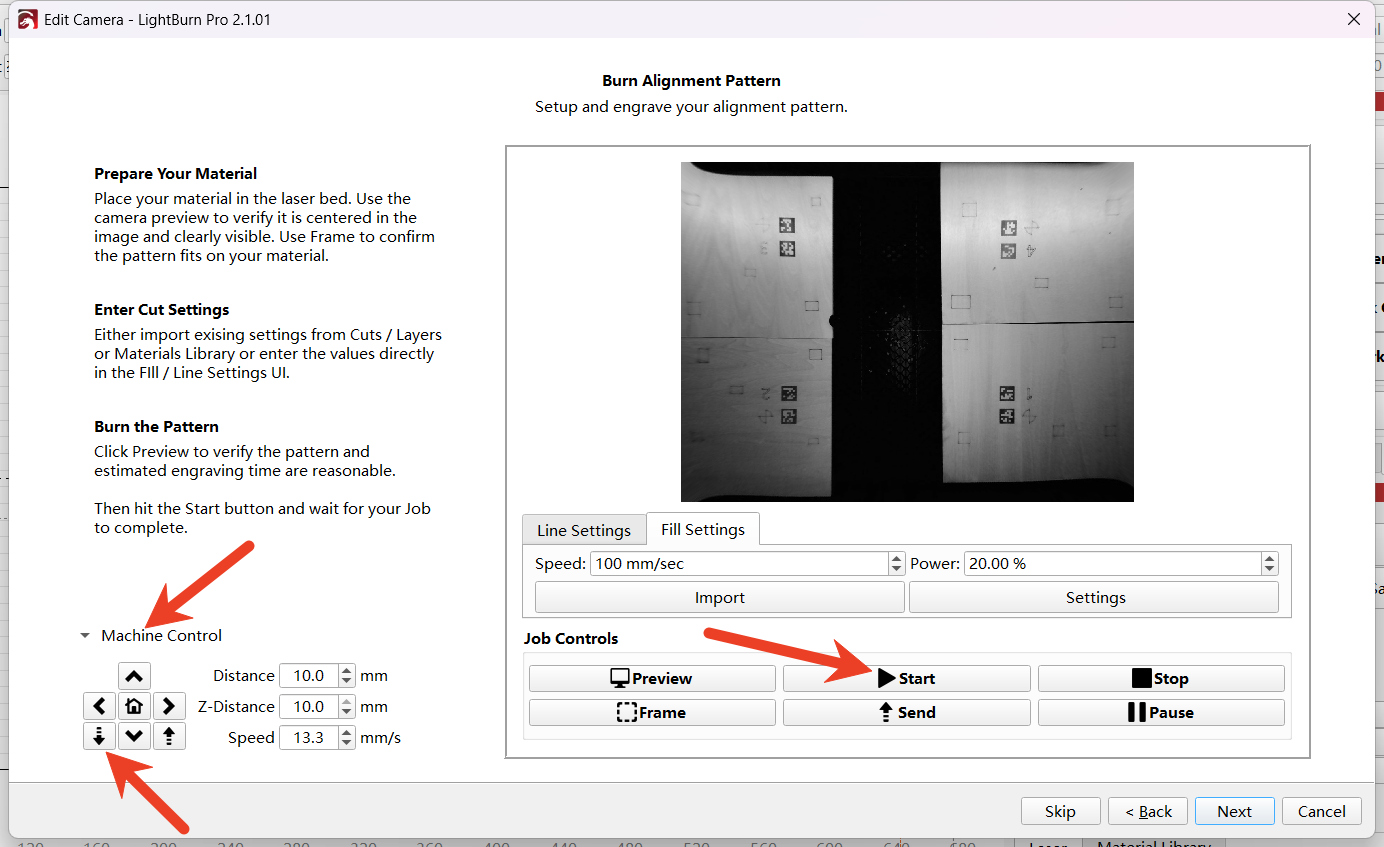
Change the speed of the line setting and fill setting to 100mm/s, and set the power to 20%.
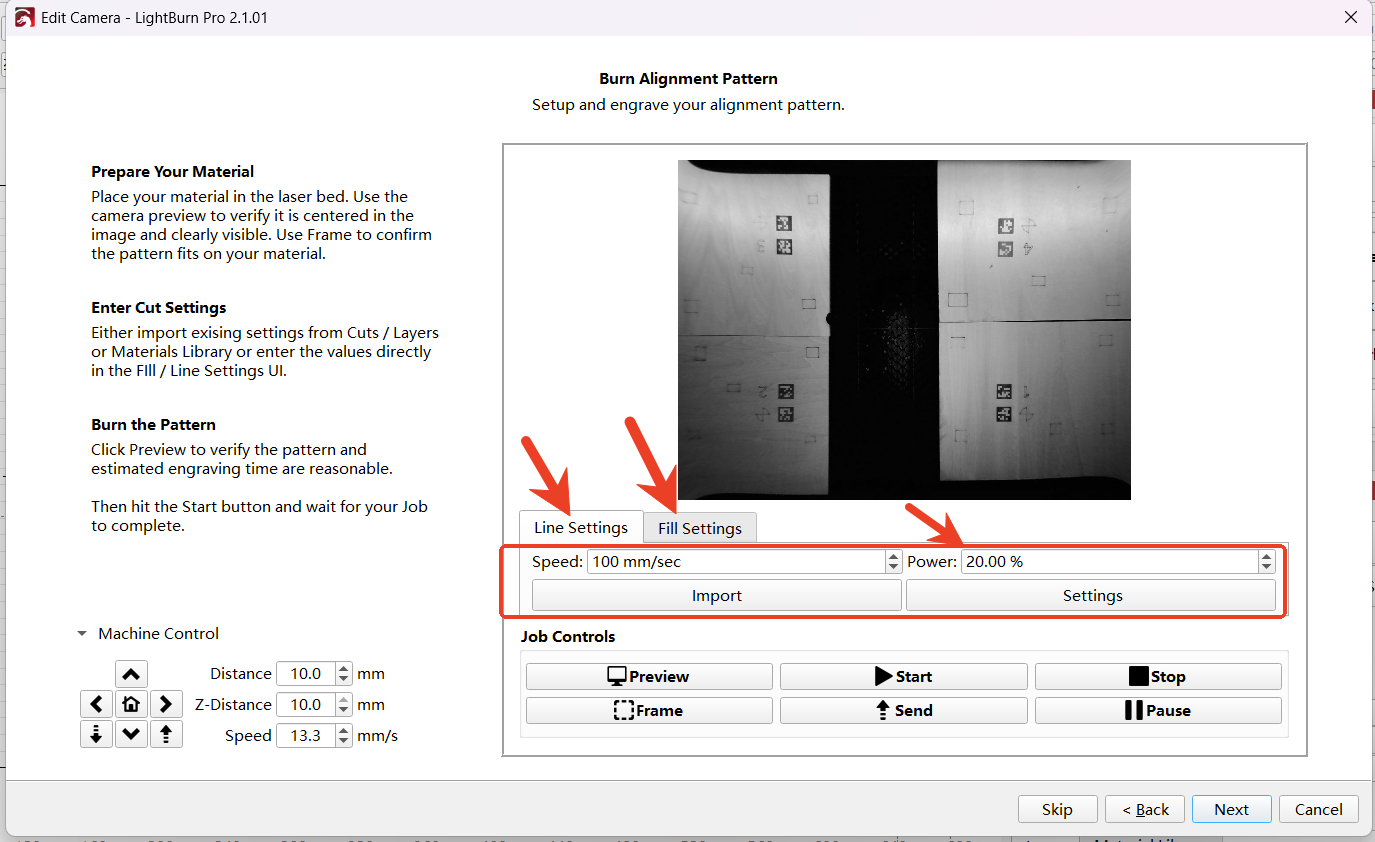
Click on "Machine Control", then click the downward arrow to control the Z-axis to descend to approximately 26mm, allowing the Z-axis of the laser head to focus. (The nozzle is approximately 4mm away from the surface of the material.)
After focusing is completed, click "Start" to begin the engraving process.
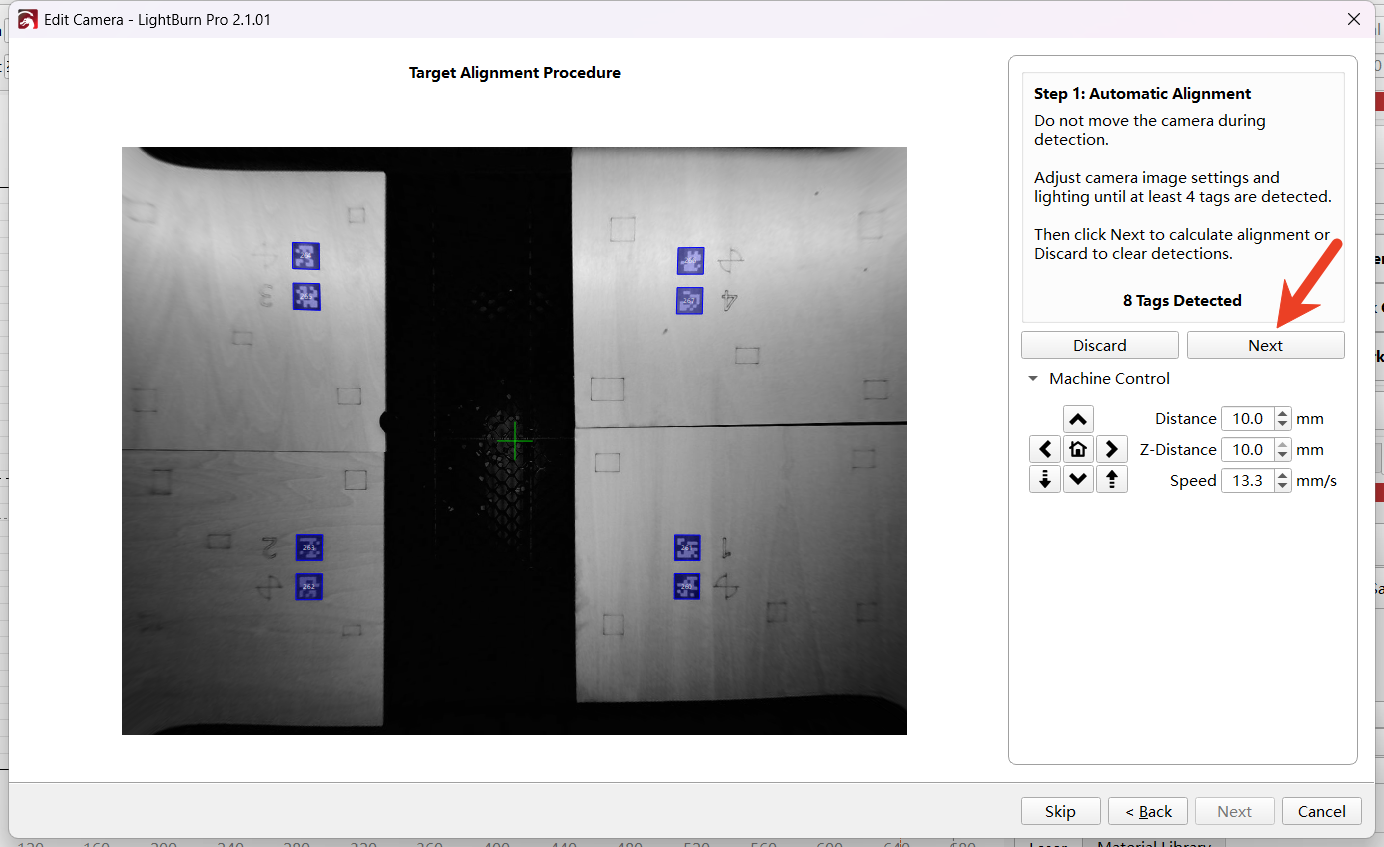
If the 8 label graphics cannot be identified, you can cover the overexposed parts of the light or click "Back" to go back to the previous step and re-carve to deepen the burn marks on the material surface. This will help successfully identify the 8 label graphics.
After successful identification, click "Next"
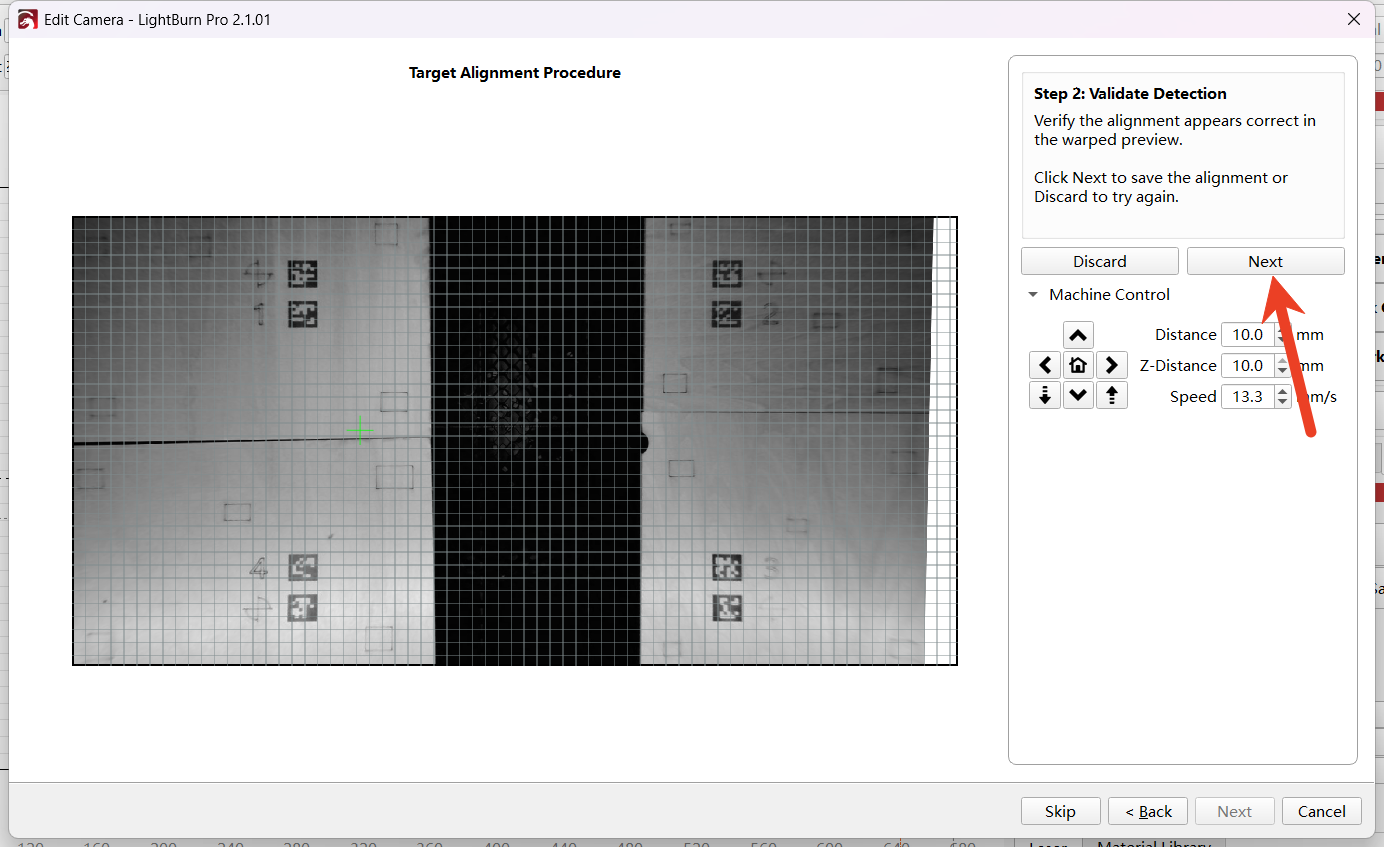
Click "Next" to complete the camera alignment settings
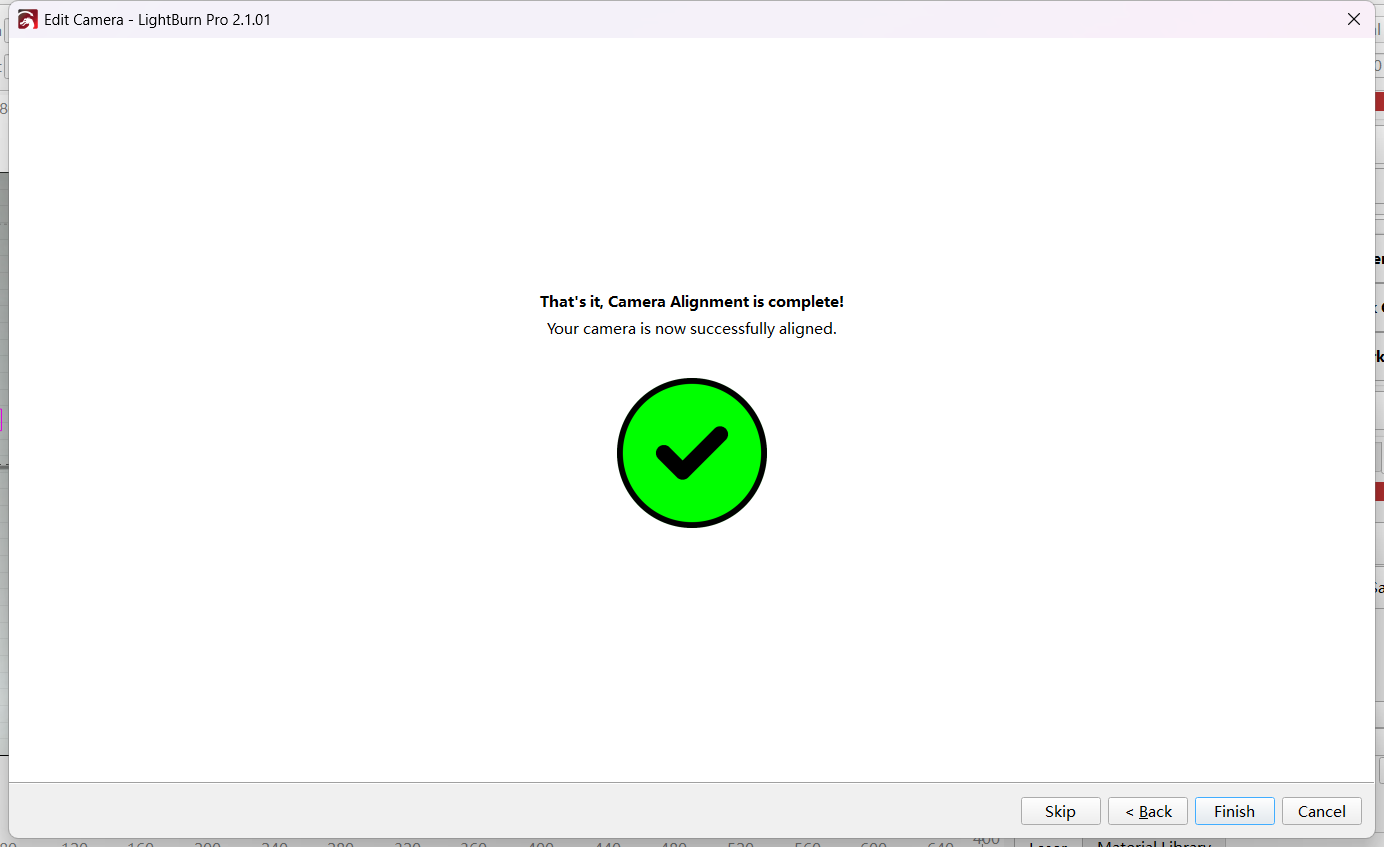
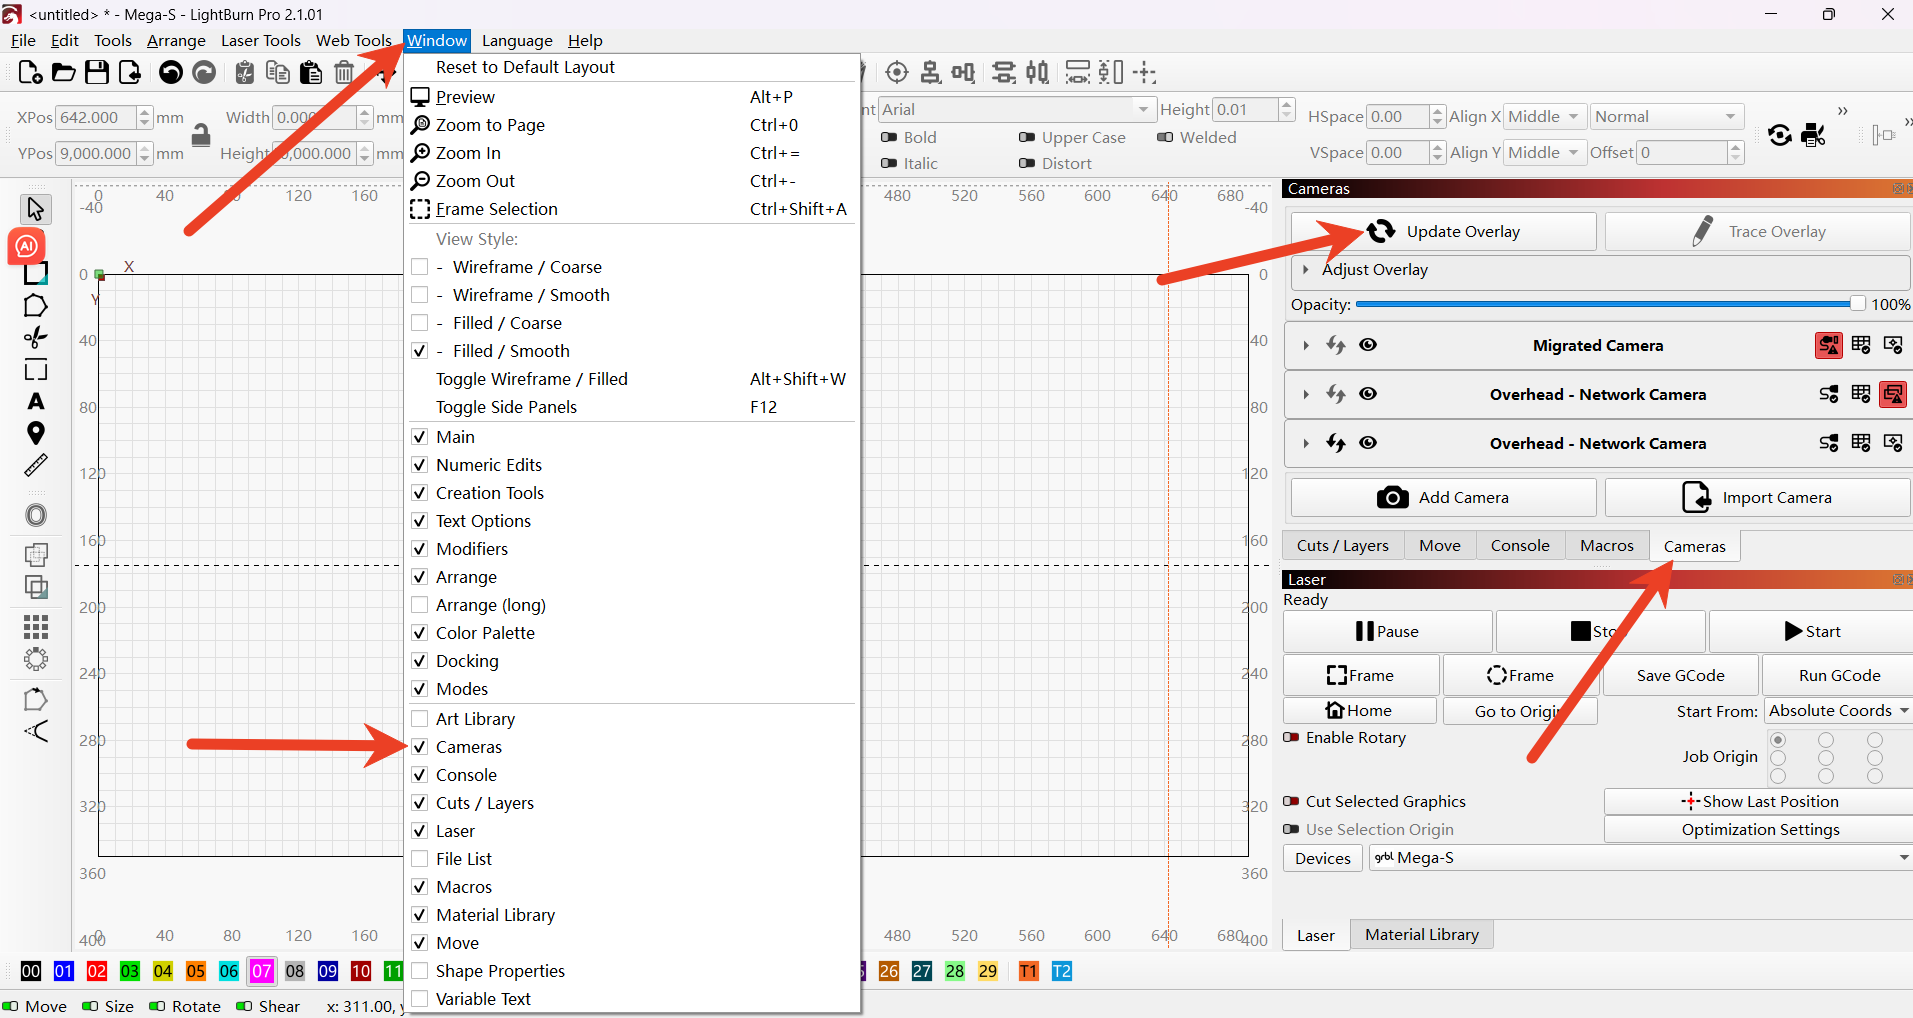
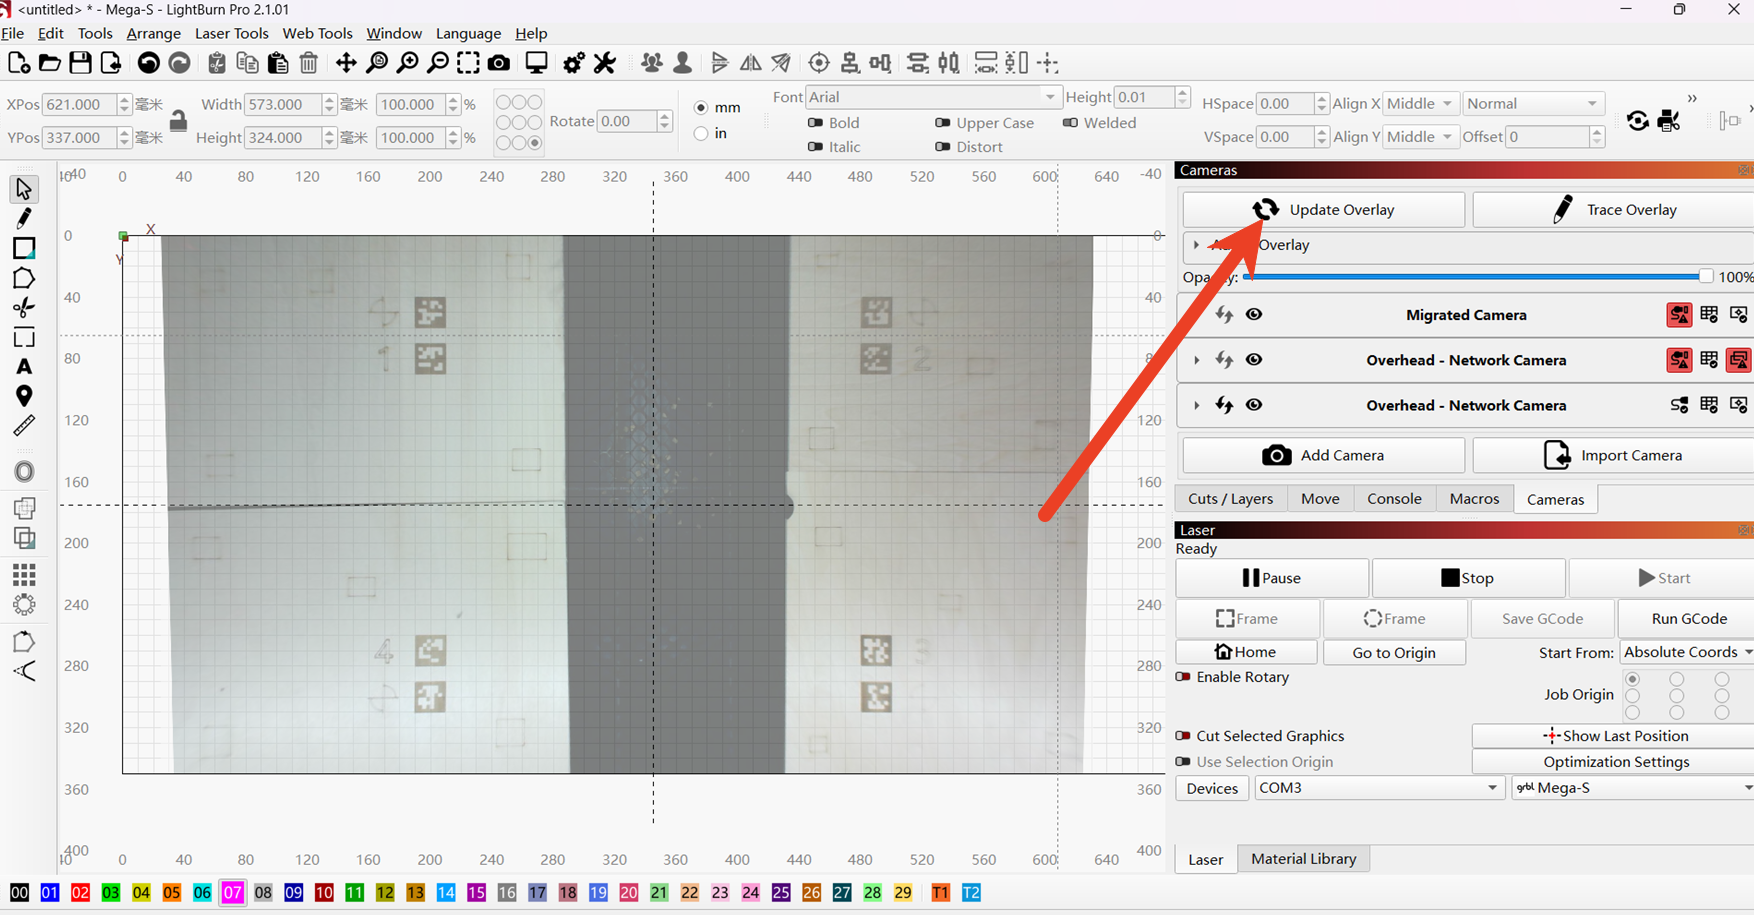
In Windows, add the cameras, click "Update Overlay", and then add the camera images to the canvas.